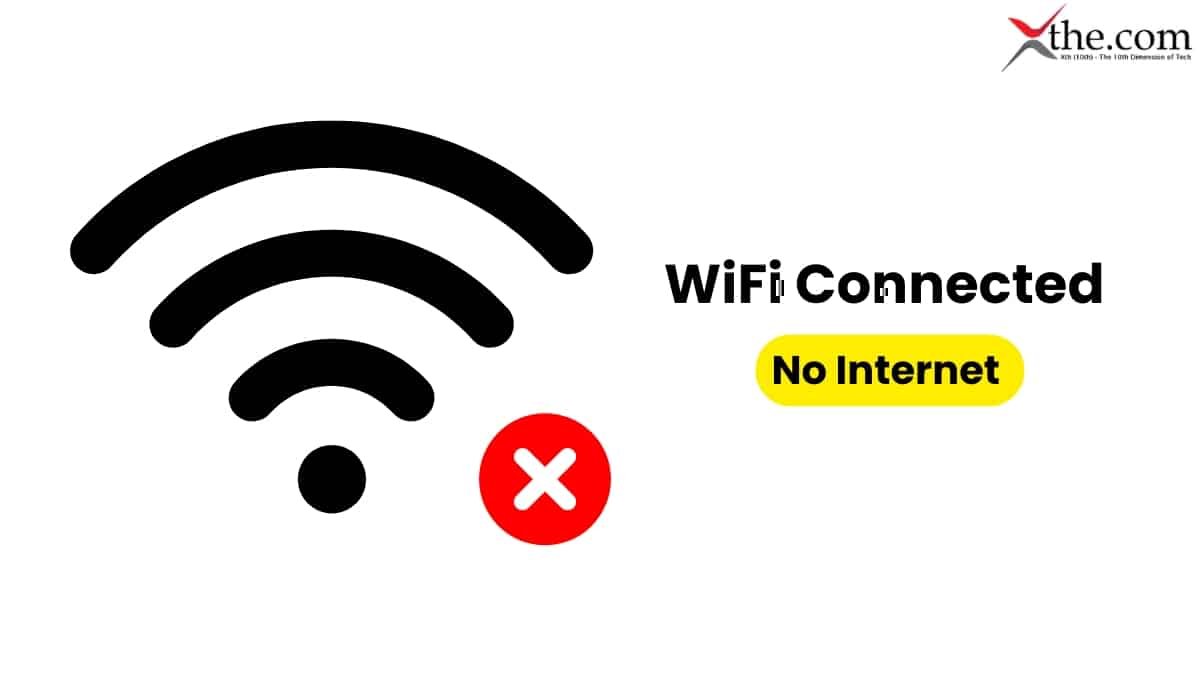
You’re connected to Wi-Fi. The signal bars are full. Everything looks fine until you open a browser and nothing loads. No emails, no streaming, no video calls. For millions of users across the US, seeing “Wi-Fi connected, no internet” is one of the most confusing and frustrating tech problems. This issue shows up everywhere: home offices, college dorms, apartments, coffee shops, airports, and even brand-new homes with fiber internet. And while it feels like the internet is “down,” the reality is often more nuanced. This guide explains why Wi-Fi can connect without the internet, what’s really happening behind the scenes, and how US users can fix it step by step. 

What “Connected but No Internet” Actually Means 

When your phone, laptop, or tablet connects to Wi-Fi, it’s only confirming one thing: 

Your device can communicate with the router. 

That connection does not guarantee the router itself has access to the internet. 

Think of Wi-Fi like a local road and the internet like the highway system. You may be on the road, but if the highway is blocked or never connected, you’re not going anywhere. This distinction is key to understanding why this problem happens so often. 

Temporary ISP Outages and Service Disruptions 

An outage from your ISP is one of the top reasons for a disconnection from the internet. In the USA, ISPs such as AT&T, Comcast Xfinity, Spectrum, Cox, and Verizon all perform maintenance work on their networks during the night hours, or they may have interruptions in service due to either weather, construction, or equipment failure. 

Your router might be connected locally, but if the connection does not have access upstream, you will not have access to the Internet. This usually happens when performing maintenance late at night, early in the morning, or in rural or suburban areas following severe storms. 

Modem and Router Communication Breakdown 

Most US homes use two devices: 

  • A modem that talks to your ISP 
  • A router that distributes Wi-Fi to your devices 

If the modem loses its connection, even briefly, the router can still broadcast Wi-Fi, creating the illusion that everything is working. 

Common triggers include: 

  • Power flickers 
  • Overheating hardware 
  • Aging modems (especially DOCSIS 3.0 units) 
  • Loose coax or fiber cables 

This is why restarting both devices often fixes the issue. 

DNS Problems: The Invisible Internet Killer 

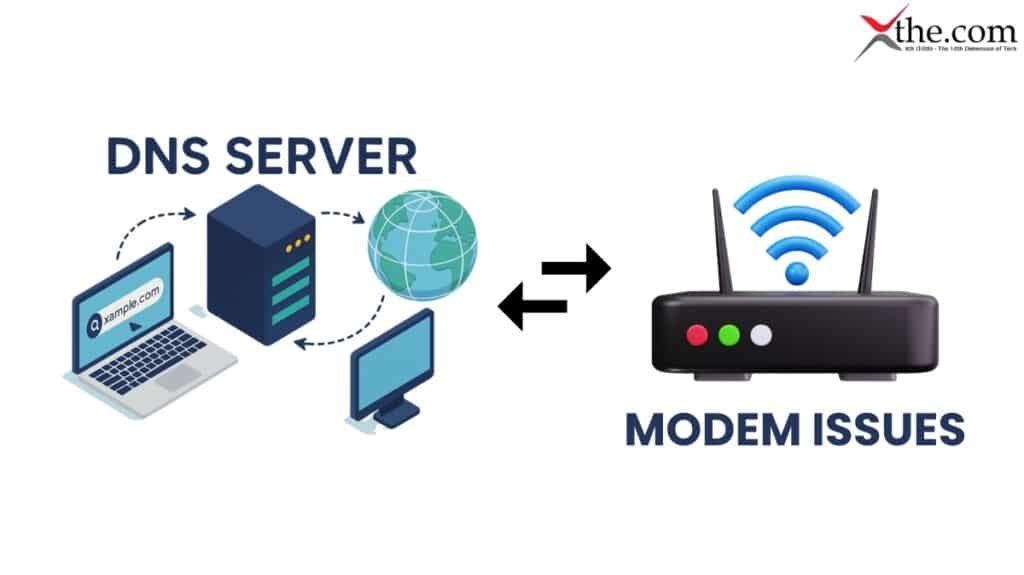
DNS issues are a major reason Wi-Fi works, but websites don’t load. 

DNS servers translate website names like google.com into IP addresses. If DNS fails, your internet connection technically exists, but nothing resolves. 

In the US, ISP-provided DNS servers sometimes go down or slow dramatically. When that happens, apps may partially work while browsers fail completely. 

This is especially common after router firmware updates or when switching ISPs. 

IP Address Conflicts and Network Misconfiguration 

Your device needs a valid IP address to access the internet. 

If your router fails to assign one correctly or assigns the same IP to multiple devices, you’ll get a “connected, no internet” message. 

This happens frequently in: 

  • Homes with many connected devices 
  • Apartments with overlapping networks 
  • Older routers are struggling with smart home gadgets 

Network misconfigurations can also occur after VPN use, network resets, or Windows/macOS updates. 

Captive Portals Blocking Access 

In public places like airports, hotels, hospitals, and coffee shops, Wi-Fi often uses captive portals. 

Your device connects to Wi-Fi, but internet access is blocked until you: 

  • Accept terms and conditions 
  • Log in 
  • Enter a room number or code 

Sometimes the portal fails to open automatically, making it look like the internet is broken when it’s actually waiting for authentication. This is a very common issue for US travelers. 

Router Firmware and Software Glitches 

Routers are small computers, and they crash too. 

Firmware bugs can cause routers to: 

  • Drop internet access 
  • Fail to route traffic 
  • Mismanage DHCP assignments 

This is especially common with ISP-provided routers and mesh systems that update automatically in the background. After an update, Wi-Fi may stay active while routing services fail silently. 

Device-Specific Network Issues 

Local failure occurs when one device shows no internet connectivity despite other devices that do have internet connectivity functioning normally. Common causes at the individual device level for this problem are: 

  • Corrupted network settings 
  • Outdated operating systems 
  • Using a VPN or Firewall in conflict with your network access 
  • Incorrect Proxy Settings 

Windows laptops may exhibit adapter problems following any updates to the Windows OS. Additionally, iPhones and Android devices may periodically contain cached data that will need to be cleared in order to allow for proper connectivity. 

VPNs and Security Software Interference 

VPNs are widely used in the US for work, privacy, and streaming, but they can also break internet access. 

If a VPN fails to connect properly, it may block all traffic while still allowing Wi-Fi connectivity. 

Security software and firewalls can do the same, especially after updates or when switching networks. 

This issue often appears suddenly and disappears when the VPN is disabled. 

When Too Many Devices Overload the Network 

The majority of American homes today typically use many electronic devices, including: 

  • Cell phones or Smartphones 
  • Laptops 
  • Televisions (TVs) 
  • Smart Speakers 
  • Home Security Cameras 
  • Video Game Consoles 

Older wireless routers may be incapable of supporting these multiple devices, and when they do become overwhelmed with usage, the router may maintain an active Wi-Fi signal but have difficulty routing Internet traffic to/from your devices. 

This is common during peak evening hours when everyone is streaming or gaming simultaneously. 

Step-by-Step Troubleshooting for US Users 

Restart your modem and router. Remove all power from them and leave them turned off for 60 seconds. When you restore power, turn your modem on first, then your router. 

Use your provider’s app or a mobile data connection to check for an Internet service provider (ISP) outage in your area. If there is an outage, waiting for it to be resolved will almost always be your only option. 

Try using another device. If there is no internet connection on multiple devices, your local network is down. 

Temporarily disable any VPNs – if internet access resumes after disabling a VPN, the VPN is causing your issue. 

Forget the Wi-Fi network on your device and reconnect to it to clear any cached settings that may be causing the problem. 

If you are having problems accessing the internet on a public network, try to access a non-HTTPS website (like example.com) to trigger a captive portal. 

If you can partially use apps but cannot load websites, change your primary and secondary DNS settings on your network-connected devices to Google’s or CloudFlare’s public DNS servers. 

Check to see if there are firmware updates available for your router and/or operating system updates available for your device(s). 

If you are still having problems after all of the above steps, reset your affected network device’s network settings. 

When Hardware Is the Real Problem 

If none of the fixes work, the hardware may be failing. 

Signs include: 

  • Frequent disconnects 
  • Router overheating 
  • Internet dropping daily 
  • Modem losing signal lights 

In the US, ISPs often provide outdated equipment. Replacing a modem or router, especially upgrading to DOCSIS 3.1 or Wi-Fi 6, can dramatically improve reliability. 

Preventing Future Wi-Fi Internet Issues 

  • Place routers centrally, not in basements or closets. 
  • Avoid stacking routers near TVs or microwaves. 
  • Restart network equipment monthly. 
  • Use quality routers rather than ISP rentals when possible. 
  • Keep firmware and devices updated. 
  • Limit unnecessary connected devices. 

Final Takeaway 

“Wi-Fi connected but no internet” doesn’t mean your internet is broken, it means the connection chain is interrupted somewhere. For most US users, the fix is simple: restarting hardware, resolving DNS issues, disabling VPNs, or waiting out an ISP outage. Understanding the difference between Wi-Fi and internet access removes the confusion and saves hours of unnecessary troubleshooting. When your Wi-Fi lies to you, now you know how to call its bluff. 

The act of plugging your laptop in after a long day of work should be a seamless process of recharging your Dell Inspiron, HP Pavilion, or MacBook. For those millions of people who use these laptops for work, school, or entertainment purposes, whether it is in a busy café in New York or in a cozy home office in California, being able to quickly identify problems such as a bad charger or a port malfunction will empower you to quickly solve them. 

This article provides US-centric solutions with real-world troubleshooting expertise, addressing common problems such as battery not charging errors, laptop charging problems, and long-tail issues such as charger and port problems, so you can fix 80% of issues without a house call.  

Read this article to get your laptop up and running again. 

Common Causes Overview 

Laptops are often plagued by the issue of battery charging not working. This could be due to hardware failure, software bugs, or issues with the power supply. 

The main causes of this problem include faulty charging cables, a damaged port, or an old battery. Overheating or dust accumulation can worsen the situation, while software configurations can sometimes fool the system into ignoring the battery. 

Charger Problems 

A faulty charger is at the top of the list for battery not charging issues. Damaged cords, bent pins, or low wattage are the causes of non-functioning chargers, especially after traveling or excessive use. 

Try using a different compatible charger, and light indicators are usually not working on the faulty charger. Substandard chargers do not have the correct voltage regulation. 

Charger Issue Symptoms Quick Check 
Frayed Cable Intermittent power, sparks Visual inspection; flex cable gently   
Bent Pins No connection, loose fit Compare to known good charger   
Wrong Wattage Slow or no charge Verify specs (e.g., 65W vs 45W)   
No LED Light Appears dead Test outlet and alternate charger   

Port Issues Detailed 

Port problems are a common issue with laptops that won’t charge and charging issues with USB-C laptops that tend to accumulate dust or lint are quite common. Dust, lint, or worn-out internals prevent proper contact, simulating a drained battery. 

Port Problem Signs Fix Steps 
Debris Buildup Sporadic charge Blow out with air canister; swab isopropyl   
Bent Pins No fit, angled cable Straighten with toothpick (carefully)   
Loose Connection Drops at angles Secure with tape temporarily; service center   
Corrosion Green residue Baking soda wipe, dry fully   

Battery Health Checks 

Older lithium-ion batteries will degrade capacity, preventing charging beyond 20-30% due to cell failure or BMS lockout. Swelling or leakage requires immediate replacement. 

Battery status can be viewable in the system settings; a health below 80% indicates a need for replacement.  

Battery Symptom Cause Threshold for Replacement 
Won’t Charge Past 50% BMS Protection Persistent after reset   
Swelling Gas Buildup Any bulge—safety hazard   
Overheats Cell Failure >104°F during charge   
No Hold After Full Capacity Loss <1hr runtime on full   

Software and Settings Fixes 

Software bugs result in battery not being charged by overriding hardware. Windows “Battery Limit” or macOS optimization stops charging to prolong battery life, displaying “Plugged In, Not Charging.” 

OS Setting to Check Disable Method 
Windows 11 Battery Slider Settings > Power > 100%   
macOS Sonoma Optimized Charging System Settings > Battery > Off   
Linux TLP Config Edit /etc/tlp.conf   
BIOS Charge Threshold Boot to BIOS > Advanced   

Overheating Factors 

Excess heat activates safety cut-offs, halting battery charging to prevent a fire. Clogged vents or high temperatures (>95°F) deceive sensors. 

Cool the laptop on a hard surface, using HWInfo for monitoring. Dirty or failing fans require cleaning or replacement. 

Step-by-Step Troubleshooting 

This is the procedure to follow to diagnose the battery, not charging issues systematically. 

  • Unplug and press power for 30 seconds to reset. 
  • Check the light on the charger and swap if it is not bright. 
  • Clean the ports very carefully. 
  • Boot to BIOS and see if it charges there (since the problem may be with the OS). 
  • Run diagnostics (F12 on Dell and HP). 
  • Update all software. 
  • See if the battery works on another laptop if possible. 
Step Time Needed Success Rate (Est.) 
Reset Power 1 min 40%   
Swap Charger 5 min 60%   
Clean Ports 2 min 30%   
BIOS Test 10 min 25%   
Diagnostics 15 min 20%   

Device-Specific Tips 

US brands like Apple, Dell XPS, and HP Spectre share traits but differ in some ways. 

  • MacBook: SMC reset (Shift+Ctrl+Opt+Power); common USB-C port wear. 
  • Dell/HP: Express Charge fails post-BIOS update; ePSA diagnostics key.  
  • Lenovo ThinkPad: Battery gauge reset via Novo button.  
Brand Common Fault Fix Tool 
Apple MagSafe/USB-C Apple Diagnostics (D)   
Dell DC Jack ePSA (F12 boot)   
HP Smart Adapter HP PC Hardware Diagnostics   
Lenovo Threshold Mode Vantage App   

Prevention Strategies 

Extend battery life to dodge not charging woes. Charge at 20-80%, avoid overnight plugs, and use originals. 

Store spares at 50% in cool spots. Firmware updates patch BMS bugs. 

Habit Benefit Frequency 
Optimal Range Reduces Wear Daily   
Original Charger Voltage Match Always   
Vent Cleaning Heat Control Monthly   
Calibrate Accurate Gauge Quarterly   

When to Seek Pros 

DIY disasters? Experts will rewire the port ($100-200) or repair the motherboard.  

Battery replacements: $50-150 for compatible. 

Replacement Options 

OEM batteries come with a guarantee of fit; third-party batteries such as Green Cell save 40%. Check UL certification for safety. 

US sources: Battery Ship, LaptopBatteryExpress have fast shipping. Allow 2-4 hours for installation for those with DIY knowledge. 

Type Price Range Lifespan 
OEM $120-250 500 cycles   
Refurb $60-120 300 cycles   
Third-Party $40-100 400 cycles   

A battery that won’t charge is a problem, but 80% of these issues can be solved by simply changing or cleaning the charger. 

Conclusion 

In summary, a laptop battery that won’t charge often stems from simple issues like a faulty cable, dirt buildup, or software glitches, which you can tackle with basic troubleshooting. For more stubborn problems such as damaged ports, failing batteries, or motherboard faults, avoid DIY pitfalls and turn to professionals for repairs costing $50–200, depending on the fix. Always check your warranty first through manufacturers or services like Best Buy Geek Squad if your device is under a year old, saving you time and money. 

If you spot warning signs like smoke or bulging, stop using the device right away to prevent hazards, and seek expert help immediately. Regular maintenance, like cleaning ports and updating software, keeps your battery healthy longer. With these steps, you’ll get back to full power quickly stay charged and safe 

FAQS 

1. Why Won’t My Laptop Battery Charge When I Plug It In? 

A faulty charging cable/port, low-power adapter, or clogged charging ports can be the reason. Check your cable and adapter, clean your ports, and try another charger if possible. 

2. Can I Repair My Faulty Charging Port Myself? 

This can cause more harm to your laptop, such as short circuits. Professionals suggest rewiring the charging port ($100-$200). If your laptop is still under warranty (less than 1 year), you should contact Best Buy Geek Squad or the manufacturer. 

3. Is My Battery Swollen or Smoking a Hazard? 

Yes, it is. You should not use it anymore because of the potential danger of fire due to overheating or battery degradation. This is a sign that you should replace it immediately ($50-$150 for a compatible battery) or repair the motherboard by a professional. 

4. What Is Causing the Overheating That Prevents Charging? 

When the laptop is subjected to heavy usage or inadequate ventilation, it heats up, causing the charging process to be interrupted by safety pauses. This can be remedied by cooling the laptop by placing it on an elevated surface, ensuring the vents are clean, or switching to power-saving mode. 

5. How Do I Determine If My Warranty Will Cover My Battery Problem? 

If your device is less than 1 year old, you can file a claim with the manufacturer or Geek Squad. Just don’t attempt to repair it yourself. If your device is older than 1 year, you can attempt basic repairs such as cable swaps before consulting a pro.

Source –  

Lithium Battery Not Charging? Troubleshooting & Fixes by ACE Battery 

Why Isn’t My Laptop Battery Charging? Quick Fixes And Troubleshooting Solutions [Updated On- 2026] 

Why Is My Battery Not Charging? 19 Reasons & 8-Step Fix 

Laptop Not Charging? Ultimate Guide to Fixes and Solutions 

Why Your Battery Will Not Charge and How to Fix It 

Why Does My Laptop Battery Not Charging? Quick Fixes And Troubleshooting Solutions [Updated On: February 2026] 

Why Is My Battery Not Charging? Causes, Fixes, And When To Seek Help – TYCORUN Energy

You press the power button on your Windows PC, grab your coffee, maybe check your phone and your computer is still loading. For many users in the US, especially those working remotely, attending online classes, or gaming, a slow Windows startup feels like wasted time before the day even begins. If your Windows laptop or desktop takes minutes to reach the desktop, you’re not alone. Long boot times are one of the most common complaints among Windows 10 and Windows 11 users. In most cases, slow booting isn’t a hardware failure; it’s the result of software settings, background processes, or aging storage. 

This guide explains why Windows boots slowly, what’s happening behind the scenes, and how to fix it step by step without being overly technical. 

What Happens When Windows Boots 

When you turn on a Windows PC, a lot happens before you see the desktop. The system checks hardware, loads drivers, starts essential services, launches background apps, and prepares user settings. If any part of this chain is delayed, the startup slows down. 

In the US, where many PCs are used for work, school, entertainment, and gaming all on the same system, boot processes often get overloaded with extra tasks that Windows doesn’t strictly need to start immediately. 

Too Many Startup Programs 

The most common reason Windows boots slowly is too many startup apps. 

Programs like Microsoft Teams, Zoom, Adobe services, cloud sync tools, gaming launchers, printer software, and antivirus utilities often configure themselves to launch at startup. Individually, they don’t seem heavy, but together they can add 30 seconds or several minutes to boot time. 

Many users don’t realize these apps are running until they check Task Manager. Over time, especially on work-from-home PCs, startup lists quietly grow longer. 

Traditional Hard Drives vs SSDs 

Hardware still matters, especially storage. If your PC uses a traditional hard disk drive (HDD) instead of a solid-state drive (SSD), slow booting is expected. HDDs physically spin to read data, while SSDs access data instantly. In the US, many budget laptops and older desktops are still running HDDs, particularly systems purchased before 2020. On Windows 10 or 11, HDD-based systems can take several minutes to boot, even when everything else is optimized. 

This isn’t a Windows bug, it’s a storage bottleneck. 

Windows Updates Running in the Background 

Windows updates don’t just install when you click “Restart.” They also prepare files, clean up old updates, and optimize system components during startup. 

After major updates, especially Windows 11 feature updates, boot times often increase temporarily. On slower systems, background update tasks can make every startup feel sluggish for days. US users who keep their systems updated (as recommended for security) often notice slow boots without realizing updates are the reason. 

Fast Startup Isn’t Always Fast 

Fast Startup is an option built into Windows that helps speed up booting the PC by saving the current session to the hard drive rather than completely powering down. Unfortunately, there are times when using Fast Startup results in a longer boot time because of problems with older hardware drivers or following large updates.  

In addition, Fast Startup can cause issues when using USB drives, dual-boot systems, and encrypted disks. If your computer takes longer to boot when it has been powered off compared to when it was rebooted, then Fast Startup may be causing this issue. 

Driver Issues and Hardware Delays 

Drivers are essential for Windows to communicate with hardware but outdated or corrupted drivers can stall the boot process. Graphics drivers, network drivers, and storage drivers are frequent culprits. Windows may wait several seconds or longer trying to initialize faulty hardware before moving on. 

This is common on laptops with aging Wi-Fi cards, external USB devices left plugged in, or systems that recently upgraded from Windows 10 to Windows 11. 

Antivirus and Security Software 

Security software is critical, but it comes at a cost. Third-party antivirus programs often run deep system scans or initialize multiple services during startup. On lower-end systems, this can significantly slow boot times. In the US, where many users install additional security software alongside Windows Defender, overlapping protection can increase startup load without improving security. 

Background Services You Don’t See 

Windows runs dozens of background services at boot, some essential, others optional. Print spoolers, Bluetooth services, remote desktop services, telemetry tools, and vendor-specific utilities all start quietly. Individually, they’re lightweight, but collectively they can delay startup. 

OEM software preinstalled by manufacturers like HP, Dell, and Lenovo is a major contributor, especially on consumer laptops. 

Corrupted System Files and Disk Errors 

If Windows system files are damaged often due to forced shutdowns, failed updates, or power outages startup can slow dramatically. 

The system may retry loading components or perform silent repairs during boot. Disk errors on older drives can also cause Windows to repeatedly check and recheck files. This issue is more common on PCs that are rarely restarted or are frequently put to sleep instead of shut down. 

How to Check What’s Slowing Your Boot 

To diagnose slow startup times, Windows has native tools. One tool is the Task Manager, which shows how much each app will delay or hasten your boot. Event Viewer will provide you with information about any errors regarding your start-up, as well as how long services take to load on boot. 

On Windows 11, Startup Apps provides a new interface that is simplified for average users to disable programs that are not needed during boot time. 

Practical Steps to Speed Up Windows Boot Time 

To speed up startup times, get rid of all unneeded startup apps from the start menu (specifically the High Impact category) and only include applications that are necessary to run at boot-up. Be sure to continually keep Windows updated and frequently update all your operating system’s drivers, especially your video graphics and system chipset drivers. If Fast Startup isn’t functioning properly, disable it to see if there is an improvement in boot performance 

Also, try to unplug any USB devices from your computer before turning on your PC. If you’re using a standard hard drive, replacing it with an SSD is the most effective way to improve boot times and reduce boot time from outstandingly lengthy to just but a few seconds. 

Using system file verification tools that are built into the operating system and performing disk cleanup can help remedy hidden problems within your computer that could lead to a slow boot time on older machines. 

When Slow Booting Signals Hardware Limits 

If your PC still boots slowly after optimization, hardware limitations may be the real issue. Low RAM, aging CPUs, and failing hard drives all struggle with modern Windows versions. In these cases, no amount of tweaking will fully solve the problem. For many US users, a modest hardware upgrade or replacing a decade-old system provides better long-term value than constant troubleshooting. 

Final Takeaway 

Windows doesn’t boot slowly for no reason. Most delays come from startup apps, storage limitations, background updates, and driver issues not from Windows itself being “broken.” 

For US users balancing work, school, and entertainment on a single PC, slow startup is frustrating but usually fixable. With a few smart adjustments and the right expectations based on your hardware you can dramatically reduce boot time and start your day without staring at a loading screen. 

A slow boot isn’t inevitable. It’s a signal your system needs attention—and now you know exactly where to look. 

FAQ’s

1. Is slow Windows booting a sign of hardware failure? 

Not usually. In most cases, slow startup is caused by software settings, system updates, or storage limitations rather than broken hardware. 

2. How do startup programs affect Windows boot time? 

Apps that launch automatically at startup consume system resources and can significantly delay how fast Windows reaches the desktop. 

3. Does using a hard drive instead of an SSD slow boot times? 

Yes. Traditional hard drives take much longer to load Windows compared to solid-state drives, which access data almost instantly. 

4. Can Windows updates make my PC boot slower? 

Yes. Windows updates often run background tasks during startup, especially after major updates, which can temporarily slow boot times. 

5. Do antivirus programs slow down Windows startup? 

Some third-party antivirus tools run multiple services at boot, which can increase startup time, especially on lower-end systems.

References: 

Windows taking insanely long time to boot and reduced performance.

Make Your Computer Faster: Boost Performance and Speed Up Your PC

Imagine you turn on your windows computer for an important Zoom meeting with colleagues on the other side of the country, only to be greeted by an unsettling silence from your computer speakers no notifications, no background music, nothing. For the millions of Americans who use their computers every day for work, fun, and staying in touch, “no sound on computer” seems to rank among the most exasperating tech problems, not to mention stopping productivity in its tracks in home and offices from New York to California.  

Whether it’s “audio not working” after a normal software update or speakers just stopping mid-binge on Netflix, the underlying issues will always just be simple mistakes such as muted outputs or outdated drivers. Using the best troubleshooting methods specifically designed for normal PC configurations desktop computers from Dell and HP bestsellers at Best Buy, or laptops such as the latest MacBooks with Boot Camp installed  

Let’s understand in this article how to get your audio up and running in no time without needing an IT degree. 

Common Causes Table 

Cause Category Specific Issue Likelihood (High/Med/Low) Why It Happens  
Hardware Loose cables or unpowered speakers High Connections fail from movement or power loss 
Software Muted volume or wrong output device High Default settings change after updates 
Drivers Outdated or corrupted audio drivers Medium Windows updates conflict with sound drivers 
System Exclusive mode in apps or services disabled Medium Apps like browsers take audio control 
Hardware Fault Damaged speakers or ports Low Wear over time in older PCs 

 
These causes cover 90% of “no sound on computer” reports from US support forums. 

Initial Hardware Checks 

Begin here for quickest solutions to desktop or laptop speakers. 

  • Make sure speakers are turned on and volume dials are turned up. This may be a function of external speakers. 
  • Check cables: Make sure the 3.5mm audio jack or USB cord is securely connected to the green audio-out jack, not the pink microphone-in jack. 
  • Headphones check: Connect them to the same jack. If audio plays, the speakers might be the problem. 

This troubleshooting sequence can be completed in under 2 minutes before diving into software troubleshooting. 

Quick Volume and Output Fixes 

Windows misroutes audio to wrong devices like Bluetooth. 

Steps for Windows 10/11: 

  1. Right-click speaker icon in taskbar > Open Volume Mixer. 
  1. Unmute all sliders; set device volume to 50%+. 
  1. Click Playback Devices tab: Right-click Speakers > Set as Default. 
Output Device Issue Symptom Fix   
Wrong default Sound routes to disconnected HDMI TV Set Speakers/Headphones as default in Sound settings. 
Bluetooth paired Audio silently streams to absent AirPods Disconnect Bluetooth devices in Settings > Devices. 
No devices listed Empty playback list Restart Windows Audio service  

If audio not working persists, proceed to troubleshooter. 

Built-in Windows Troubleshooter 

Microsoft’s tool diagnoses 70% of software glitches automatically. 

How to Run: 

  • Search “Troubleshoot Settings” > Other troubleshooters > Playing Audio > Run.  
  • It scans drivers, output devices, and services like Windows Audio.  
Troubleshooter Result Action Success Rate   
Found wrong device Switches to correct output device High 
Service not running Restarts audio services High 
Driver issue flagged Prompts update/reinstall Medium 

Reboot after running; test YouTube playback. 

Driver Diagnostics and Updates 

Outdated drivers cause “no sound on computer” after Windows updates. 

Check Driver Status: 

  1. Right-click Start > Device Manager > Sound, video and game controllers. 
  1. Look for yellow exclamation on Realtek Audio.  
  1. Right-click > Update driver > Search automatically. 
Driver Problem Symptoms Fix Steps  
Outdated Works in safe mode only Download latest from PC maker (Dell/HP) site. 
Corrupted Code 10/43 error Uninstall device > Action > Scan for hardware changes. 
Missing No audio devices shown Reinstall from manufacturer’s US support page. 

For US users, HP/Dell/Lenovo sites offer auto-detect tools. 

Advanced Software Fixes 

If basics fail, target system conflicts. 

Restart Audio Services: 

  • Search “services.msc” > Windows Audio > Restart (Run as admin).  

Disable Audio Enhancements: 

  • Sound settings > Playback > Speakers Properties > Enhancements > Disable all.  
Service/Setting Why Disable Impact   
Windows Audio Stops if crashed Restores the output device instantly. 
Exclusive Mode Apps lock audio Uncheck in Properties > Advanced. 
Fast Startup Corrupts drivers on reboot Disable in Power Options. 

Test after each change with Sound settings test tone. 

Testing and Verification 

Confirm fixes with systematic tests. 

Test Method Steps Expected Result If Fails 
System Sound Settings > System > Sound > Test speakers Tone plays Check mute/drivers. 
Media Player Open Groove/YouTube Audio outputs Wrong output device. 
Safe Mode Restart holding Shift > Troubleshoot > Advanced > Startup > Safe Mode Sound works? Software conflict. 
External USB Plug USB speakers/dongle Auto-detects Port/hardware issue 

Run tests post-fix; document for warranty claims. 

Hardware Replacement 

Rarely needed, but for persistent “audio not working.” 

US Retailer Recommended Speakers Price Range Why Buy   
Best Buy Logitech Z207 USB $40-60 Plug-and-play, no drivers needed. 
Amazon Creative Pebble $25-40 Compact for desks, USB powered. 
Walmart Insignia 2.0 $20-30 Budget fix for laptops. 

Check return policy; test on another PC first.  

Prevention Tips 

Keep your speakers from going mute by following these easy practices specifically designed for US computer users. Update sound drivers every month from the official websites of Dell, HP, or Lenovo to avoid compatibility issues triggered by Windows patches. Use their auto-detect features to download the updates easily. Eject USB speakers from the taskbar before unplugging them and set volume levels between 20% and 80% to avoid distortion. 

Turn off Fast Startup in Power Options to avoid driver issues during booting, run the Playing Audio troubleshooter every quarter, and purchase a $10 USB audio adapter as a quick fix for malfunctioning ports. 

Conclusion 

To Conclude going through the diagnostic tables from hardware issues to volume adjustments, and then on to driver updates and service restarts, you’ve now equipped yourself with the know-how to kick “no sound on computer” problems once and for all. Most PC users in the US can fix audio problems in under 15 minutes without needing to call technical support, getting their workday calls, streaming, and gaming back on track for Dell, HP, and Lenovo computers. 

If hardware problems are indicated by stubborn bugs, a quick fix using USB speakers from Best Buy or Amazon will give you a temporary fix while you consider your warranty options with Geek Squad. You’ve got this sound problem solved means your productivity is unleashed, whether in a Manhattan high-rise or a California home office. 

FAQs 

1. Why is there no sound on the computer after a Windows update? 

Windows updates usually reset the audio drivers or change the default output device, causing speakers to go mute until they are readjusted. Try restarting the troubleshooter and updating audio drivers from your computer manufacturer’s website, such as Dell or HP. 

2. How can I troubleshoot no sound on external speakers? 

Verify that speakers are connected and set as default devices in Sound settings. Try using headphones; if they produce sound, replace the speakers. USB speakers skip the port problem. 

3. What if there is a yellow exclamation mark in the Device Manager for audio drivers? 

This indicates that the audio drivers are corrupted or outdated, preventing the output device from functioning. Uninstall the drivers by right-clicking and then search for hardware changes or download new drivers from the US support website of the computer manufacturer. 

4. Does restarting the PC fix no sound from speakers? 

It resolves temporary service glitches or exclusive mode locks in 40% of cases but run audio services restart via services. MSc first for faster results without rebooting. 

5. Can faulty hardware cause audio not working on laptops? 

Yes, worn jacks or internal speakers fail over time; test USB audio adapters. If safe mode has sound but normal mode doesn’t, it’s software otherwise, contact Best Buy Geek Squad.

Source –  

Fix No Sound from Your Computer | Step-by-Step Guide | Lenovo US 

 No sound from your computer? A quick troubleshooting guide 

5 Common Audio System Problems and Their Solutions – Onsitego Blog 

How to troubleshoot and repair a broken speaker that makes no sound  

No Sound on PC? 5 Easy Fixes for Computer Audio Issues | HP® Tech Takes 

How To Fix Audio System With No Sound? – Audio Gear Insider 

You’re ready to have an important Zoom meeting, a customer service call, or an online class, and then no one can hear you! If you live in the United States, where remote work and virtual interviews, online classes, and video conferencing have become common place, a malfunctioning microphone could feel like a medical emergency. 

Fortunately, the overwhelming majority of microphone problems with laptops and mobile devices do not have physical defects. The problem is typically due to the device being muted, being in conflict with permissions, or due to a software glitch.  

This article breaks down the most common causes and fixes in clear, step-by-step language, no tech degree required. 

Why microphones stop working in the first place 

Microphone problems usually fall into three categories: settings, software, or hardware. Sometimes the mic is muted at the system level. Other times, an app like Zoom or FaceTime doesn’t have permission to access it. In some cases, Bluetooth headphones hijack the audio input without realizing it. Actual hardware damage is far less common than people assume, especially on newer devices. 

Understanding which category, you’re dealing with helps you fix the issue faster instead of randomly toggling settings and hoping for the best. 

Start with the basics 

Before making any changes to the advanced settings, start by checking all of the basic things first. Double check that the microphone is not muted in any way, especially if there is a physical mute button/switch on the computer for peripherals such as laptops, headsets, or gaming controllers. If you have an external microphone or headphones plugged into your computer, remove them and test your internal (built-in) microphone as well. Restarting your computer may sound cliché, but it will resolve temporary glitches which can impact your audio input settings. 

Also, test your microphone in more than one app. If it works in Voice Recorder but not on Zoom, the issue is almost certainly app related. 

Microphone not working on a Windows laptop 

Microphone issues with Windows laptops usually stem from the system’s privacy options and outdated driver versions. The first step is to go into your Settings, then go to Privacy & Security, and then to the Microphone option. Ensure that the option for allowing microphone access on this computer is set to “On” for each app you have installed. Also check to see if microphone access is enabled for the specific application; you will be using Zoom, Teams or Chrome (if you have them installed). 

Next, go to Settings > System > Sound and check the input device. Many users have multiple microphones listed, including webcam mics or Bluetooth devices. Select the correct one and speak to see if the input level moves. If it doesn’t, click “Troubleshoot” and let Windows diagnose the issue. 

Another common problem is audio drivers, especially right after a Windows update. Open Device Manager, expand Audio inputs and outputs, then update the microphone driver. If your mic no longer works after an update, rolling back the driver may fix the problem. 

Microphone issues on macOS laptops 

MacBooks have good audio reliability, but privacy settings can block microphone use without notifying you. To check microphone access, go to System Preferences > Security and Privacy > Microphone and check that you’ve allowed access to any apps you want to use. macOS enforces strict privacy; if you deny an app permission to access the microphone once, then it will never prompt you to grant permission again. 

Then, check System Settings > Sound > Input and select the correct microphone. Speak normally and watch the input level. If there’s no movement, the system may be using an external device or a virtual audio driver instead. 

If you continue to experience issues, try restarting your Mac in Safe Mode. This will disable any third-party extensions that can cause audio input to malfunction. If the microphone works in Safe Mode but not normally, it is likely due to a background application interfering with normal operation. 

Microphone not working on an iPhone 

For iPhones, microphone problems are often related to the given app permission settings, or the microphone port is blocked. Access Settings > Privacy & Security > Microphone to see if the app (Phone, FaceTime, zoom etc.) being used has permission. 

If your caller can hear you through the speakerphone but not through a regular phone call, it may be due to blockage or damage to the bottom microphone. Over time, microphone holes may get clogged with lint, dust or debris. Carefully clean the holes using a toothpick or soft brush; never spray compressed air directly into them. 

Also, check Settings > Accessibility > Audio/Visual to make sure audio balance and noise cancellation settings aren’t interfering with input. 

Microphone problems on Android phones 

Android devices vary by manufacturer, but the basics are consistent. Open Settings > Privacy > Permission Manager > Microphone and confirm the app has access. Some Android versions allow mic access only while the app is in use, which can cause problems if background permissions are restricted. 

Restart the phone in Safe Mode to see if third-party apps are causing interference. If the microphone works in Safe Mode, uninstall recently added apps especially voice assistants, call recorders, or audio enhancers. 

As with iPhones, blocked mic ports are common. Android phones often have multiple microphones, so test calls on speaker and video apps to identify whether it’s a hardware or software issue. 

Why the mic works in one app but not another 

This is one of the most confusing problems for users. Each app manages microphone access independently. Zoom, Google Meet, and Teams all have their own audio input settings. Even if your system mic works, the app may be set to the wrong input device. 

Open the app’s audio settings and manually select the correct microphone. Avoid using “Same as a system” if you have multiple audio devices connected. 

Browser-based apps add another layer of complexity. Chrome, Safari, and Edge have separate permission controls. Make sure the browser itself has mic access, then confirm the website is allowed to use it. 

Bluetooth headphones and microphone conflicts 

Although Bluetooth headsets are handy, their equal number of problems have made them infamous for their low microphone quality. Occasionally, they will connect just fine for speaker use, but not for the use of your microphone, or they could switch to one of the poor-quality hands-free profiles. 

When trying to troubleshoot Bluetooth, start by disconnecting your Bluetooth headset and testing your computer’s built-in microphone to be sure that it is working. If so, you can reconnect your Bluetooth headset and manually choose it as an audio-input device. Wired headsets are usually more dependable for making important calls. 

When microphone issues point to hardware damage 

If you have tried all the software fixes for your microphone issue and none of them have fixed the problem, hardware could be to blame. Typical symptoms of hardware-related problems include: a crackling sound from the mic, very low sound output from the mic, or no input from the mic (in any app or on any setting). Microphones can also be impacted by liquid damage, drops, and prolonged exposure to dust. 

While using an external USB microphone may work well as a temporary fix on laptops, getting your phone repaired as a professional may be needed if you have multiple microphones that don’t seem to work properly. 

Real-world scenarios where mic issues show up most 

Work-from-home users often notice mic problems during Zoom or Teams meetings, usually due to app permissions or wrong input selection. Students face similar issues during online exams, where browser permissions play a big role. 

Gamers frequently experience mic failures in voice chat because of conflicting audio devices or outdated drivers. On phones, call-related mic issues often surface during speakerphone use or video calls, highlighting blocked or damaged microphones. 

How to prevent microphone problems 

Do not overlook driver updates on Windows. Besides keeping your operating system and applications up to date, check app permissions regularly, particularly following any updates. Gently clean the ports of your device every few months, and don’t use inexpensive Bluetooth accessories because they might introduce audio problems. 

An external microphone can help reduce your dependency on the built-in hardware for performing important tasks and will enable you greater control. 

Final checklist before you panic 

Before assuming your microphone is broken, check out mute buttons, permissions, input selection, and Bluetooth devices. Test in multiple apps. Restart the device. Clean mic ports. Update software and drivers. 

Most microphone problems can be fixed in minutes once you know where to look. In a world where communication is essential, a silent mic is frustrating, but rarely permanent. 

FAQs  

1. How do I check if my microphone is muted? 

Check both software and hardware controls. Many laptops, headsets, and keyboards have physical mute buttons. Also review system sound settings to ensure the microphone input isn’t disabled or turned down. 

2. Why does my microphone work in one app but not another? 

Each app manages microphone permissions separately. An app like Zoom, Teams, or a web browser may be set to the wrong input device or may not have microphone access enabled. 

3. What should I do if my MacBook microphone isn’t working? 

Check System Settings > Privacy & Security > Microphone to ensure the app has permission. Also confirm the correct input device is selected under Sound > Input. Safe Mode can help identify software conflicts. 

4. Why can people hear me on speakerphone but not on regular phone calls? 

This usually indicates a blocked or damaged primary microphone. Cleaning the mic ports carefully often fixes the issue. If not, hardware repair may be required. 

5. Can Bluetooth headphones cause microphone problems? 

Yes. Bluetooth headsets can hijack audio input or switch to low-quality profiles. Disconnect Bluetooth devices to test the built-in mic, then reconnect and manually select the correct input source.

References: 

Fix microphone problems 

Microphone Not Working: Laptop, Headset, and Wireless Mic Issues

You pull out your phone to scan a QR code at a restaurant, join a FaceTime call, or capture a once-in-a-lifetime moment, and the camera won’t open. The screen goes black. The app crashes. Or worse, you get the dreaded “Camera Failed” message. 

For US users, where smartphones double as work tools, payment devices, navigation systems, and social lifelines, a non-working phone camera is more than an inconvenience. It can disrupt remote work, online banking, telehealth appointments, and everyday communication. 

The good news? In most cases, a broken camera isn’t actually broken. Camera failures are usually caused by software bugs, app conflicts, permission issues, or temporary hardware confusion, not permanent damage.  

This guide explains why phone cameras stop working and walks you through practical, step-by-step fixes that work for both iPhone and Android users in the US. 

Why phone cameras stop working? 

Camera problems usually fall into three main categories: software issues, app-level conflicts, or hardware-related problems. Software issues are by far the most common. These include buggy updates, corrupted app data, or system services crashing in the background. 

App conflicts happen when multiple apps try to access the camera at the same time. Video conferencing apps, social media platforms, and QR scanners are frequent culprits. Hardware issues, like physical damage or water exposure—do happen, but far less often than people assume. 

Understanding The Problem 

You can start troubleshooting your phone camera by resetting your device (turning it off, then back on). This is a very simple step, and it usually helps clear the error message on your device that says your camera is not available. (Other common tips include closing other applications that may be running in the background, such as Instagram/Snapchat/Zoom, or Facetime 

Next, take your case off the phone and clean the camera lens. If there are smudges, dirt, or other debris on the camera, it will not prevent the camera from turning on. However, it can cause the auto-focus to fail, which may make you believe that your phone camera lens is defective. 

Finally, try using either your front or your rear-facing camera on your phone.  

Camera app not opening or crashing immediately 

The most frequently encountered problem reported by users in the US is that the camera app fails to launch or immediately closes upon launch. This usually indicates that either the camera app’s data may be corrupt, or there may be a failure with a system service. 

If you are using an Android device, open settings, select apps, from the list to select a camera, then select storage, and then in storage, clear your cache (do not clear any of your data at this time). If your camera app has received and installed an update from Google Play, it may have resulted in corrupt cache files that will prevent your camera from launching. 

Users of iPhones do not currently have any option available to clear the camera app’s cache, but restarting and updating the iPhone to the most recent version of iOS will usually resolve the problem. If the problem has occurred after a newly installed app or an updated app that is related to the use of the camera, you should uninstall the camera-related app(s) that have been recently installed and try testing the camera app again. 

Black screen or frozen camera preview 

A black screen generally indicates that software is unable to properly read/access to camera hardware. This issue sometimes occurs when there’s an active background app that is already using/gaining access to the camera. To fix this issue, you should first close all running apps and then open your camera. If that doesn’t resolve your issue, you should try restarting your phone. Additionally, if you’re an Android user, starting your phone in Safe Mode may help identify whether any of your third-party applications are causing the issue. 

If your camera is functional when you boot your phone in Safe Mode, but it does not function when you boot your phone normally, you can try uninstalling any apps you’ve installed recently (particularly video calling, flashlight, or camera effect type applications). 

Camera Permissions Blocking Access 

The main cause of camera problems is not granting permission for the camera. This is most often the case after software updates. iOS and Android both have strict privacy guidelines, so even if you have one denied, your camera will not work at all. 

To see whether you have enabled camera access, check the camera app in your camera settings (Settings > Privacy & Security > Camera) and confirm that both the camera app and any other apps you’re using have been granted camera access. Additionally, look at your Screen Time restrictions; if there are restrictions, they can also silently deny you access to your camera. 

For Android phones, verify that you have permission to use your camera by going to Settings > Privacy > Permission Manager > Camera. Many Android phones only allow camera access while the camera is on; this can affect how background scans will work on your phone. 

Camera works in one app but not another 

This is extremely common and often confusing. Each app controls camera access independently. Your phone camera may work perfectly in the default Camera app, but fail in Zoom, Instagram, or your banking app. 

Open the app’s settings and manually select the camera if available. In video conferencing apps, confirm the correct camera (front or rear) is selected. For browser-based camera use, check browser permissions separately; Chrome, Safari, and Edge each manage camera access differently. 

If a specific app consistently fails, reinstalling it often resolves corrupted permissions. 

Blurry images & focus issues 

If the camera opens but produces blurry or shaky images, the problem may be related to autofocus or optical image stabilization (OIS). This is more common on newer phones with advanced camera hardware. 

Restart the phone and test again. If the camera rattles or vibrates, especially when opening the app, it may indicate OIS hardware failure, often caused by drops. 

Also, check for third-party camera apps that override focus behavior. Removing them can restore normal operation. 

Camera not working after a software update 

US users frequently report camera issues after major iOS or Android updates. Updates can temporarily break system services or conflict with older app versions. 

Check for follow-up updates, as manufacturers often release quick patches. Update all apps through the App Store or Google Play Store, especially camera-dependent apps. 

If problems persist, resetting app preferences (Android) or resetting all settings (iPhone) can help without erasing data. 

Overheating and camera shutdowns 

Phones can disable the camera when the device overheats, which is common during navigation, video recording, or outdoor use in warmer US states like Texas, Florida, and Arizona. 

Let the phone cool down, remove the case, and avoid using the camera while charging. Overheating-related camera shutdowns are protective measures, not permanent damage. 

When the issue is likely hardware-related 

If the camera will not function within any applications, has been restarted, been updated and is functioning in Safe Mode, as well as checks done on permission settings, hardware damage is much more likely. Some signs of this include click sounds, a black screen that remains black, and broken lenses. 

Water exposure, even months earlier, can corrode internal camera connectors. Drops can misalign lenses or damage stabilization modules. 

At this point, professional repair or manufacturer support is the best option. 

How to prevent future camera problems 

Keep your phone updated but avoid installing major updates immediately if your device is older. Review app permissions regularly. Avoid cheap third-party cameras or flashlight apps. Protect your phone from drops and moisture and avoid prolonged overheating. 

Cloud backups ensure that if repair is needed, your data is safe. 

Final thoughts 

A phone camera that suddenly stops working is frustrating, but rarely permanent. In most cases, the issue is software-related and can be fixed in minutes with the right steps. 

Before assuming your phone needs repair or replacement, work through the troubleshooting process carefully. Understanding how camera software, permissions, and hardware interact gives you control and saves money. 

In today’s digital-first world, your phone camera is essential. The good news is that keeping it working is usually simpler than it seems. 

FAQs 

1. How do I know if my camera problem is hardware-related? 

If the camera fails in all apps, stays black after restarts, makes clicking noises, or has visible lens damage; hardware failure is more likely. 

2. Can overheating disable my phone’s camera? 

Yes. Phones automatically disable cameras when overheated to prevent damage. Let the phone cool down before using the camera again. 

3. Why did my phone camera stop working after a software update? 

Major iOS or Android updates can temporarily disrupt camera services or app compatibility. Installing follow-up updates and updating apps usually fixes the problem. 

4. Why are my photos blurry even though the camera opens? 

Blurry images are often caused by dirty lenses, autofocus issues, or third-party apps interfering with camera controls, not a broken camera. 

5. Can app permissions stop my phone camera from working? 

Yes. If camera permission is denied, often after a system update the camera will not work in any app until access is re-enabled in Privacy settings.

References:

How to fix ‘Camera failed’ error on Samsung Galaxy phone 

Android camera not working? Here’s how you can try to fix it

If the camera or flash on your iPhone, iPad or iPod touch aren’t working

You tap your phone screen to answer a call, scroll through emails, or unlock your device and nothing happens. No response. No feedback. In the United States, where smartphones and touchscreen laptops are essential for work, banking, navigation, healthcare apps, and daily communication, a non-responsive touchscreen can feel like your entire digital life has come to a halt. You will be happy to know that most touchscreen problems are temporary and are not the result of hardware issues. Most touchscreens are shut down by software problems, environmental issues or poor calibration. Touchscreens are not often inoperable because of a problem with the actual screen, and some of them can be repaired without going to a professional. This guide will provide you with the reasons touchscreens fail as well as detailed steps on how to accomplish different tasks to help you and all other people in the United States get to your desired results. 

Why touchscreens stop responding 

There are 3 categories of issues with touchscreens: hardware damage, software-related, and environmental. 

Software-related issues happen most often and occur after a software update, an app crashes, and not restarting your phone/tablet for a long time. 

Environmental factors that could inhibit capacitive touch sensors include moisture, extreme temperatures, and static electricity. Accessory items such as screen protectors, thick cases, and third-party stylus pens may also inhibit touch sensitivity. 

Actual hardware damage, such as a cracked digitizer or loose internal connector is less common, though it can occur after drops or liquid exposure. 

Start with the simplest checks first 

Before assuming your touchscreen is broken, start with the basics. Restart the device. This single step resolves a surprising number of touchscreen issues by clearing temporary software glitches and restarting background services. 

Next, completely clean the screen by using a microfiber cloth. Hand sanitiser is particularly common since the pandemic and can leave oils, sweat and other residue on the screen which may prevent the screen from detecting your finger touching it. You should also remove any gloves as touch screens will not typically register your finger when you are wearing gloves unless they have been designed specifically to be touch enabled. 

If you’re using a screen protector, remove it temporarily. Poor-quality or damaged protectors are a frequent cause of unresponsive touch input. 

Touchscreen not responding on a smartphone 

On smartphones, touchscreen failures often appear as delayed response, missed taps, or complete unresponsiveness in certain areas of the screen. This is usually related to software issues or interference from apps. 

Update your device’s operating system (iOS or Android) if it is functional enough to complete an update. New operating system releases include fixes for bugs related to touch input. Be sure to also update any installed applications, as outdated applications may place excessive strain on your device by consuming resources, contributing to touch input lag. 

Booting into Safe Mode on an Android device can help determine if an external application is causing your device’s touch input issue. If your touch screen works properly in Safe Mode, then try uninstalling any recently installed applications such as launchers, gesture-based applications, or applications that use screen overlays. 

For an iOS device, you can resolve continued touch screen issues without losing personal data by performing a reset of all settings even if you do not want to perform a full factory reset. 

Touchscreen issues on touchscreen laptops and tablets 

Touchscreen laptops and tablets, such as Windows 2-in-1 devices, Surface models, and Chromebooks can experience touch problems due to driver issues. 

On Windows devices, open Device Manager and expand “Human Interface Devices.” Look for “HID-compliant touch screen.” If it’s disabled, re-enable it. If it’s missing or malfunctioning, updating or reinstalling the driver often fixes the issue. 

Windows updates may break the touchscreen functionality until the problem is fixed. To fix this issue, either roll back your most recent update or install a pending patch to restore touch input. 

For iPad, check that you are using the latest version of iPadOS and that all third-party accessories are removed. If you have an issue with the touchscreen, restarting the device or performing a forced restart can sometimes solve the problem. 

Screen works but touch is inaccurate or delayed 

If your touchscreen isn’t responding properly / quickly, then it could be an issue with your system (possibly having a problem). It may need recalibrating or fixing up the system some more to help it respond to you faster. 

For Android devices, you can turn on developer options in settings, then adjust the animation scales (speed) in Developer Options will help it respond faster than the way it does right now. Some manufacturers also have a way built into their settings to calibrate (adjust) the touch screen within these options. 

If you use a touchscreen on a Windows laptop, running the built-in calibration tool can greatly improve how accurately things touch the screen; however, it is essential after replacing out a touch screen or doing a driver/software update. 

Most problems with “slow” or “not responding” touch screens or this type of device is due to having insufficient free storage available. Releasing up some storage space can also have an overall bigger effect on the full performance of your device. 

Moisture and Heat Environmental Interferences 

Your touch device uses electrical functionality. Therefore, if there is any moisture present around the touchscreen area (e.g., rain, humidity, sweaty hands, or condensation), it may not recognize your finger press. 

If your device has been exposed to moisture, make sure to power off your device until it is dried completely. You should not use external devices like hair dryers on the device because you could potentially damage internal components of your device. 

Overheating can also disable touch input temporarily. In warmer US states or during prolonged use (navigation, gaming, charging), devices may throttle performance to protect hardware. Let the device cool down before testing again. 

When accessories cause touchscreen problems 

Many US users unknowingly introduce touchscreen issues through accessories. Thick cases can put pressure on screen edges. Cheap charging cables can introduce electrical interference. Poor-quality screen protectors can block touch sensitivity. 

If your touchscreen stops working while charging, unplug the device and test again. This is often caused by uncertified chargers or faulty outlets. 

Styluses designed for specific devices may not work properly on others, leading users to think the screen itself is broken. 

Touchscreen not working after a drop 

Drops are one of the leading causes of touchscreen failure. Even if the glass isn’t cracked, the digitizer underneath may be damaged or disconnected. 

Signs of hardware-related touch damage include unresponsive zones, ghost touches, or flickering display paired with touch failure. Unfortunately, these issues typically require professional repair. 

If the device is under warranty or covered by protection plans like AppleCare+ or carrier insurance, contact support before attempting any repair. 

How to prevent future touchscreen problems 

Regularly reboot your device and keep it current; however, you should wait to do major updates until after some time after receiving them for devices that are older. Only use chargers and other accessories that are certified for your device when charging. Frequently clean your device’s screen, especially after using hand sanitizer or lotion. 

Do not expose your devices to heat or moisture for extended periods. Use protective cases that do not put pressure on the edges of the screen. 

Final thoughts 

If you find yourself with a non-responsive touchscreen, it may feel like the end of the world, but in reality, most touchscreen issues are just temporary software glitches, environmental conditions affecting the device, or issues caused by accessories. Fortunately, most touchscreen issues can be resolved at home and quickly (in most cases).  

Before you assume that replacing or repairing an expensive touch screen is necessary, take some time to methodically troubleshoot the problem; knowing how touchscreens operate and what might cause them to malfunction will give you the ability to determine if this is really happening. 

In a world where nearly everything happens through a screen, keeping your touchscreen responsive isn’t just convenient, it’s essential. 

FAQs  

1. Can a simple restart really fix touchscreen problems? 

Yes. Restarting clears temporary system errors and restarts touch-related services, which resolves many unresponsive touchscreen issues instantly. 

2. How do I know if an app is causing my touchscreen to fail? 

If your touchscreen works in Safe Mode (Android) or after removing recently installed apps, a third-party app, especially launchers or overlay apps is likely the cause. 

3. Why does my touchscreen stop responding when my device is charging? 

This is often caused by uncertified chargers or faulty cables creating electrical interference. Using manufacturer-approved chargers usually fixes the issue. 

4. Does moisture or sweat really affect touchscreens? 

Absolutely. Moisture, humidity, sweat, or condensation can disrupt the electrical signals touchscreens rely on, making them temporarily unresponsive. 

5. How can I tell if my touchscreen problem is hardware-related? 

Unresponsive areas, ghost touches, flickering displays, or touch failure after a drop or liquid exposure usually indicate digitizer or internal hardware damage.

Many people in the United States are worried about their phones overheating. Whether you have an iPhone or an Android device, you can expect some heat due to the way you use to cool the phone down, and because some phones will really run slow, waste battery life, and sometimes break parts of your hardware from getting too hot. If you know what makes your phone overheat, you can take care of it without spending any money to get it repaired or upgrading to a new phone. 

This article will cover what causes your phone to overheat, what you can do to fix it, and a look at what types of myths there are about phone overheating in today’s world of mobile phones with 5G technology, and because of the heat in some areas during the summer months. 

Why Phones Get Hot 

Heat is generated when any type of device performs processing functions, and your phone produces heat as it does these types of functions. Phones have multiple components that produce heat when used, including the CPU and GPU (both of which have high-performance capabilities), battery, and radio receivers/transmitters (for Wi-Fi, Bluetooth, and cellular data signals). Generally speaking, the more advanced uses of your phone will produce additional heat. 

Generally, when your phone is used for normal operation, such as streaming Netflix or scrolling through TikTok, you should expect it to be slightly warmer than normal (but typically in the normal range). In most cases, this is not a problem. 

Problems can occur if your phone becomes too hot to touch, displays a temperature warning, or shuts down unexpectedly. Modern phones have built-in thermal management systems that help control internal temperatures. If the phone’s internal temperature exceeds safe limits, it may respond by dimming the display, slowing performance, turning off the flash for the camera, or terminating charging until cooler temperatures return. All these protective functions help prevent the phone from being damaged. 

Common Causes of Phone Overheating 

Phone overheating rarely happens without a reason. In most cases, it is linked to usage habits, environmental factors, or background processes running unchecked. 

Heavy App Usage and Gaming 

Your processor is pushed to its limit with high-performance games, video editing applications, and augmented reality applications. The number of mobile gamers and content creators in the United States is expanding, and these types of users are also putting a strain on many devices, even those that are high-end. The internal temperatures of the device can reach very high levels during long gaming sessions or livestreaming. 

5G and Weak Signal Areas 

An often-ignored factor in your phone’s elevated temperature is the weak cellular signal to connect to networks, particularly the newest 5G networks. When your device is having difficulty acquiring and keeping a stable signal from the cell tower, it will put more effort into keeping that signal and subsequently place an increased burden on the battery as well as produce increased heat. 

In areas with limited cellular coverage, such as rural areas, underground parking garages, or buildings with poor service, you may find your device is running at an increased temperature due to the constant search for a signal. 

Charging While in Use 

Using your phone while it’s charging is a major contributor to overheating. Charging already generates heat due to battery activity. Adding gaming, streaming, or video calls at the same time increases thermal stress significantly. 

Fast charging technologies, which are common in US smartphones today, also generate more heat than standard charging. 

Background Apps and Software Bugs 

Running background applications can use resources that are not actively being utilized. Social media networks, GPS/Maps, etc., may be periodically updating their content even when not actively being used. 

Additionally, after each major update to iOS or Android operating systems, bugs in the procedures may run unchecked, causing runaway processes to adversely affect the performance of the device until resolved with a patch. 

Environmental Heat 

Contributing to this phenomenon as well is the outdoor temperature. In states such as Texas, Florida, Nevada, and Arizona, it is common for high outdoor temperatures to cause phones to overheat quickly. If a phone is left in a hot car or exposed to direct sunlight, it increases its chance of overheating. 

Most smartphones have an operating range of 32°F – 95°F. If a phone exceeds this temperature range, it may trigger an overheat warning. 

Warning Signs Your Phone Is Overheating 

While mild warmth is normal, excessive heat presents clear warning signals. Pay attention if you notice: 

  • A temperature warning message on screen 
  • Sudden brightness reduction 
  • Apps closing unexpectedly 
  • Camera flash disabled 
  • Slower performance (thermal throttling) 
  • Battery draining unusually fast 

If your phone shuts down automatically, it is likely protecting itself from internal damage. 

Practical Fixes for an Overheating Phone 

When your phone becomes too hot, quick action can prevent long-term issues. The key is reducing processing load and allowing the device to cool naturally. 

1. Stop Intensive Activities 

Close heavy apps such as games, video streaming platforms, or camera apps. Give the phone time to stabilize. Avoid immediately reopening demanding apps. 

2. Remove the Case 

Some protective cases, especially thick or rugged models, trap heat. Removing the case improves airflow and speeds up cooling. 

3. Move to a Cooler Environment 

When you’re outside, avoid putting your phone into the refrigerator or freezer immediately; instead, always put it into the shade (or inside) until you can. Sudden temperature changes, like taking a hot phone and putting it in the freezer, can cause condensation inside the device, which can cause permanent damage to the phone. 

4. Enable Airplane Mode Temporarily 

Turning on Airplane Mode lessens radio activity, which can help with overheating that relates to poor signal strength, especially when there is weak coverage. 

5. Check Battery and App Usage 

Battery settings on your device may provide insight into what applications are using the most battery power. You should uninstall/restrict applications that consume excessive background resources. 

6. Update Software 

It’s also a good idea to install any new iOS/Android updates as manufacturers periodically provide fixes to prevent overheating software bugs and to improve performance. 

Myths About Phone Overheating 

Several misconceptions about smartphone heat continue to circulate online. Understanding the truth can prevent unnecessary panic. 

Myth 1: Heat Always Means the Battery Is Exploding 

Modern smartphones seldom explode due to battery issues. Batteries made by large manufacturers will have several checks to avoid large-scale problems. If your device overheats, it should turn itself off automatically long before major problems arise. 

Myth 2: Putting a Phone in the Freezer Fixes It Faster 

Rapid cooling can damage internal components and cause moisture buildup. Always let the phone cool gradually at room temperature. 

Myth 3: Only Cheap Phones Overheat 

Even premium devices from Apple, Samsung, and Google can overheat under heavy load or poor environmental conditions. Price does not eliminate thermal limits. 

Myth 4: Closing All Apps Improves Cooling 

Modern operating systems manage background apps efficiently. Force-closing every app repeatedly can sometimes increase battery use instead of reducing it. 

When Overheating Signals a Hardware Problem 

It is natural for your phone to get hot occasionally, but if it becomes hot to the touch during regular use or even causes heat build-up while just sitting there doing nothing, you could be experiencing a problem with your battery or some internal component of the phone. 

If your battery is swollen, shuts down unexpectedly, or does not seem to charge properly, you should seek a professional’s opinion on what is happening with your phone. In the United States, you can go to an Apple Store, a Samsung service center, or an authorized repair shop to have diagnostic tests run to find out if you need to replace your battery. 

Final Thoughts 

Overheating phones have become commonplace today because of all the high-speed 5G networks. Apps, charging habits, and software updates must be managed to keep your phone from overheating. There are many built-in safety features and resources to help you maintain safe phone usage through daily use, provided; however, you take care of your smart phone. 

FAQs  

1. Why does my phone overheat so easily? 

Phones typically overheat due to heavy app usage, gaming, charging while in use, weak cellular signals (especially 5G), background apps, or hot weather conditions. Mild warmth is normal, but excessive heat usually points to high processing load or environmental factors. 

2. Is it normal for my phone to get warm while charging? 

Yes, some warmth during charging is normal, especially with fast charging technology. However, using your phone for gaming or streaming while charging can significantly increase heat and should be avoided. 

3. Can 5G cause my phone to overheat? 

In areas with weak 5G coverage, your phone may work harder to maintain a signal, which can increase battery usage and heat. Switching to LTE or enabling Airplane Mode temporarily in low-signal areas can help reduce overheating. 

4. Can overheating damage my phone permanently? 

Yes. Prolonged overheating can degrade the battery, reduce performance, and damage internal components over time. Modern phones shut down automatically to prevent serious harm. 

5. Do only cheap phones overheat? 

No. Even premium devices from Apple, Samsung, and Google can overheat under heavy use or extreme heat conditions. Overheating depends more on usage and environment than price. 

References:

Why Is My Phone Hot? 5 Reasons Your Phone is Overheating and How to Stop It

Don’t Lose Your Cool: What to Do if Your Phone Is Overheating

After several weeks of hints, OpenAI is now testing ads in ChatGPT for users in the US. This is a big change for both the business model and how people use the product. Ads will appear for those on the free plan and the new, cheaper ChatGPT Go plan. Users with paid plans like Plus, Pro, Business, and Enterprise will not see ads.  

OpenAI says this early ad test is meant to help more people access advanced AI features and help pay for the technology and development needed to keep ChatGPT running for many users.  

OpenAI says ads will clearly be marked as sponsored and will look different from the chatbot’s answers.  

Ad Controls and Privacy 

OpenAI says ads will not affect the chatbots’ answers or your privacy. Your conversations and personal data will not be shared with advertisers. You can also control your ad settings, such as turning off personalization or opting out of ads, though this may mean you get fewer free messages.  

With this rollout, ads will match the topic you’re discussing. However, there are safeguards to ensure ads do not appear in sensitive areas such as health or politics.  

OpenAI says this first phase is a chance to test and learn. Feedback from early users will help improve ads. Improve how ads work, and it may lead to future changes. The company plans to use what it learns to find a better balance between making money and providing users with a good experience.  

What This Means For The Industry 

OpenAI is adding ads to ChatGPT as competition in the AI industry grows and companies seek ways to monetize their services. Some users and experts have mixed feelings about this change, but OpenAI says the ads are there to help keep free and low-cost options available.  

As OpenAI continues testing ads, its choices may shape how other AI companies handle ads and make money. Some, like Anthropic, have said they will never use ads. Anthropic has even made Super Bowl commercials joking about ads in AI chats. In one, a young man asks for help getting six-pack abs, and the AI starts helping, but then tries to sell him fake insults to make him taller.

Source: ChatGPT Begins Showing Ads to US Users for the First Time 

Apple’s Xcode 26.3 now includes Anthropic’s Claude agent and OpenAI’s Codex, bringing autonomous, agentic coding to the platform. AI agents can manage complex, multi-step development tasks autonomously within the IDE.  

Key Features of Agent Tech Coding in Xcode 26.3 

With Agentic coding, AI models become active partners in development instead of just offering suggestions. They can handle many tasks when given high-level natural-language instructions.  

  • Project-wide awareness column agents can examine and comprehend the whole project’s file structure, dependencies, and design patterns.  
  • Automated task execution: Agents can take brand goals (such as “add a new feature” and “show the weather”), break them into smaller steps, write the required code, update settings, and fix errors on their own.  
  • Visual verification: Agents can use co-Xcode previews to check their work, spot user interface issues, and make fixes by themselves.  
  • Documentation and testing: The AI can look up Apple’s documentation and inline comments and set up and run unit or UI tests.  
  • Open standards support: Apple now uses the Model Context Protocol (MCP), an open standard that lets developers use other compatible agents or tools, not just Claude Agent and Codex.  

Availability 

The Xcode 26.3 release candidate was made available to Apple developer program members on February 3rd, 2026. The full release is expected soon on the Mac App Store. Developers can turn on and set up their preferred models in Xcode’s settings or use their own API credentials for OpenAI or Anthropic.  

Xcode 26.3 now supports Agent Coding, which lets developers build apps with coding agents like Anthropic, Claude Agent, and OpenAI’s Codex. With this feature, Xcode can work more independently to help developers reach their goals, from decomposing tasks to making decisions based on project architecture and using built-in tools.  

Building on the intelligent features introduced in Xcode 26, which included a new coding assistant for Swift, this update gives coding agents even more access to Xcode’s tools. Now, agents like Claude Agent and Codex can work with developers throughout the whole development process. This helps developers streamline their tasks, work faster, and bring their ideas to life more easily. Agents can search documentation, review file structures, update project settings, and visually check their work by capturing Xcode previews and making changes as needed.  

At Apple, our goal is to make tools that put industry-leading technologies directly in developers’ hands so they can build the very best apps, said Susan Prescott, Apple’s vice president of worldwide developer relations. Agentic coding supercharges productivity and creativity, improving the development workflow so developers can dedicate attention to innovation.  

With easy access to Cloud Agent and Codex, developers can use the advanced reasoning from these models in their app-building workflow. This connection combines the strengths of these agents and Xcode’s built-in features, helping developers achieve the best results when building Apple platforms. Developers can choose the model that works best for their project.  

In addition to these built-in integrations, Xcode 26.3 also supports the Model Context Protocol. This open standard lets developers use any compatible agent or tool with Xcode, giving them more flexibility. 

Source: Xcode 26.3 unlocks the power of agentic coding