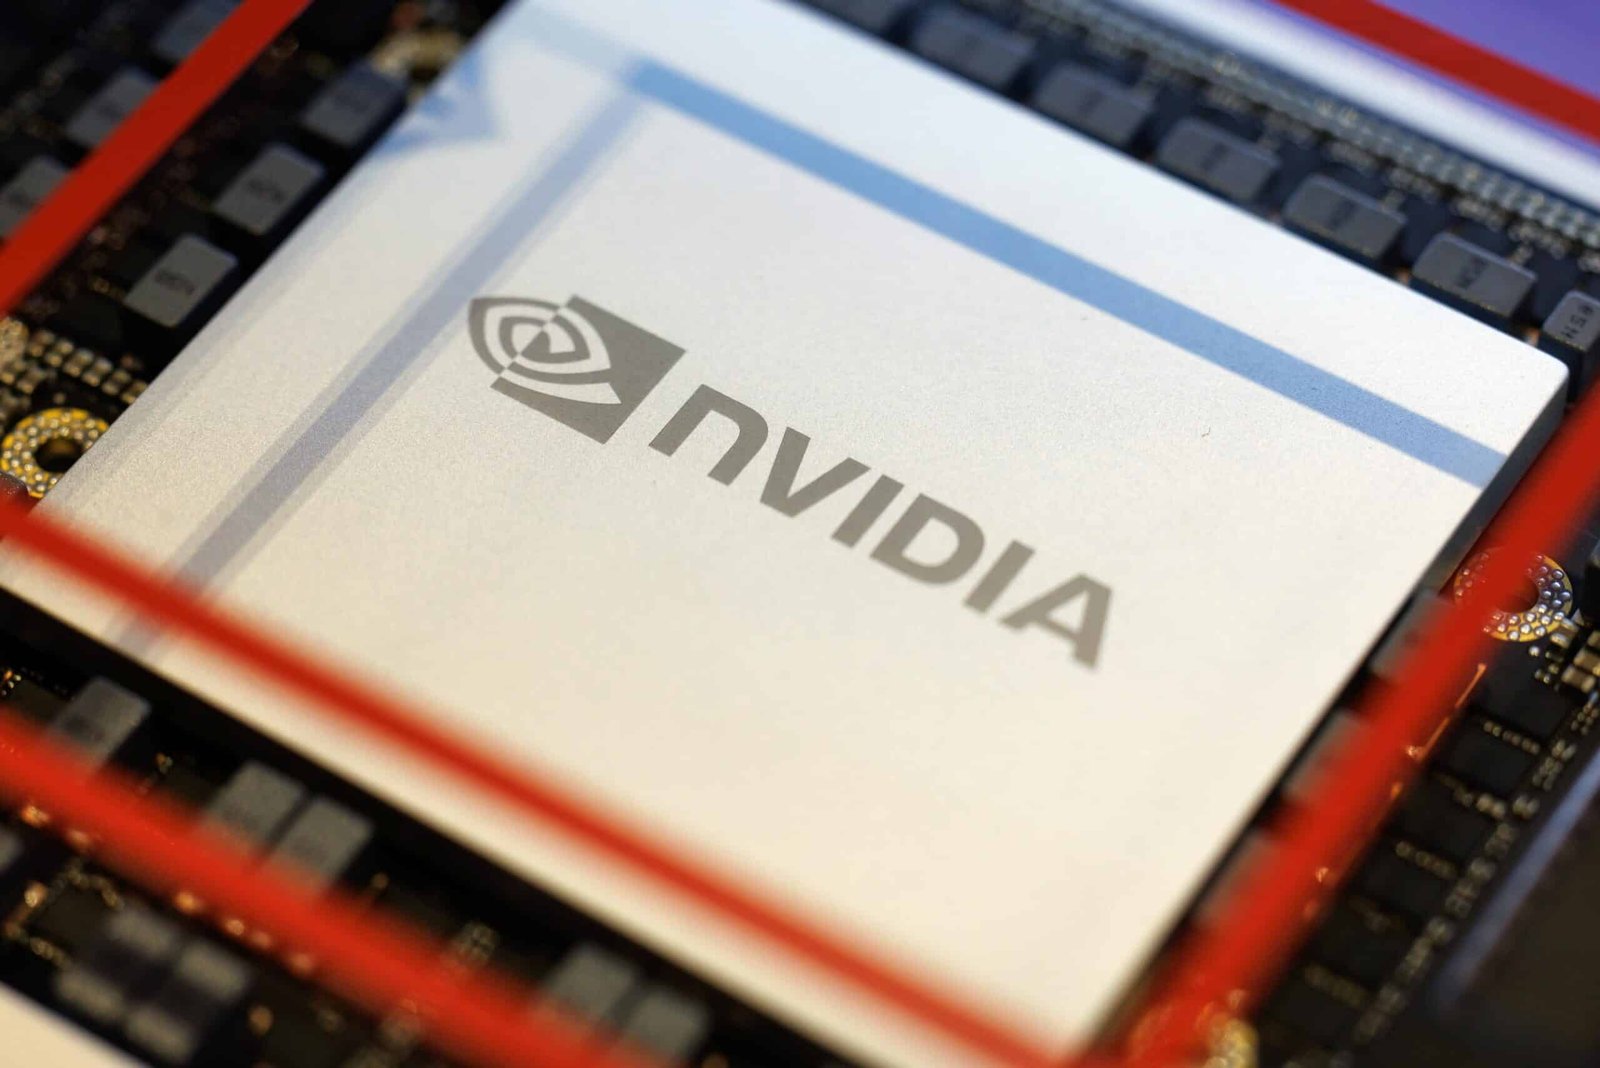





The NVIDIA Blackwell B200 is a big step forward from the Hopper H200. It delivers much bigger AI throughput and data bandwidth and is built for trillion-parameter models and large-scale AI training. At the same time, the H200 (141 GB HBM3e) focuses on improving memory capacity and bandwidth for existing infrastructure. The B200 (192GB HBM3e) features a dual-drive chiplet design that doubles performance in most metrics.
Key Specifications Comparison
Feature
Hopper B200
Blackwell B200
Architecture.
Hopper (monolithic)
Blackwell (dual die)
Transistor Count
~ 80 Billion
~ 208 million
Memory Capacity
141 GB, HBM 3E
192 GB, HBM 3E
Memory bandwidth
~ 4.8 TB’s
~ 8 TBs
Interconnect
NVLink4 (~0.9 TB’s)
NVLink5 (1.8 TB’s).
Peak AI (FP8/FP4)
~4PF (FP8)
~9 PF (FP 8) /18PF (FP 4).
TDP (Power)
~700 W
~1000 to 1200 W+
Data Center Throughput
Training performance: The B200 can deliver up to 3 times better training performance for large models than the previousgeneration.
Inference throughput: for AI inference, the B200 provides up to 2.5-3 times the throughput of the H200.
FP4 capabilities: One key advantage of the B200 is its native support for 4-bit floating-point (FP4) format. This enables up to 18-20 petaflops of performance, about twice the throughput of the H200s FP8 in some cases.
Transformer engine: The B200 features a second-generation transformer engine, enabling faster, more efficient AI model processing.
Memory Bandwidth and Capacity
Capacity: The B200 has 192 GB of HBM3E memory, while the H200 has 141 GB.
Bandwidth: The B200 offers 8 TB/S of bandwidth, much higher than the H200’s 4.8 TB/S. This helps reduce memory bottlenecks during large model training.
Interconnect and Scaling
NVLink 5: The B200 uses the fifth-generation NVLink, providing 1.8 TB/s of Intel GPU communication bandwidth. This is twice as fast as the H200’s 900 TB/s.
Scaling Cologne: The Blackwell architecture can support much larger and denser clusters, such as the GB200 and NVL72. It allows up to 576 GPUs to work together as one unit.
Summary of Use Cases
Hopper H200: High-throughput inference for models under 100B parameters, upgrading existing H100 infrastructure, and cases where power cooling limitations exist.
Choose the Blackwell B200 for training next-generation base models running a trillion-parameter model inference, handling long-context LLMs, and using new liquid-cooled high-density data centers.
NVIDIA’s latest GPUs can make choosing the right hardware for AI projects tricky. The H100 is a proven, reliable option. The H200 offers much more memory, and the new B200 promises huge performance gains. Still, with high prices and unpredictable availability, it is important to look past the marketing and understand what really sets these chips apart.
We have looked at how each GPU performs in real-world scenarios, including power consumption and actual performance, to help you decide which one fits your needs and schedule.
H200: the Memory Monster
The H200 builds on the H100 by offering much more memory. Using the NVIDIA HAPA architecture, the H200 is the first GPU to provide 141 GB of HBM3e memory with a bandwidth of 4.8 TB/s.
Key Specifications:
Memory: 141 GB HBM3e.
Memory Bandwidth: 4.8 TB/s
TDP: 700 W (same as H100)
Architecture: Hopper
Best for: larger models (100+ B+ parameters), long-context applications.
A key advantage is that both the H100 and H200 use the same 700 W of power. The H200 is not only faster, but it also delivers higher throughput without increasing power consumption.
B200: The Future Unleashed
B200 is NVIDIA’s new flagship based on the Blackwell Architecture. It has 208 billion transistors compared to 80 billion in the H100 and H200, and brings major new features.
Key specifications
Memory: 192 GB/HBM3E
Memory bandwidth: 8 TBs
TDP: 1000W
Architecture: black file (dual chip design)
Best for: next-gen models, extremely long contexts, future-proofing
Performance Deep Dive: Where Rubber Meets the Road
Training Performance: Performance data shows that a single Blackwell 200 GPU is about 2.5 times faster than a single H200 GPU, measured in tokens per second. The DJX B200 system offers three times the training performance and 15 times the inference performance compared to the DJX H100 system.
Inference Capabilities: For organizations that value deployment, inference performance is often more important than training speed. The H200 can double the inference speed of the H100 when running large language models like Llama2. The B200 offers even greater gains, with up to 15 times the inference performance of H100 systems.
Memory Bandwidth: The Unrecognized Hero
Memory bandwidth affects how quickly a GPU can supply data to its compute cores. Higher bandwidth means data moves faster, which can improve performance.
HB100:3.35 TB/s(respectable)
H200: 4.8 TB/s (43% Improvement)
B200: 8TB/s (another universe)
The H200’s memory bandwidth is 4.8 TB/s, an increase from the H100’s 3.35 TB/s. This extra bandwidth is important for processing large datasets, as it helps reduce wait times for data during memory-intensive tasks. This may result in faster training.
Cost Analysis: What You Are Paying
Pricing on these GPUs has been all over the map this year. The H100 started 2025 at around $8 per hour on cloud platforms, but increased supply has pushed that down to as low as $1.90 per hour. Following the recent AWS price cuts of up to 44%, with typical ranges of $2 to $3.5 per hour, depending on the provider
If you plan to buy hardware directly, expect to pay at least $25,000 for each H100 GPU. After adding costs for networking, cooling, and other infrastructure, a full multi-GPU setup can easily exceed $400,000. These are major investments.
H200 Premium, you can expect to pay about 20-25% more for the H100, whether you buy or rent in the cloud. For some workloads, the extra memory makes the higher price worthwhile.
B200 investment: The B200 will cost at least 25% more than the H100. The H200 at first may be hard to get in early 2025; however, it offers excellent long-term performance and effectiveness. If you want the latest technology right away, you will pay a premium.
Artificial Intelligence is no longer only a future trend. Today, it forms the backbone of productivity, marketing, business automation, and software development. By 2026, AI tools have become smarter, faster, and easier to use. No matter if you run an organization, a business, create content, study, or develop software, the best AI tools can help you save time, cut costs, and work more efficiently.
Productivity is changing fast, and finding the best AI tools is now a must for remaining competitive, not just following a trend. This year’s top AI Tools range from smart personal assistants that organize your day to advanced generative models that make it hard to tell where human work ends, and machine work begins. These tools deliver a new level of efficiency.
It is now 2026, a little over three years since ChatGPT launched in November 2022, sparking the AI boom. Since then, AI has become a regular part of daily work and personal life, and there are now many more tools available.
What are AI tools?
AI tools are software programs that use artificial intelligence, machine learning, and natural language processing to automate tasks, analyze data, and create content. They help people work more efficiently in writing, design, data analysis, and customer service.
Types and Examples of AI Tools
AI tools can be grouped by what they do and how they work.
Generative AI tools such as ChatGPT and Gemini can create, summarize, or analyze text. Some also make images, videos, or code.
Voice and audio AI apps like Eleven Labs and Murf turn text into realistic, natural-sounding voices. They can also clone or generate new voices.
Design and creative tools such as Canva use AI to make it easier to create marketing materials and visual content.
Data analytics and business AI tools such as H2O.ai and Anaplan support financial planning, forecasting, and decision-making by providing predictive insights.
Automation and workflow tools such as Zapier, N8n, and AI Agents handle complex tasks by automating multi-step processes.
Health care and research AI tools help with medical diagnosis and the analysis of research data. For example, NotebookLM is used for document analysis.
Artificial Intelligence tools use machine learning to analyze large amounts of data and find patterns, rather than just following fixed rules. They learn to predict, create, or organize information. This helps them automate tasks such as writing, image recognition, and insight generation, much as a digital brain does.
Benefits of using AI tools
AI tools provide significant benefits by automating monotonous tasks, improving decision-making through fast data analysis, and raising operational productivity. These technologies operate 24/7, lower human error, promote innovation across sectors, and lower operational costs while improving customer experiences through personalization.
Key benefits of AI tools include:
Automation and Capability: AI optimizes workflows, handles mundane tasks, and manages data, significantly increasing productivity and cutting operational costs.
Improved decision-making: By analyzing large data sets, AI provides data-driven insights and predictions to support more accurate business strategies.
24/7 Availability: AI-powered tools such as chatbots provide constant service without fatigue, offering better availability than human teams.
Better accuracy and safety: AI reduces human error in tasks such as data entry and analysis in factory conditions. It increases safety by enabling hazardous tasks to be performed.
Personalization and Customer Experience: AI analyzes user behavior to deliver customized content and experiences, increasing customer satisfaction.
Augmented Accessibility technologies, such as speech-to-text, real-time translation, and AI-powered content generation, boost accessibility for people with disabilities and improve educational activities.
Innovation: AI accelerates research and development, helping to create new products, services, and advanced, efficient processes.
Artificial intelligence also excels at security by monitoring, detecting, and alerting on anomalies and potential threats in real time.
The Importance of Artificial Intelligence Tools in 2026
By 2026, AI tools have moved beyond being just assistants. They now serve many roles, such as:
Automated Research Partners
Content Creators
Graphic designers
Video Editors
Coding Assistance
Business Workflow Managers
Companies that use artificial intelligence effectively are growing more quickly. By automating monotonous tasks, they can spend more time on strategy and creative work.
Best AI Tools by Category
Best AI writing and content creation tools for 2026
OpenAI’s ChatGPT: Best Overall AI Assistant
GPT remains a top choice in 2026 thanks to its cutting-edge multimodal features. It is recognized as the leading generative AI tool, offering flexible, easy-to-use options for a wide range of tasks. People rely on it for answering questions, searching the web, and helping with writing.
Best for:
Bloggers
Marketers
Students
Business Owners
Key Features:
Long-form content writing
Code Generation
Research Assistance
Image Understanding
Workflow Automation
Performs web searches for accurate real-time information
ChatGPT is a great option if you need an all-time, all-in-one assistant.
Jasper: best for marketing teams
Best for: agencies and marketing teams
While it stands out:
Brand voice customization
SEO Optimization
Campaign-focused templates
Copy.ai: best for quick copy
Copy.ai works well for creating short-form content like:
Social Media Posts
Email Campaigns
Product Descriptions
It is easy to use, quick, and great for beginners.
Grammarly’s GrammarlyGo: Best for Editing and Tone.
If you have content that needs polishing, GrammarlyGo can improve its clarity, tone, and professionalism.
Blend AI image and design tools in 2026.
Visual content helps increase engagement. Modern AI tools let users generate images from text prompts, making it easy to design attention-grabbing visuals quickly.
Midjourney: Best for AI Art
Its journey creates high-quality artistic images and gives users advanced control over prompts.
Best for: Designers, NFT creators, social media creatives
Key Features:
You can make custom images by entering detailed text prompts.
It also lets you adjust the aspect ratio to keep your visuals consistent and professional.
Canva AI: Best for Easy Graphic Design
Canva AI Tools help anyone create professional-looking designs.
Features:
Magic Design
Background remover
AI Text to Image
Presentation Generator
Generate images from user prompts.
With Canva AI, you can quickly and easily create images using AI-powered tools.
It’s a great choice if you don’t have a design background.
Adobe Firefly: Best for Professionals
Adobe Firefly is part of Adobe’s suite and lets professionals use AI to design and edit at a high level. You can fine-tune AI-generated images to get results that match your creative ideas.
Best AI video and audio tools for 2026
Video content continues to lead on platforms such as YouTube, Instagram, and LinkedIn. Generative AI tools help make new content like text, images, audio, or code by learning from existing data.
Synthesia: AI Video Creation
You can make professional AI avatar videos with Synthesia, no camera needed. It can also add new images to your videos, automatically or on request, making your visuals stand out.
Best for course creators, corporate training, and marketing videos
Runway: Advanced AI Video Editing
Runway includes features like:
Background Removal
Motion Tracking
AI Video Generation
Image generation capabilities for video projects
Runway is known for its advanced video generation tools that let you create and edit videos with artificial intelligence.
Several creators and filmmakers apply for the runway.
Descript: Best for Podcast and Audio Editing
With Descript, you can edit audio by editing text, a revolution for podcasters. Its AI transcription tools convert speech to text, making it easier to record meetings and discussions.
Best AI Tools for Business & Productivity
Respa is designed to help with marketing content such as ads, landing pages, and brand messaging.
AI automation can help companies save thousands of hours each year.
Notion AI: Smart Documentation and Planning
Notion AI works right inside the Notion Workspace, making it easier to stay productive in one digital space.
Notion AI helps:
Summarize Meetings
Generate reports.
Create task plans.
It can automate and organize meeting notes, making it easy to capture and summarize what was discussed.
It quickly pulls out the main points from meetings and documents, helping you understand the most important information right away.
You can use data from past projects to set better goals and spot possible risks.
Include an AI chat interface for conversational planning and data summarization.
It can automatically turn meeting notes or project discussions into tasks.
This tool is especially helpful for teams.
Zapier AI: Workflow Automation
Zapier connects thousands of apps and now includes AI-powered automation. Zapier AI connects with other apps to simplify workflows and expand functionality, making it a strong tool for businesses seeking flawless integration.
Features:
Automates repetitive tasks across platforms
Integrates with thousands of popular apps
It offers advanced tools for organizing and combining information from different platforms.
Zapier can pull in live data from web searches, social media, and other connected apps to give you instant insights.
ClickUp AI: team productivity booster
ClickUp AI helps with:
Task Summaries
Email drafting
Workflow suggestions
It gives sales tips, helpful data, and resources through analyzing meetings and tracking who speaks and how often.
Integrating smoothly within daily workflows, automating regular tasks for faster productivity.
Helps you manage your to-dos and task lists efficiently.
ClickUp AI is a great option for small teams because it’s affordable and can grow as your team grows. Project management tools like Asana and ClickUp also help teams collaborate and track tasks.
Best AI Tools for Students
Some of the best AI tools for students in 2026 are:
ChatGPT and Gemini for tutoring
Quillbot and Grammarly for writing
Notion AI for staying organized
Canva for design
These tools can help you summarize, brainstorm, format, and visualize your work, making research and studying more efficient.
Study and Research Assistants:
ChatGPT and Gemini are great for brainstorming, explaining difficult ideas, and making practice questions.
NotebookLM by Google helps you analyze uploaded documents and create study guides using AI.
Chat pdf lets you work directly with PDFs so you can summarize, search, and better understand long documents.
Writing and Editing
Grammarly checks your grammar, punctuation, and register to help with academic writing.
Quill bot is useful for paraphrasing, summarizing, and formatting citations.
Jenni.ai is a helpful tool for academic writing and research.
Organization and note-taking.
Notion AI brings together project planning, note-taking, and smart automated summaries.
Otter.AI transcribes lectures as they happen and makes notes you can search later.
Design and Creativity
Canva with magic AI helps you quickly make presentations, posters, and infographics.
Microsoft Designer uses AI to make high-quality graphics, which is helpful for projects and presentations.
Specialized Study Tools
Quizlet uses AI to make personalized learning sessions and flashcards for you.
Wolfram Alpha is great for solving math problems and doing technical data-driven research.
If you want an AI tool to help with studying and writing, many of these options have free versions or student plans that can save you time and help you do better in school.
Comparison Table of Best AI Tools
In 2026, the leading AI tools focus on productivity, coding, and creative work. ChatGPT, Claude, and Google Gemini stand out as the top choices for general-use coding and multimodal tasks. Other strong options include Perplexity for research, Co-Pilot for Microsoft integration, and Mid-Journey for image creation.
AI tools compared for 2026
For general use and research, ChatGPT offers strong reasoning and voice features, while Perplexity is best for live research with citations.
For coding and writing, Claude 4.6 and 4.5 Opus lead in technical ability and logic, along with Claude Code.
Gemini 3 Pro is the top choice for ecosystem and multi-modal tasks, especially with Microsoft 365 and video features.
Microsoft Co-Pilot is best for workflow automation thanks to its incorporation with Microsoft 365.
Detailed comparison table of AI tools
Tool
Best for
Key strengths
ChatGPT
Deep Research Conversational
Strong reasoning, versatile voice model
Claude 4.5/4.6
Coding, writing, reasoning.
High Coding Accuracy Nuanced Writing
Google Gemini 3
Multimodal Google Ecosystem
1M +Token Window Video/Image Generation
Perplexity
Real-time search citation
High Quality cited Answers
Microsoft Co-Pilot
Productivity M365 Apps
Integrates with Word, Excel, email
Claude Code
Software Development
Works directly with large codebases
Midjourney
Image generation.
Superior artistic quality.
Free vs Paid AI Tools
Free AI tools work well for beginners, casual users, or anyone testing things out. They give you basic features for free but usually have usage limits, run slower, and use older models.
Paid AI tools like GPT-4 offer faster performance, better security, and more advanced features. These are important for professionals and businesses that need reliable, expandable solutions.
Free AI tools
Best for: beginners, testing, and casual use.
Pros: No cost and instant access to basic features.
Cons: limited use (tokens or credits), slower speeds possible, privacy issues, and only older models available.
Best for: professionals, businesses, and heavy users.
Pros: Access to advanced models, Faster speeds, Unlimited use, Better data security, and extra features
Cons: You need to pay a monthly or yearly subscription fee.
Examples: ChatGPT Plus (GPT-4), Midjourney, Adobe Firefly (paid Plans).
Key Considerations
Security: paid tools usually offer better privacy. Free tools might use your data to improve their models.
Productivity: paid tools often give better results and need fewer edits.
Scalability: If you need to create a lot of content or code, paid tools are a must.
For most users, a freemium model works best: using free versions for brainstorming or trying out tools, then upgrading to paid versions for critical, high-volume, or sensitive projects.
How To Choose The Best AI Tool
Start by deciding what you want the AI tool to help you achieve, such as content creation or data analysis.
Check how easily it integrates with your current systems and ensure it meets data security rules similar to those of GDPR or CCPA.
Look for tools that are easy to use, can grow with your needs, and deliver clear results within 3 to 6 months.
Also consider:
the cost
the level of support from the vendor
whether you need technical skills or can use a no-code option
What to Think About When Choosing AI Tools
Figure out the main problem you want to solve, like spending less time on social media, automating tasks, or making more detailed reports.
Check what the tool can do.
For Text and Programming Tasks: ChatGPT and Claude are good choices for reasoning and creating long-form content.
If you need to work with complex or large data sets, Tableau or Power BI is a better option.
For automation, Zapier works well for simple tasks, while N8n is better for more advanced or self-hosted solutions.
Ensure the tool complies with data protection laws and keeps your sensitive information safe.
Think about how easy the tool is for your team to learn and how well it fits with your existing technology.
Compare the subscription price to the time or money you could save by using the tool.
Try out free trials or versions first to see how well the tool works before you pay for it.
Check that the vendor offers good documentation, training, and support if you need help.
Choose tools known for reliability and stability, such as Anaconda, data science, or n8n for automation.
Future of AI Tools
AI tools are quickly evolving from basic chat assistants to autonomous systems that work as proactive partners. By 2026, AI will move beyond simple task automation to managing entire workflows, becoming a core part of business operations, and boosting productivity. This shift is expected to add trillions to the global economy.
These are the main trends guiding the future of AI tools:
From Chatbots to Agentic AI (Autonomous Agents)
The next generation of AI will do more than answer questions; it will conduct complex, multi-step tasks for users.
Actionable agents: AI agents will manage projects autonomously, handling tasks such as responding to customer complaints, booking meetings, and updating CRM systems.
Super Agency: AI will serve as a digital workforce by late 2025. 23% of organizations are expected to use agentic systems for activities such as IT support and research.
Workflow transformation: In the future, AI will do more than summarize meetings. It will draft emails to attendees, update tasks, and track follow-up, changing how workflows are managed.
Multimodal and Integrated Systems
AI is advancing from fast, text-only models to systems that can understand and generate content across text, audio, images, and video.
Flawless Interaction: AI tools will hold real-time conversations that feel human and can recognize emotions.
Identified workspaces: tools such as Cursor for coding and N8n for automation are becoming the main hubs. They let users connect multiple AI models and tools into a seamless workflow.
Model context protocol (MCP): New standards, such as MCP, were introduced in November 2024. Enable AI models to access data files and tools across different apps. This reduces the need to switch between separate tools.
Personalization and Small Models
Early AI relied on large, general models, but the future will focus on smaller, specialized, and more efficient systems.
Hyper-personalization AI tools will tailor content to each user’s behavior, creating highly personalized experiences in marketing and customer service.
Persistent context: Future AI assistants will remember users’ past actions, preferences, and long-term goals, acting like a second brain.
Smaller focused models: bitnet models and other efficient, compact AI designs will enable fast, specialized tools that use less computing power.
Deep Integration in Key Industries
AI is moving from being experimental to becoming an essential part of everyday business operations.
Health Care: AI is Making Progress in Diagnostics by 2025. Tools are expected to achieve high precision in medical applications, helping address the global shortage of health workers.
Finance & Audit: AI is automating audits and financial reporting, enabling immediate monitoring and pattern detection that humans cannot do on their own.
Physical AI: More companies are using AI in robotics, drones, and digital twins in 2025. 58% of companies report some use, and this number is expected to rise.
Responsible AI and Governance
As AI systems become more independent, regulation and security become increasingly important.
AI governance and risk management: Organizations are developing, testing, and monitoring AI to manage risks such as bias, data privacy, and intellectual property issues.
AI Insurance: New Hallucination Insurance products are expected to help companies protect themselves from mistakes or harmful outputs generated by AI.
Security agents, as agents, take on more tasks. AI-driven security tools will be needed to protect them from compromise.
The Future Workforce
AI is meant to be a partner in creativity and learning, not a replacement for people. The 30% rule says AI can automate about a third of tasks in complex jobs, but human decision-making and strategy are still essential in the future. Employees will need to understand how to work with AI agents, not just carry out tasks.
FAQs
What are the best AI tools?
Right now, four main AI tools stand out, each having its own strengths.
Claude 3.5/4(Anthropic): known for its skill in detailed writing and logical thinking. Its artifacts feature lets users view and edit code documents and website mock-ups side by side, making it great for working together on projects.
ChatGPT-4o/5 (OpenAI): This is the most flexible option. Its cutting-edge voice mode and SORA video features render it a strong creative assistant and a dependable tool for data analysis.
Perplexity AI: This tool is a top choice for replacing traditional search engines. It pulls real-time web data and generates reports with sources, making it ideal for research that requires accurate facts.
Gemini 1.5 Pro (Google): Best for handling large amounts of data. It’s a 1-million-token context window that lets you upload whole books or long videos and ask detailed questions without losing track of information.
Which AI tools are free?
You can now access advanced AI tools for free, but most versions have daily limits on how much you can use them.
Tool
Best Free Use Case
Free Tier Highlights
Microsoft Co-Pilot
General Productivity
Free access to GPT-4 level models and DAL-E 3 image generation
NotebookLM
Personal Knowledge
Completely free, creates audio overviews and structured guides from your uploaded PDFs
Canva (Free)
Graphic Design
Access to magic studio for basic AI image generation and background removal
Claude (free)
Human-like writing
Access to most intelligent models (sonnet) with limited daily message turns
Which AI Tool Is Best For Business
For business use, Microsoft Co-Pilot Studio and ChatGPT Enterprise are top choices, but in 2026, Zapier Central stands out the most.
Zapier Central is different from regular chatbots because it lets businesses create active AI agents. These agents work across more than 6000 apps. For example, they can draft invoices in QuickBooks when a project is finished in Asana, research leads in LinkedIn and automatically update Salesforce. For companies that need to manage knowledge, Glean is now the best internal search for AI. It organizes all company documents, Slack messages, and emails to provide employees with quick, secure answers.
Which AI Tools Are Best For Students
Today’s students are choosing tools that help them learn deeply and stay organized. Instead of using just basic answer engines, it remains the key tool for STEM students. Unlike LLMs, it uses computational logic to solve math and physics problems step by step, ensuring zero hallucinations.
Quizlet Q-Chat: This AI tutor uses the Socratic method rather than just giving answers; it asks helpful questions so students can figure things out on their own, which helps them remember better.
Otter.ai: Great for lectures, it records and transcribes classes as they happen, highlights important ideas, and creates automatic study summaries.
Grammarly, in 2026, does more than check spelling. It now has a tone detector and an academic citations tool to help students format their bibliographies correctly in APA or MLA style.
When pressing the power button does not turn on your computer, and there is no light, fan sound, or startup chime, and there is only silence, you are not alone. For people living in the US who use computers as their primary means to interact with others and obtain information, many people experience an immediate sense of panic upon discovering their computer won’t turn on. Many times, the problem can easily be traced back to a few common sources: power failure, defective cable connection, or minor hardware failure. This guide provides a step-by-step approach beginning with simple troubleshooting techniques and progressing to more complex solutions.
What “Won’t Turn On” Really Means
Clarifying the symptoms is an essential part of the troubleshooting process. For example, “won’t turn on” can represent many different scenarios, such as a computer that shows no signs of life at all (i.e., no lights, sound or screen activity) compared to a computer that appears to have turned on to some extent (i.e., lights and/or fan noise are present, but the computer does not boot and/or display an image). In both instances, the computer is considered to be running, but the screen will remain black.
Each scenario points to different underlying causes, so identifying exactly what your system does or doesn’t do helps narrow the problem quickly.
Step 1: Rule Out Power Source Problems
The leading cause of computers not turning on in the United States is power problems. This is especially true after power outages, storms, and traveling.
First, make sure that the wall outlet where your computer is plugged in works by trying to plug in something else (i.e. lamp or phone charger).
If you are using a power strip or a surge protector to plug your computer in, then plug your computer directly into the wall outlet to check for issues with the power strip or surge protector (especially after a voltage spike). A surge protector may fail silently after a voltage spike occurs.
For laptops, inspect the charging cable and power brick. Look for frayed wires, bent connectors, or burn marks. If the charging light doesn’t turn on when plugged in, the adapter itself may be faulty. Many US households have multiple USB-C chargers now, but not all provide enough wattage for laptops, especially MacBooks and gaming laptops.
If you’re using a desktop, confirm that the power supply switch on the back of the tower is turned on and that the power cable is firmly seated.
Step 2: Perform a Power Reset
A power reset can often fix startup problems, such as those from residual electrical charges, which are fairly common. For laptops, unplug the charger, remove the battery if it is removable, and then hold down the power button for 20–30 seconds. Once you have done that; reconnect the charger and try to power on your laptop again. If you have a MacBook that does not have a way to take the battery out, just turn off the laptop, then unplug and wait a couple of minutes, then try again.
For desktops, unplug the power cord from the back of the desktop and leave it unplugged for at least 30- seconds before plugging it back in and turning on the power to the desktop. Power fluctuations can often cause problems that a power reset will fix.
Step 3: Look for Signs of Life
When you press the power button, observe carefully. Do any indicator lights turn on? Do you hear fans spinning or a startup sound? Even brief activity provides clues. If there are lights or fan noise but no display, the problem may not be power related at all. Instead, it could involve the screen, graphics card, or internal connections.
On laptops, increase screen brightness using the keyboard controls. On desktops, try connecting an external monitor. In US offices and homes with multiple displays, it’s not uncommon for the system to default to the wrong output.
Step 4: Disconnect External Devices
Sometimes a system may not start up correctly due to the presence of external peripherals. For example, disconnect all external devices (other than a keyboard, mouse, and power cable), such as USB flash drives, external hard drives, printer devices, web camera,s and docking stations. Then, attempt to turn on your machine.
This step is especially important for Windows PCs because a malfunctioning USB device or corrupted bootable USB will stop a Windows computer from booting normally.
Step 5: Check the Battery (Laptops)
Battery deterioration is common in laptops after several years of continuous recharging due to their battery usage. The battery may be at fault if your laptop does not operate under any conditions unless it is attached to a power source.
You should try powering the laptop without the battery if you can detach it and see if it starts up normally with only the charger connected. If the laptop works normally, then it is likely that the battery will have to be replaced. In the US, most manufacturers and third parties sell replacement batteries at prices lower than purchasing a new laptop.
If you have a MacBook, be aware of signs that could indicate a problem with the battery or charging port, such as the laptop not charging well when the charging cable is not in a specific position, or there is no indication that your laptop is charging.
Step 6: Listen for Beeps or Error Signals
Older computers typically use beeper systems or flashing lights as a means to identify hardware-related problems, and the patterns for these systems will depend on the manufacturer; however, all will indicate some problem related to either RAM, motherboard, or graphics card.
If your computer beeps more than once or has a flashing LED, refer to the manufacturer’s support site for a listing of diagnostic codes.
If you’re comfortable opening a desktop PC, reseating internal components can resolve startup failures caused by loose connections.
Turn off the PC, unplug it, and open the case. Gently reseat the RAM sticks and, if applicable, the graphics card. Dust buildup, a common issue in US homes with pets or carpets, can also interfere with connections, so use compressed air to clean the interior.
Avoid this step with laptops unless you have technical experience, as internal access is more complex and can void warranties.
Step 8: Consider Recent Changes or Updates
Consider everything that occurred prior to the beginning of your problem. Were you performing a Windows update, upgrading a hardware component, or doing anything else affecting the computer’s hardware when the problem occurred? Updating software may occasionally leave the computer unable to start. Misinstalled hardware will prevent the computer from even powering on.
If your computer can power on, but you cannot start the operating system, there are ways that you can recover the operating system, like Windows Startup Repair or macOS recovery mode. If the computer cannot power on at all and you have verified that the power supply is working, then the problem may be hardware related.
Step 9: Test the Power Supply (Desktops)
The Power Supply Unit (PSU) in a computer is subject to wear from time and mechanical stress caused by electrical surges, even after being properly grounded. If you have eliminated all other possible problems with your computer’s power supply/computer connection/ and electrical connections, your computer does not power up.
You may indeed need to replace your power supply unit. Many computer repair shops in the United States can quickly test your power supply for you, and usually it will be significantly less expensive to replace your power supply than replace your entire computer system.
Step 10: Know When to Seek Professional Help
In cases where none of the previous options solved your issue, it is possible the issue could lie with the motherboard, processor, or internal circuitry. Repairing these components usually entails utilising specific tools and experience from a technician.
Professional repair is commonly the only alternative for laptops (especially those with soldiered components). To assist you with this decision, consider the age of your laptop and repair costs. If your laptop is older than 5 to 6 years old, consider purchasing a new laptop instead of investing in repairs.
Final Takeaway
A computer that won’t turn on is alarming, but it doesn’t always signal the end of the road. For many US users, the issue comes down to power delivery, batteries, cables, or simple resets rather than catastrophic hardware failure.
By working through these steps methodically, starting with power checks and ending with professional diagnostics, you can save time, reduce stress, and avoid unnecessary expenses. And even if the fix requires expert help, you’ll know exactly what to explain when you walk into a repair shop, which is half the battle.
How can I tell if the problem is my power outlet or my computer?
Plug another device, like a lamp or phone charger, into the same outlet. If it doesn’t work, the outlet or power strip is likely the issue.
FAQs
1. Can a power outage or surge cause my computer not to start?
Absolutely. Power surges can damage surge protectors, power supplies, or charging adapters, even if they look fine externally.
2. Do external devices really stop a computer from turning on?
Yes. Faulty USB devices, docks, or external drives can interfere with the boot process, especially on Windows PCs.
3. Is it safe to open my computer and reseat parts myself?
It’s generally safe for desktops if you’re careful and unplug the system. For laptops, internal repairs are riskier and may void warranties.
4. How do I know if my desktop power supply has failed?
If there are no lights, fans, or sounds after ruling out cables and outlets, the PSU may be faulty. Many US repair shops can test it quickly.
5. When should I stop troubleshooting and seek professional repair?
If you’ve ruled out power, cables, batteries, and resets, the issue may involve the motherboard or processor. Professional help is recommended at that point.
You open an app, it loads for a second, and then it closes without warning. Maybe it happens once, maybe it happens every single time. App crashes are one of the most common tech frustrations for US users, whether it’s a banking app on your iPhone, a social media app on Android, or a productivity tool on a Windows laptop. With Americans relying heavily on apps for work, school, healthcare, and entertainment, an unstable app can feel like a serious disruption.
This guide explains why apps keep crashing across iPhone, Android, and Windows, and what actually works to fix them.
What an app crash really means
An app crash happens when software encounters an error it can’t recover from. Instead of freezing the entire system, modern operating systems shut the app down to protect the rest of the device.
Crashes usually fall into four categories:
Software conflicts
Memory or storage problems
Corrupted app data
Outdated apps or operating systems
Rarely is the issue caused by hardware failure. In most US households, crashes are tied to updates, permissions, storage limits, or background apps competing for resources.
Common reasons apps crash on all devices
Before breaking things down by platform, it helps to understand the issues that affect all devices.
Apps that are no longer being updated
Most app developers update their apps every time a new operating system is released. If you are running an outdated application version on your newly updated device, the chances of having crashes are very likely.
Old Operating Systems
As with outdated applications, it is just as likely that you can face an issue due to running a new app on an older version of an operating system that does not support some features.
Overloaded Storage
When your storage is almost at capacity, it can result in an application not being able to load files, cache data, and save temporary information; therefore, the application will crash.
Corrupted Files & Cache
As an application loads very quickly due to temporary files being saved, after multiple updates and interrupted downloads, these temporary files can become corrupted and therefore lead to your app crashing.
Operating System Memory Overload
When multiple applications are running simultaneously on your device, your device’s memory can become overwhelmed, i.e., running multiple applications on older devices or budget laptops.
Why apps keep crashing on iPhone
iPhones are known for stability, but app crashes still happen, especially after updates.
iOS updates and app compatibility
One of the most common crash triggers on iPhones is a mismatch between iOS versions and app updates. After a major iOS update, some apps may not be fully optimized yet.
App permissions issues
If an app suddenly loses access to the microphone, camera, location, or network, it may crash instead of prompting you again.
Low iPhone storage
Many US users underestimate how much space photos, videos, and apps take up. When storage dips below a safe threshold, apps become unstable.
Beta software
If you’re using iOS beta versions, app crashes are expected. Many third-party apps don’t fully support beta releases.
What helps on iPhone
Update apps from the App Store
Update iOS to the latest stable release
Restart the iPhone
Check Settings > General > iPhone Storage
Delete and reinstall the crashing app
Why apps keep crashing on Android
Android offers flexibility, but that flexibility also means more variables and more potential crash points.
Device fragmentation
In the US, Android phones range from budget models to flagship devices. Not all apps run equally well on all hardware, especially on older or low-RAM phones.
Corrupted cache files
Android apps rely heavily on cached data. Corruption is common after updates or forced shutdowns.
Aggressive battery optimization
Some Android versions restrict background processes aggressively. Apps that rely on background services may crash when resumed.
Third-party launchers and overlays
Custom launchers, screen recorders, or floating widgets can conflict with apps and cause instability.
If an application immediately crashes on opening, the problem typically pertains to corrupt data, permissions, or incompatible updates.
Some common causes would be:
An interrupted app update
An interrupted app login
Permissions missing
An incompatible version of the operating system (OS)
Reinstalling the application can often solve this type of issue since it resets configuration files.
Why apps crash after updates
Apps are updated to provide enhancements to the app; updates are currently one of the main causes of app crashing.
This generally occurs due to:
The previously cached data is in conflict with the new code.
The presence of bugs from the updates.
The operating system version is not supported anymore.
In the USA, these updates are typically installed automatically overnight; the end-user doesn’t even know the update caused the problem.
When crashes point to hardware limitations
Frequent app crashes across apps may indicate an issue with the underlying hardware (especially on older hardware). Signs of an issue may include:
Crashes while multitasking
Slowdowns prior to a crash
Frequent “App Not Responding” messages
Low RAM (Random Access Memory), old storage chips, and overheating can affect the stability of applications.
Troubleshooting steps that actually work
Try these steps in order before assuming the app is broken:
Restart the device
Update the app
Update the operating system
Check available storage
Close background apps
Clear app cache (Android/Windows)
Reinstall the app
Check app permissions
Disable battery optimization (Android)
Update drivers (Windows)
Most crashes are resolved within the first few steps.
How to prevent apps from crashing in the future
Keep your system and apps updated but avoid beta software unless necessary. Maintain free storage space. Restart devices weekly. Avoid installing unnecessary apps that run in the background. On Windows, keep drivers updated and avoid stacking multiple security tools.
Using stable, supported software versions goes a long way toward preventing crashes.
Final thoughts
App crashes are frustrating, but they’re rarely mysterious. On iPhone, Android, and Windows, crashes usually point to software mismatches, storage issues, or resource limits, not broken devices.
Before giving up on an app or replacing your phone or computer, try targeted troubleshooting. In most cases, a few smart fixes can restore stability and keep your apps running smoothly in a world where digital reliability matters more than ever.
FAQs
1. Are app crashes caused by my phone or computer getting old?
Not always. While older devices may struggle with newer apps, most crashes are caused by outdated software, storage issues, or conflicts, not hardware failure.
2. Why do apps crash more often after updates?
Updates can introduce bugs or create conflicts with existing cached data. If an app or operating system update isn’t fully optimized, crashes may occur until a fix is released.
3. Why do apps crash on my iPhone even though iOS is known for stability?
iPhones can experience crashes due to iOS and app version mismatches, low storage, beta software, or revoked app permissions.
4. Can low storage really cause apps to crash?
Yes. Apps need free space to store temporary files and cache data. When storage is nearly full, apps may fail to load or crash unexpectedly.
5. How do I know if an app crash is the app’s fault or my device’s fault?
If only one app crashes, it’s likely an app issue. If many apps crash across your device, the problem is usually system-related, such as low memory, outdated software, or hardware limitations.
You open your phone or computer, ready to download an app, update software, or save a file, only to see the dreaded alert: “Storage almost full.” Confused, you check your files and photos, and there’s barely anything there. No huge videos, no massive downloads, no obvious clutter. This is a surprisingly common problem for US users across iPhones, Android phones, Windows PCs, and Macs. And while it feels like a glitch, the truth is more complicated. Storage is often consumed by invisible system data, cached files, hidden backups, and apps quietly growing in the background.
This article explains why your storage looks full even when it’s not and what you can safely do to reclaim it.
Why “Nothing There” Is Rarely the Full
Modern devices don’t just store photos and documents. They constantly generate background data to keep apps fast, systems stable, and content ready to load instantly. Over time, that background data piles up.
In the US, where streaming, cloud sync, social media, and work-from-home tools are heavily used, devices accumulate more hidden data than ever before. Video streaming apps cache shows, browsers save site data, messaging apps store media, and operating systems reserve space for updates, even if you don’t realize it.
The result is a storage breakdown that doesn’t match what you see at first glance.
System Data and “Other Storage” Explained
System Data is one of the largest contributors to storage space. Depending on your device, it may be listed as Other, Other Storage, or System Files.
The System Data storage category tends to expand tremendously when you receive an iOS update or when you have had a failed installation, as well as from high levels of app usage. On Mac computers, System Data consists of Items like Cache files, Log Files, Temporary Files, and Local Backups. If you use a PC running Windows, you may find System Restore Points, Windows Update Files, and Reserved Storage all taking up space on your hard drive.
The reason so many people feel that they have lost storage space on their device(s) is that operating systems do not provide the user with a detailed description of what comprises the categories they belong to, hence making it appear that the space has simply been swallowed up into nothingness.
Cached Files: Helpful at First, Harmful Over Time
Cache files are designed to speed things up. Apps like Netflix, YouTube, Spotify, Instagram, and TikTok store temporary data so videos and images load faster next time.
But over weeks or months, cache files can grow massive. A single streaming app can quietly use several gigabytes of storage, especially if you watch content daily on mobile data or Wi-Fi.
In US households where phones double as entertainment hubs, cached content is one of the most common reasons storage fills up without obvious files.
Deleted Files That Aren’t Really Deleted
Photos and videos usually move to a Recently Deleted folder first, where they sit for 30 days. Email apps keep attachments even after you delete messages. Cloud apps like Google Drive, iCloud, and OneDrive may store local copies for offline access.
On Windows and Mac systems, deleted files remain in the Recycle Bin or Trash until manually emptied, still counting against your storage.
This safety net is useful, but it often misleads users into thinking space has been freed when it hasn’t.
Messaging Apps and Hidden Media Files
Texting and messaging apps are silent storage hogs. Apps like iMessage, WhatsApp, Telegram, and Signal store photos, videos, voice notes, GIFs, and document previews, even after conversations are archived or muted. Group chats are especially problematic, as shared media accumulates rapidly.
In the US, where messaging apps are used for work, family groups, and social planning, years of shared media can sit hidden inside app storage without ever appearing in your main photo gallery.
Cloud Sync Isn’t Always “Cloud-Only”
Many users assume cloud storage means files don’t take up local space. That’s not always true.
iCloud Photos, Google Photos, Dropbox, and OneDrive often keep local thumbnails or full files for faster access. If settings aren’t optimized, your device may store far more data locally than expected.
This is a common frustration for US users who pay for cloud plans but still get “storage full” warnings on their devices.
Software Updates and Reserved Storage
Operating systems now reserve space in advance for updates and system stability.
Windows uses Reserved Storage to ensure updates install properly. iOS and Android temporarily store update files even after installation. macOS keeps snapshots for system recovery.
You usually can’t see or delete this space manually, but it contributes to the feeling that storage is disappearing without explanation.
App Data That Grows Over Time
Navigation apps save map data, shopping apps store browsing history, productivity apps save drafts and offline files, and games download additional assets long after installation. Even if you haven’t opened an app recently, its stored data may still be taking up space.
This is especially noticeable on older devices with smaller base storage still common among budget phones and laptops in the US.
How to Find What’s Actually Using Your Storage
The first step to fixing the problem is visibility.
On iPhones and Android phones, go to Settings > Storage and wait for the breakdown to load fully. This can take several seconds, but it reveals which apps and categories are consuming the most space.
On Windows, open Settings > System > Storage to view detailed usage by category. On macOS, use System Settings > General > Storage for recommendations and large file detection.
Often, users discover that one or two apps account for the majority of “missing” space.
Safe Ways to Reclaim Storage Space
The first step is to clear app caches when possible. Android has the option to clear app caches directly, but iPhone users may need to remove/reinstall these applications in order for their caches to be cleared.
When cleaning up devices, you should also delete downloads, unused applications, and forgotten screen recordings. Make sure to empty your trash and recently deleted folders. Also, check to see if there are large attachments in your Messaging applications.
When using a cloud service, you can change the settings for Optimise Storage so that files will be stored locally and occupy precious space on the device.
With computers, you can delete temporary files and old update data left behind by the last update of your Operating System. This can help free up several gigabytes of space from your hard drive without sacrificing any performance.
When Storage Issues Point to Bigger Problems
There may be an issue with your device if storage fills up again soon after emptying out. The possible reasons could include corrupt system data, failed updates, or an application that has been in a crashing loop and continues to recreate files until fixed.
In less common cases, malware and adware may also be on your device and are usually present when using an unsecured Windows PC; therefore, it can create junk data in the background without being detected.
If you notice that your storage is disappearing quickly after clearing out, it may be time for a factory reset or have your device professionally diagnosed.
Final Takeaway
“Storage full but nothing there” isn’t a mystery; it’s a side effect of how modern devices work. Hidden system files, cached content, messaging media, cloud sync behavior, and app data all quietly consume space in ways most users never see.
For US users juggling work, entertainment, and cloud services on a single device, this problem is increasingly normal. The fix isn’t panic or immediate upgrades; it’s understanding where storage really goes and managing it intentionally.
Once you know what’s hiding behind that warning message, reclaiming your space becomes far less frustrating and far more effective.
FAQs
1. What is “System Data” or “Other Storage” on my device?
System Data includes cache files, logs, temporary files, update data, and system backups used by the operating system. These files help your device run smoothly but can grow over time and are not always easy to view or delete manually.
2. Can app cache really use that much storage?
Yes. Streaming, social media, and browser apps can store several gigabytes of cached data to load content faster. Over time, this cached data can quietly consume a large portion of your storage.
3. Do messaging apps store files I can’t see?
Yes. Messaging apps store photos, videos, voice notes, GIFs, and document previews inside the app itself. Group chats in particular can accumulate large amounts of hidden media over time.
4. If I use cloud storage, why is my local storage still full?
Cloud services often keep local copies or thumbnails of files for faster access. Without storage optimization settings enabled, these local files can take up significant space on your device.
5. How can I find out what’s actually using my storage?
Use your device’s built-in storage analysis tools. These provide a category and app-level breakdown, helping you identify which apps or system data are consuming the most space.
In the United States, USB devices have become integral parts of daily use on computers, be it a flash drive, an external hard drive, a printer, a webcam, a keyboard or even your cell phone; all these devices are connected to your computer using a USB connection and therefore are a major resource for assisting Americans with working remotely, learning remotely, running small businesses, or simply being productive while they are at home.
Because of the high number of Americans who are using laptops/desktops for long periods, USB errors are also becoming more prevalent due to the older technology of many current laptops/desktops (especially in light of frequent updates to the various operating systems), fluctuations in power supplies (due to natural disasters), and driver conflicts between operating systems/devices. All these factors could potentially lead to your system displaying the message indicating that a “USB device is not recognized.”
This article will explain the reasons why USB errors occur and will provide you with a simple, step-by-step method for troubleshooting and resolving them. Most steps will take less than ten minutes to complete and do not involve the need for replacing your devices or going to the repair shop.
Common Symptoms
You may be dealing with a USB recognition issue if you notice any of the following:
“USB device not recognized” error message on Windows
USB device does not appear in File Explorer or Finder
External drive shows up but cannot be opened
USB device connects and disconnects repeatedly
Phone charges via USB but does not transfer data
USB ports work for some devices but not others
Device Manager shows an “Unknown USB Device”
USB accessory works on another computer but not yours
Possible Causes
USB problems are usually caused by software, power, or compatibility issues, not immediate hardware failure. Common causes include:
Outdated or corrupted USB drivers
Insufficient power delivery to the USB port
Faulty or damaged USB cables
USB power management settings disabling ports
Operating system updates causing driver conflicts
Using unpowered USB hubs
Physical debris or wear inside USB ports
Incompatible file systems (especially on external drives)
Understanding the cause helps you apply the correct fix quickly.
Step-by-Step Troubleshooting Solutions
Follow these steps in order, starting with the simplest solutions.
Step 1: Unplug and Reconnect the USB Device
Disconnect the USB device
Wait 10 seconds
Plug it back in firmly
Try a different USB port if available
This resets the USB connection and clears minor communication errors.
Expected result
The device is detected and works normally.
Step 2: Restart Your Computer
Should save all files
Shut down the entire computer
Reconnect the remote USB Device After You Boot Up Your Computer
Rebooting restarts USB Drivers and services, which could be caused by errors.
Results To Be Expected: USB Device Recognized After Reboot
Step 3: Try a Different USB Cable or Device
Use a different USB cable
Take your USB device to another computer to check it
Take another USB device to your computer and check it
This determines if the problem is with a cable, device, or computer.
Step 4: Check USB Power Issues (Common on Laptops)
For Windows
Open Device Manager
Expand Universal Serial Bus controllers
Right-click USB Root Hub
Select Properties > Power Management
Uncheck “Allow the computer to turn off this device”
Windows may disable USB ports to save power, especially on laptops.
Expected result
USB ports stay active and stable.
Step 5: Update or Reinstall USB Drivers (Windows)
Open Device Manager
Expand the Universal Serial Bus Controller Node
Right-click on the device that is having problems
Select Uninstall device from the contextual menu
Reboot the computer
When the computer starts backup, Windows will reinstall the new drivers automatically. What you should see once the drivers have been reinstalled: All driver conflicts resolved and USB devices functioning correctly.
Step 6: Run Windows Hardware Troubleshooter
To do this, open “Settings,” then go to “System” and choose “Troubleshooting”. If available, select “Hardware and Devices” and follow the prompts to complete the process.
The troubleshooting tool will automatically detect any configuration/driver issues. The result will either be correcting any detected USB problems or letting you know exactly what the issue with your USB connection is.
Step 7: Check Disk Management (External Drives)
Right-click Start > Disk Management
Look for the USB drive
Assign a drive letter if missing
The drive may be detected but not assigned a letter.
Expected result: The drive appears in File Explorer.
Step 8: Fix USB Issues on macOS
Restart your Mac
Reset SMC (Intel Macs only)
Check System Settings > General > Software Update
Try connecting through a different adapter or hub
macOS updates and resets often resolve USB power and driver issues.
Expected result
USB devices mount correctly in Finder.
Step 9: Check USB Settings on Android and iPhone
Android
Unlock phone
Tap USB notification
Select File Transfer
iPhone
Unlock device
Tap Trust This Computer
Use an Apple-certified cable
Phones often default to charging-only mode.
Expected result
Device appears for file transfer.
Step 10: Avoid Unpowered USB Hubs
Plug USB devices directly into the computer
Use powered USB hubs for external drives
Many USB devices require more power than hubs can supply.
Expected result
Stable USB connections without disconnections.
When to Seek Professional Help
Reach out to something or take your computer in to get help if you experience one of the following:
You cannot access USB ports at all anymore.
You are not seeing your USB device on any computer.
You can see damage to the port or notice a burning smell.
Your device stopped working after it came into contact with liquid.
Your operating system was replaced or reinstalled after the USB device stopped being seen.
Keep in Mind
A lot of people can inadvertently develop an injury, or you can void your warranty by opening your laptop, power supply, or table,t unless you have trained to be able to do this.
How to Prevent Future USB Issues
There are several things that you can do to help to prevent you from experiencing USB problems in the future, including, but not limited to:
Keeping your operating system up to date.
Removing USB devices via safe removal.
Not using low-quality USB cables or wires
Blow out your USB ports with compressed air to clean them.
Using surge protectors or power strips;
Restarting your devices at least once per week.
Not overloading USB hubs.
This is information that is particularly useful for people who work from home or work in small businesses.
Final Thoughts
When attempting to connect to a USB device, it can be frustrating to find that the message “USB device not recognized” appears! It would be difficult to do your job, get an education, or run a business without technology! Fortunately, many USB issues can be repaired with proper troubleshooting methods instead of replacing hardware.
Utilizing a consistent troubleshooting method allows you to quickly restore the functionality of your USB Devices! By utilizing the proper procedures for maintaining and providing preventive maintenance for your devices, you will save money and create less electronic waste!
By taking the appropriate steps, your USB devices will continue being dependable tools in your daily digital life instead of being an impediment.
FAQs
1. Can a USB device fail on one computer but work on another?
Yes. This often indicates a problem with drivers, power settings, or USB ports on the affected computer rather than the device itself.
2. How do I know if the problem is the USB cable or the device?
Try using a different USB cable and test the device on another computer. If it works elsewhere, the issue is likely with your computer or cable.
3. Why does my USB device keep connecting and disconnecting?
This is commonly caused by power-saving settings, unpowered USB hubs, damaged cables, or loose USB ports.
4. How do I fix USB power issues on a Windows laptop?
Disable USB power management in Device Manager by unchecking “Allow the computer to turn off this device” under USB Root Hub settings.
5. Can operating system updates break USB connections?
Yes. OS updates can create temporary driver conflicts. Reinstalling or updating USB drivers usually resolves the issue.
As we depend more on wireless technologies, such as remote working, remote learning, wireless headphones, smart home devices, and in-car entertainment systems, Bluetooth problems become increasingly prevalent in the United States. Due to frequent software updates and the upgrading of devices that generate competition between increasing quantities of devices trying to connect, Bluetooth may stop functioning sporadically.
This article provides a comprehensive overview of the most common sources and solutions for Bluetooth issues on your Windows PC, MAC, Android phone, iPhone, Wireless Headphones (including AirPods), and Vehicle Bluetooth systems. Most solutions will require you to perform a simple troubleshooting process, which will take less than 10 minutes, without replacing the device or contacting support.
Common Symptoms
Bluetooth is not working correctly means you might see one or more of them:
You cannot use Bluetooth devices to pair
Bluetooth device pairs but disconnects often
There is no sound from Bluetooth headphones or speakers
AirPods say they are connected, but there are no sounds
The car’s Bluetooth connects, but calls and audio won’t connect
The option for Bluetooth is either not there or grayed out
Audio quality is poor, and you experience lag or drop outs when using Bluetooth.
The device you are trying to pair with does not show up as a discoverable device.
Possible Causes
When it comes to Bluetooth issues, it’s usually due to either software or signal problems, not hardware issues. Some of the most common causes of Bluetooth issues are:
Temporary software glitches due to updates or long uptime.
Out-Dated operating systems or Bluetooth drivers.
Too many wireless devices nearby causing interference.
Corrupted Bluetooth caches (on mobile devices).
Incorrect pairing history of the device you’re trying to use.
Low battery level on Bluetooth accessory device.
Vehicle Infotainment System (MIS) limitations or outdated firmware.
Knowing what causes these types of issues will allow you to find the right solution much quicker!
Step-by-Step Troubleshooting Solutions
Follow these steps in order, starting with the simplest fixes.
Step 1: Toggle Bluetooth Off and On
Deactivate Bluetooth on your device
Wait for 10-15 seconds
Activate Bluetooth once again
Why does it work?
It resets the Bluetooth radio and clears any minor connection issues.
What should you expect?
Bluetooth devices should now reconnect normally with minimal difficulty.
Step 2: Restart Both Devices
Power down and then restart phone(s), computer(s) or tablet(s).
Turn off Bluetooth devices (e.g., headset, keyboard).
Turn the device back on.
Why This Works
Restarting will clear up any existing memory problems and re-load certain OS services.
Expected Result
A stable Bluetooth connection after you completes this step.
Step 3: Check Battery Levels
Charge Completely! before trying to connect.
Do not try connecting your Bluetooth accessory to a device that has absolutely no battery power (extremely low).
Why this Works
Having too little power may limit the distance you can connect to your Bluetooth device and also make it very hard for the Bluetooth device to find your device.
Expected Result
Fewer Connection Errors
Step 4: Forget and Re-Pair the Device
Access your Bluetooth settings.
Put your Bluetooth device in “pairing mode.”
Locate your Bluetooth device in the list of devices.
Press “Forget” or “Remove Device.”
Power Cycle your Bluetooth device.
Re-Pair Your Device.
Why this Works
When you forget your Bluetooth device, it removes the pairing information between your devices, so a new, clean pairing connection will be made.
Expected Result
Once the device is paired, you should no longer have an error when connecting the two devices.
Step 5: Fix Bluetooth Issues on Windows PCs
Go to “Settings,” select “Bluetooth,” select “Devices” and make sure Bluetooth is turned on.
Run the Bluetooth troubleshoot process.
Check if Windows has any available updates for your Bluetooth driver. You need to do this via Device Manager.
Why this Works
The driver that controls the Bluetooth signal is also what controls the communication of your Bluetooth device on Windows.
Expected Result
Bluetooth devices will properly connect, and work as intended.
Step 6: Fix Bluetooth Issues on macOS
Unplug and re-plug your Mac computer.
Reset the Bluetooth function if needed.
Remove and then reintroduce the Bluetooth devices you have already connected.
Look for software updates for your Mac’s operating system that may help with Bluetooth connectivity.
Why Is This Helpful?
Apple typically releases operating system updates to improve the reliability of Bluetooth connections.
What Can You Expect?
Improved connectivity.
Step 7: Fix Bluetooth Issues on Android Devices
Go to “Settings”
Select “Apps”
Select “Bluetooth”
Clear the cache (do not clear the data)
Restart your phone
When the cache is cleared, any corrupt temporary files related to Bluetooth will also be deleted.
Result: Your Bluetooth should work again normally.
Step 8: Fix Bluetooth Issues on iPhone and iPad
Open the Settings app and select Bluetooth
Turn off Bluetooth and then back on
If necessary, perform a full network reset
Lastly, make sure your device has the latest software
Place AirPods in the case, close the lid for 30 seconds
Reset AirPods using the case button
Ensure AirPods are selected as audio output
Update iOS or macOS
Expected result
Stable audio playback and proper pairing.
Car Bluetooth Issues
Typical issues include:
Communication is established, but you don’t listen to audio.
Call drops from the phone or is garbled.
Bluetooth works sporadically.
Possible solutions:
Unpair the device and re-pair it.
Power recycle the vehicle’s AV system.
Upgrade vehicle firmware if an upgrade is available.
Limit the number of apps using Bluetooth in the background.
Assuming the changes have worked successfully, you should now have dependable hands-free calling and media playback through the vehicle’s audio system.
Bluetooth shares radio frequencies with other wireless devices.
Expected result
Reduced interference and stronger connections.
When to Seek Professional Help
If you experience one of the following situations you should contact your manufacturer’s technical support or take your device to an authorized repair technician:
There is no option for Bluetooth on your device
Bluetooth accessory detection does not work
Bluetooth hardware is malfunctioning
The problem persists even after reinstalling the operating system
Safety Tips: Do not disassemble your device if you were not requested to by the manufacturer. Opening devices may render warranty claims invalid and/or cause injury.
How To Prevent Future Bluetooth Issues:
Keep your operating system current
Don’t pair many devices
Charge each accessory frequently
Power down all devices once per week
Update vehicle info-tainment firmware when updates are released.
These tips help particularly with employees working remotely or smart home customers.
Final Thoughts
When Bluetooth stops working, it can be very frustrating to not only have your work calls interrupted, but also any streaming or driving that may occur. Fortunately, most Bluetooth-related issues are simple and quick to solve, and will sometimes require only minor repairs, rather than replacing your entire device.
Adopting a methodical process for tackling issues will help users maximize savings while keeping them up-to-date on their technology (saving them both time and money) and decreasing their overall waste; therefore, Bluetooth will remain an essential and useful component within your everyday technological toolkit, whether you are at home or on the road.
FAQs
1. Why does Bluetooth suddenly stop working even though it worked before?
Bluetooth can stop working due to recent software updates, temporary system glitches, or wireless interference. Restarting the device or toggling Bluetooth usually restores the connection.
2. How long does it usually take to fix Bluetooth issues?
Most Bluetooth problems can be resolved in under 10 minutes using basic troubleshooting steps like restarting devices or re-pairing connections.
3. Can too many Bluetooth devices cause connection problems?
Yes. Having multiple Bluetooth devices paired or active at the same time can cause signal interference and unstable connections, especially in homes or offices with many wireless devices.
4. Does low battery affect Bluetooth performance?
Absolutely, low battery levels on Bluetooth accessories can weaken signal strength, cause frequent disconnects, or prevent pairing altogether.
5. Will forgetting and re-pairing a Bluetooth device delete any data?
No. Forgetting a Bluetooth device only removes the pairing information. It does not delete personal data, files, or app settings.
US Users commonly report one of their most common issues when printing: they see a ‘Printer Offline’ message on their screen. Many people are using printers now more than ever due largely to remote work, virtual classes, and due to homes that are being used as an office and as a small business and are shared with others with whom they are in contact on the network.
Furthermore, numerous Windows and Mac updates are being performed regularly, Wi-Fi changes, and with older printers there can occasionally be a gas disruption between the computer and printer.
Follow the article provided to diagnose and troubleshoot your printer that says it is offline when you see that the printer is on and the printer is connected (network or direct/USB cable) to your computer. Most people who follow this article will be able to get their printer working properly in less than ten minutes and without replacing the printer or having to call technical support.
You may be experiencing this issue if you notice any of the following:
Printer status shows “Offline” or “Unavailable”
Print jobs stay stuck in the queue
Printer is powered on but not responding
Other devices can print, but one computer cannot
Printer worked recently but stopped after an update
Wi-Fi printer appears connected but won’t print
These symptoms are common on both Windows and macOS systems used in home offices and small businesses.
Possible Causes
Generally, the printer is not physically damaged. In most situations, the problem occurs due to any one of the following reasons:
Print spooler issues; background procedure that sends jobs to the printer is stuck
Obsolete/corrupted printer drivers
Incorrect print settings (i.e., Printer set to “Use Printer Offline”)
Changes to the network (i.e., a new router, a change in the IP address or a drop of Wi-Fi)
Operating system updates result in the resetting of printer preferences
Issues regarding USB or Wi-Fi communications
Determining the cause of the issue will allow you to select the proper resolution without wasting valuable time.
Step-by-Step Troubleshooting Solutions
Follow these steps in order. Stop once your printer starts working again.
Step 1: Restart Your Printer and Computer
Turn your printer off
Shutdown PC
Wait 30 seconds
Power up printer and restart pc
Why it Works
When you do this, you will remove any temp communication errors and reset possibly running back-end services.
Expected Result
The status of your printer will move from Offline to Ready.
Step 2: Check Printer Status Settings (Windows & macOS)
What to do (Windows)
Go to Settings > Bluetooth & devices > Printers & scanners
Select your printer
Click Open print queue
Make sure “Use Printer Offline” is unchecked
What to do (macOS)
Go to System Settings > Printers & Scanners
Select your printer
Remove and re-add it if it shows as paused or offline
Why it works
Sometimes the system manually switches the printer to offline mode after an error.
Expected result
The printer becomes selectable and responsive.
Step 3: Clear the Print Queue
What to do
Open the printer’s print queue
Cancel all pending print jobs
Close and reopen the printer window
Why it works
A single stuck job can block all future print requests.
Expected result
New printing works are performed successfully.
Step 4: Restart the Print Spooler Service (Windows)
What to do
Press Windows + R
Type services.msc and press Enter
Find Print Spooler
Right-click and select Restart
Why it works
The print spooler manages communication between your computer and printer. Restarting it clears errors and resets connections.
Expected result
Printer status updates and accepts print jobs.
Step 5: Check Network Connection (Wi-Fi Printers)
What to do
Confirm your printer is connected to the same Wi-Fi network as your computer
Print a network status page from the printer menu
Restart your router if needed
Why it works
Many US homes use dual-band routers (2.4 GHz and 5 GHz). Printers may disconnect if the network changes.
Expected result
Printer appears online across all devices.
Step 6: Update or Reinstall Printer Drivers
What to Do
Go to the Printer Maker’s Official Website
Download the most recent driver for your specific printer and operating system
Install and restart
Why it Works
Old, outdated or corrupt printer drivers are one of the biggest reasons that computers can’t communicate with printers (causing offline printer problems), especially when the computer or OS receives an update.
Expected Outcome
The printing machine starts working properly with a stable connection.
Step 7: Remove and Re-Add the Printer
What to do
Delete the printer from system settings
Restart your computer
Add the printer again using automatic detection or IP address
Why it works
This refreshes all printer settings and connection data.
Expected result
Printer shows as online and ready.
Step 8: Check Firewall and Security Software
What to do
Temporarily disable third-party security software
Try printing again
Re-enable protection afterward
Why it works
Some security tools block printer network ports.
Expected result
The printer communicates normally.
When to Seek Professional Help
You should reach out to the manufacturer support or authorized service center when:
The printer doesn’t power on.
There are error codes displayed on the printer’s display screen.
The printer continues to be disconnected from your device even after fixing this problem multiple times.
You discover that there is physical damage (e.g., Wi-Fi card damaged, USB port broken) to the printer.
Safety Tip
Unless the manufacturer states that you can open the printer, do not try to do so yourself – opening the printer will void your warranty.
Preventive Measures
To prevent future problems with the printer being offline:
Install all updates to the printers’ firmware and drivers regularly.
Ensure that you are using a stable Wi-Fi network with a steady signal.
Restart your printer on a weekly basis from your home computer or office area if you have one.
Do not change network settings frequently.
Use surge protectors to protect from power-related issues.
This will help to ensure that your printer works properly for remote workers and small business owners.
Conclusion
A common issue with network-related printing errors caused by software, not faulty devices, gives most users access to printing through a few targeted troubleshooting steps that take just minutes.
By maintaining your printer, updating its driver and performing routine troubleshooting, you will reduce waste from broken devices, save yourself money, save yourself time and frustration and keep your printer functioning well as part of your home or office enabling you to get something done without interruption.
FAQs
1. Why does my printer say “Offline” even though it’s turned on?
This usually happens due to communication issues between the computer and printer, often caused by driver problems, network changes, or a stuck print spooler.
2. Can a Windows or macOS update cause my printer to go offline?
Yes. Operating system updates can reset printer settings, disable drivers, or change network permissions, which may cause the printer to appear offline.
3. How do I fix a printer stuck offline without reinstalling it?
Start by restarting both the printer and computer, clearing the print queue, and checking that “Use Printer Offline” is unchecked in printer settings.
4. What is the print spooler, and how does it affect printer status?
The print spooler is a background service that manages print jobs. If it crashes or freezes, the printer may show as offline even when connected.
5. Can my firewall or antivirus software block printer communication?
Yes. Some security software blocks network ports used by printers, causing them to appear offline until the software is adjusted or updated.
If your internet connection feels perfectly fine during the day but slows to a crawl at night, you are not alone. This is one of the most common connectivity complaints reported by internet users across the United States, particularly those using major providers such as Xfinity, AT&T, and Verizon. Video streaming, online gaming, remote work meetings, smart home devices, and cloud backups all compete for bandwidth at the same time. This article explains why internet speeds often drop at night, how the issue differs between major US internet providers, and what practical steps you can take to improve performance.
Common Symptoms
Nighttime slowdowns can frequently present with some anticipation. Users might notice one or more of these problems during the night:
Longer load times for websites, or not loading at all
Streaming services that buffer more frequently, lower video quality
Freezing lag occurs when using services like Zoom, Microsoft Teams, and Google Meet
More pings/packet loss when gaming
Smart home devices that respond late
Speed test results that are very different from daytime speeds
These issues tend to be resolved in the late evening or early morning, indicating that congestion, rather than equipment malfunction, is the cause.
Why Internet Gets Slow at Night
Network Congestion During Peak Hours
The most common reason the internet slows down at night is network congestion. Residential internet networks are designed around shared usage. When many customers in the same neighborhood are online at once, available bandwidth must be divided among them.
In the evening, millions of household’s stream movies, attend video meetings, upload files, and play online games simultaneously. Even well-built networks can slow down under this kind of demand. This is especially noticeable in areas with dense housing, such as apartment complexes and suburban neighborhoods.
How Your Internet Provider Affects Nighttime Speeds
The type of internet service you use plays a major role in how severe nighttime slowdowns feel. Xfinity primarily uses cable internet, which relies on shared neighborhood infrastructure. During peak hours, speeds, particularly upload speeds, can drop noticeably if many nearby users are active at the same time.
AT&T customers may experience different results depending on their connection type. Fiber customers usually see more consistent performance, while DSL users may experience slower speeds due to line limitations and distance from local equipment.
Verizon customers using Fios fiber generally enjoy strong stability, but congestion can still occur during heavy usage periods. Verizon 5G Home Internet users may see more pronounced slowdowns at night because wireless towers handle increased traffic and signal interference after sunset.
Wi-Fi Congestion Inside the Home
In many cases, the slowdown is not coming from the internet provider at all but from inside the home. Wi-Fi networks are easily affected by interference, especially in the evening when neighbors’ networks are also active.
Older routers struggle to manage multiple devices at once, and crowded Wi-Fi channels can cause speed drops even if your internet connection itself is stable. This is particularly common in apartments, condos, and townhomes where many routers operate close together.
Background Device Activity at Night
Several devices have been programmed to complete their maintenance tasks during the night time hours. When users have gone to bed (but are still at home), this gives devices an opportunity to perform cloud backups or other types of system updates like OS installation, application downloads, and uploading security camera files.
While performing these types of tasks, devices such as smart TVs, gaming consoles, mobile phones/laptops, and smart hubs can consume bandwidth without a clear indication that it is happening. When performing at the same time, each device’s ability to perform these types of tasks can significantly reduce overall performance.
Traffic Management and Network Prioritization
Most Internet service providers in the United States do not throttle common web browsing, but they will manage the speed of traffic on the Internet when their networks get congested. They do this by prioritizing specific types of traffic temporarily or downgrading less important types of traffic to keep their networks from becoming unstable.
Customers on wireless home Internet plans will likely experience these types of speed management as opposed to customers on wired plans, which may feel like throttling; however, speed management is not applied on an individual basis.
Step-by-Step Troubleshooting Solutions
Basic troubleshooting steps should be followed prior to more complex troubleshooting solutions.
Testing your speed when using the same device and method of connection at varying times throughout the day is a good starting point for identifying the source of your slow speeds. If you are only experiencing significantly slower speeds at night compared to daytime, then most likely you are experiencing network congestion.
You may also want to restart or power cycle your modem and router. Power cycling your modem and router allows them to clear temporary memory problems associated with them and allows the router to establish a fresh connection to your service provider’s network. This does not always resolve network congestion problems; however, it can help to provide a more stable internet connection.
Using a wired Ethernet connection instead of Wi-Fi is one of the best methods for troubleshooting. A wired connection prevents the potential problems of interference and signal loss and allows you to easily identify whether your problem is Wi-Fi related or whether it is related to your ISP.
Sometimes simply reducing the number of devices that are using significant amounts of bandwidth can also help to improve performance. Pausing streaming, downloading or backing up devices that are not being used can often have an immediate positive effect on your internet speed.
If you are having trouble connecting to Wi-Fi, try switching to either 5 GHz or 6 GHz by changing the frequency on your wireless router. These frequencies tend to offer faster speeds and also tend to experience less interference than the 2.4 GHz frequency, especially in the evening hours when most people are using their Wi-Fi.
If you’re an advanced user, you can also use QoS settings on your router to give priority to traffic from things like video calls or work devices. This can help ensure that those devices remain working well during times when most other people are using the internet at home.
It is also a good idea to keep your router’s firmware updated. Updating the firmware on a router will improve the router’s ability to handle multiple devices as well as improve your security and thus increase the overall efficiency of the network.
If your router is more than four or five years old, upgrading to a new router will greatly improve performance. Today’s routers are built to better support multiple devices at once and do a better job managing traffic with fewer performance problems.
If none of the above options work for you, you may want to contact your internet service provider. They can check if your area is experiencing any congestion and may also be able to schedule any necessary upgrades or adjustments to the network in your area.
When to Seek Professional Help
If connection speeds have been consistently poor throughout the day regardless of whether you use a cable or a wireless connection, you may need to seek professional help. If your modem is showing intermittent drops or there are warning lights on the modem, this could indicate a connection problem. Also, if your hardware has been overheating, this could indicate that there may be something wrong with it.
You should contact the manufacturer of your devices for assistance or go to an authorized service center to avoid voiding your warranty by opening your networking device to try and fix it yourself.
If after you have contacted the manufacturer, you have determined that the hardware you have is defective; the safest and most effective option is to replace it.
Prevention Tips
Enhanced network management helps prevent slowdowns during the night; by scheduling backups and updates during off-peak hours to avoid competition with other users. Another way to help reduce competition in networks is to use a mesh Wi-Fi system, which provides better coverage in larger homes and prevents too many devices from being connected to one access point.
For optimal signal distribution, routers should be installed centrally in your home and positioned as high as possible, as opposed to being placed at the flooring level or against walls. If your household has a significant amount of streaming, gaming, and/or remote working needs, upgrading your internet service plan may be required.
Ongoing network maintenance, comprising a combination of regular network quality checks and proper usage of network devices in your home, will help ensure consistent network performance.
Conclusion
For many Americans, the internet is causing problems due to low speeds during nighttime hours. The reasons for this could be caused by either network congestion or limitations with your Wi-Fi equipment as opposed to having a defective modem/router; therefore, if you learn about how to troubleshoot your current Internet connection as well as practice basic tips that will enhance the performance of your Internet speed will not only lower your monthly bill but will avoid purchasing and installing new hardware.
Moreover, taking an active approach towards improving your Internet connection through troubleshooting will minimize your contribution to the landfill by reducing e-waste as well as providing an efficient home network for day-to-day access.
FAQs
1. Why does my internet slow down mostly at night?
Internet speeds often slow down at night due to network congestion, when many people in the same area stream videos, play games, attend video calls, and use smart devices at the same time.
2. Do Xfinity, AT&T, and Verizon all experience nighttime slowdowns?
Yes, but the severity depends on the connection type. Cable and wireless services are more affected by congestion, while fiber connections tend to be more stable during peak hours.
3. Why does Verizon 5G Home Internet slow down after sunset?
Verizon 5G Home Internet relies on wireless towers. At night, increased traffic and signal interference can reduce available speeds for home users.
4. What devices use bandwidth at night without me knowing?
Smart TVs, phones, laptops, gaming consoles, security cameras, and cloud backup services often run updates and uploads overnight, consuming bandwidth in the background.
5. When should I contact my internet service provider?
If slow speeds persist all day, occur even on wired connections, or your modem shows frequent disconnects or warning lights, it’s time to contact your ISP for further investigation.
You’re on a Zoom call, streaming a show, or uploading a file, and suddenly the Wi-Fi drops. Or maybe it doesn’t drop, but everything crawls to a painful halt. For US households, where remote work, online schooling, smart TVs, and connected devices are the norm. Many Americans pay for high-speed broadband plans, yet still struggle with unreliable connections. The good news is that most Wi-Fi problems have clear causes and practical fixes. Understanding what’s actually going wrong is the first step toward a faster, more reliable connection.
Why Wi-Fi problems happen
Issues with Wi-Fi can be categorized into three distinct areas: 1) Signal Issues, 2) Network Congestion, and 3) Equipment Limitations. Unlike wired internet, Wi-Fi signals use radio waves. Therefore, distance to your Wi-Fi Router, walls, interference from other devices, and even appliances in your home will affect your Wi-Fi signal.
In many homes throughout the US (especially in apartments, older homes, and large suburban homes), the Wi-Fi signal has to travel through multiple layers of walls/floors to reach the Wi-Fi router, as well as compete with other Wi-Fi networks in proximity. As an example, if your house contains dozens of devices that are connected to your local Wi-Fi network, the user experience can deteriorate very quickly.
Understanding whether you’re dealing with drops, slow speeds, or dead zones helps narrow down the right solution instead of randomly restarting your router every day.
Wi-Fi keeps dropping randomly
Few things are more frustrating than Wi-Fi that connects and disconnects throughout the day. This problem is often blamed on the internet service provider, but in many cases, the router itself is the culprit.
Wi-Fi drops commonly occur due to overheating routers, outdated firmware, or interference from neighboring networks. In apartment buildings and dense neighborhoods, dozens of routers may be broadcasting on the same channels, causing frequent disconnects.
Another common cause is automatic network switching on phones and laptops, where the device jumps between Wi-Fi and cellular data or between different Wi-Fi bands.
What helps?
Restart the router and modem weekly, not just when problems occur. Place the router in an open, ventilated area. Update router firmware through the manufacturer’s app or web interface. If your device supports it, disable aggressive Wi-Fi switching settings.
Slow Wi-Fi speeds despite fast internet plans
Although many users in the US have an internet plan that allows for up to 300 Mbps, 500 Mbps, or even 1 Gbps, the actual performance can be much lower when using Wi-Fi. This is normally not the result of their ISP, but rather due to the hardware they are using. Older routers may not support newer protocols and are limited by the number of devices connecting to that router at one time.
Another reason for the discrepancy could be network congestion. Devices such as smart TVs, game consoles, and computers are likely competing for the same network bandwidth, creating a situation where you are likely to be using more data than what your current network can handle.
Distance from your router, however, is also a large contributing factor in how fast your internet speed will be, as distance increases, so will the amount of time it takes to transfer data from your router to your device, even if it does not lose the connection altogether.
What helps?
Test speeds near the router versus farther away to confirm signal loss. Upgrade to a newer router if yours is more than four or five years old. Limit bandwidth-heavy tasks during work hours. Use wired Ethernet connections for stationary devices like desktop PCs and gaming consoles whenever possible.
Dead zones in certain rooms or floors
Wi-Fi dead zones are prevalent in many multi-story homes or homes built with solid construction materials such as concrete, brick, steel & plumbing. Even if you have a good internet connection, your Wi-Fi will be diminished when trying to pass through solid surfaces like these. Wi-Fi dead zones can be a result of your router’s position within your home as well.
If your router is located within a basement or a corner of the home, the wi-fi signals will have difficulty reaching the different locations of your home, therefore creating dead zones within your home. Dead zones are typically caused by poor distribution of the wi-fi signal rather than a poor internet connection.
What helps?
Move the router to a central, elevated location. Avoid placing it near TVs, microwaves, or large metal objects. For larger homes, consider Wi-Fi extenders or mesh Wi-Fi systems, which are far more effective than single-router setups.
Interference from other devices and networks
Interference from Wi-Fi is a big problem in the U.S., particularly in multi-family buildings. The many networks in close proximity to each other will often overlap, leading to congestion on many of the commonly used channels.
Household devices (cordless telephones, baby monitors, Bluetooth accessories, and microwave ovens) can also cause interference with Wi-Fi signals, especially on 2.4 GHz bands.
What helps?
Switch to the 5 GHz band if your router supports it. It offers faster speeds and less interference, though with shorter range. Modern routers automatically manage band steering, but manual configuration can help in crowded environments.
Router and modem issues
ISP subscriptions often include a rentable router that is frequently not able to handle loads of multiple users. Additionally, their ISP routers can have fewer antennas than most consumer-grade routers and less power in their processing units (CPUs).
Over time, routers become physically damaged due to excess heat, being powered on/off frequently, and due to bugs in firmware, which can affect performance well before they totally break down.
What helps?
Consider buying your own router for better performance and control. Reboot both the modem and router when troubleshooting, not just one. If problems persist, ask your ISP to check signal levels or replace aging hardware.
Wi-Fi problems on specific devices only
Wi-Fi will function as planned on one device, and not on another; therefore the issue may be hardware-related. Examples of hardware issues include outdated driver files, settings that have become corrupted, or the use of aggressive power management modes that can limit Wi-Fi performance.
Typically, laptops will reduce their Wi-Fi transmission power in order to extend their battery life. Conversely, mobile devices will often select their cellular data connections instead of their Wi-Fi network connections, or if they are using cached network settings.
What helps:
Update device software and Wi-Fi drivers. Forget and reconnect to the network. Reset network settings if the issue persists. On laptops, disable aggressive power-saving modes for Wi-Fi adapters.
When your ISP actually is the problem
In most cases, when your Wi-Fi isn’t working or the connection is slow, it has to do with local conditions in your area. However, there are times when there is a legitimate problem with the Internet Service Provider (ISP). Regional outages, overloaded infrastructure, and a bad modem signal can cause slow/unstable connections for several people.
You’re probably having a Wi-Fi issue if you are also experiencing a slow or unstable ethernet connection.
What helps?
Run speed tests using a wired connection. Check your ISP’s outage map. Contact support and ask for signal diagnostics rather than generic troubleshooting scripts.
How to prevent ongoing Wi-Fi problems
Purchase good networking hardware.
Assemble your Wi-Fi router in a strategic way.
Install updated firmware on a regular basis.
Prevent a single connection from being overloaded with many devices at once.
For larger homes, you may want to consider planning the area of wifi coverage rather than just having one wifi router provide all of the coverage.
Final thoughts
Even though your Wi-Fi connection may at times seem unpredictable, Wi-Fi issues all have their unique causes that can easily be fixed. Drops in the connection, slow speeds and dead zones all can point to their own specific problems; understanding those problems can greatly clarify the solutions that you need.
Before blaming your ISP or upgrading your internet service, take a minute and evaluate your current Wi-Fi setup. The experience of a couple of smart changes to your home’s Wi-Fi system can often turn a “not usable” connection into one that works out just fine.
FAQs
1. Why is my Wi-Fi slow in some rooms but fast near the router?
Wi-Fi signals weaken with distance and obstacles like walls, floors, and metal objects. This often leads to slower speeds or dead zones in multi-story homes or larger US houses.
2. How many devices are too many for one Wi-Fi router?
Most basic routers struggle when more than 15–20 devices are connected at once. Smart TVs, phones, laptops, and smart home devices can quickly overwhelm older hardware.
3. What causes Wi-Fi dead zones in US homes?
Dead zones usually result from poor router placement, thick walls, concrete construction, or large distances between the router and devices.
4. How can I tell if my ISP is actually the problem?
Run a speed test using a wired Ethernet connection. If speeds are still slow or unstable, the issue may be with your ISP rather than your Wi-Fi setup.
5. What’s the best long-term solution for reliable Wi-Fi at home?
Investing in quality networking hardware, placing routers strategically, updating firmware regularly, and using mesh Wi-Fi systems for larger homes offers the most reliable results.