




In recent days where the technology has become a part of our routine, Artificial intelligence has evolved from the fantasy to everyday utility in everyone’s life’s. Its no longer depends on the movies or the corporate data centers, Ai is the power which anticipates one’s needs as per the requirements and then streamlines chores and enhances well-being. For instance, just imagine waking up to the smart coffee maker that prepares a perfect cup, or a robot vacuum cleaner that understands your house layout and cleans. These innovations aren’t just conveniences; they’re transforming mundane tasks into effortless experiences, freeing us to focus on what truly matters. 

From the health trackers that predict wellness trends to voice assistants that orchestrate entire day, Ai gadgets which just redefine daily life across homes, offices and commutes This article drives the most devices available today, highlighting boosting productivity, promotes health, and spreads joy. 

Smart speakers like Amazon Echo and Google Nest Hub Max serve as central AI gadgets for home automation. They use AI to learn preferences, automating routines such as morning coffee brewing or light adjustments via voice commands. Wearable AI complements this by syncing health data for holistic daily management. 

Feature Amazon Echo Google Nest Hub Max 2 
AI Core Alexa AI Gemini Nano 
Key Use Voice tasks, routines Pattern anticipation 
Daily Benefit News, shopping lists Recipe cues, summaries  
Price Range $50–$200 $200–$300 

Fitness Trackers and Wearable AI 

So here comes fitness trackers which represents essential wearables which monitor the activities like sleep , heart rate with the machine learning algorithm. Which helps in checking the heart rate and counts the footsteps and the sugar and BP levels. These AI detect patterns in exercise habits, which seriously offers real-time feedback effectively for the proper outcomes respectively. 

Activity tracking are the steps, calories, heart rate and the GPS running and the cyclings . Noting the footsteps and the cycling counts and best feature is measuring the sound sleep. 

Tracker Model Activity Tracking Sleep Analysis Coaching Features 
Fitbit Charge 6 Steps, calories, heart rate Sleep stages via AI Personalized workouts  
Apple Watch Series 10 GPS running, cycling REM/deep sleep insights AI recovery suggestions 
Garmin Venu 3 Multi-sport modes HRV-based sleep score Endurance training plans 

Health Monitoring Wearables 

As these are really advanced, Ai gadgets track important signs like the blood pressure and the high and low glucose levels continuously.futhermore,AI predicts irregularities like giving alarms and preventing issues and transforming health care. These devices also provide diet alarm and exercise recommendations.  

Monitor Type Metrics Tracked AI Alerts Integration 
Oura Ring Gen 4 HR, blood oxygen, temp Anomaly detection App-based insights  
WHOOP 5.0 Strain, recovery Blood sugar trends Sleep coaching 
Levels CGM Patch Continuous glucose Spike/drop predictions Nutrition tips 

Smart Home Ecosystems 

Now the AI gadgets in smart homes, which include thermostats and lights, create adaptive environments. Connected via hubs, they just learn from the energy use and comfort without manual input. This setup ensures security with the AI-driven doorbell and also the entry level face recogonization.and the devices nest thermostat, philips hue light and the ring Doorbells. 

So here is the tabular form for your understanding. 

Device Function AI Adaptation Energy Savings 
Nest Thermostat Temperature control Learns schedule Up to 15%  
Philips Hue Lights Ambient lighting Mood-based automation Motion-triggered 
Ring Doorbell Visitor detection Face recognition Night vision AI 

Kitchen and Productivity AI Devices 

Here comes actual play of the home. Ai powered Kitchen is the powerhouse of the entire house. AI – powered kitchen gadgets are like the smart refrigerators which invents new recipes, while reducing waste. Productivity tools , such as the Ai ear buds which gives real time translation, during commuting. This helps in streamlining and planning the routine and helps in global interactions 

Gadget Primary Use AI Feature Daily Impact 
Samsung Bespoke Fridge Inventory mgmt Recipe generation Waste reduction  
Timekettle Earbuds Language translation Contextual learning Travel ease 
Reolink Robot Vacuum Floor cleaning Home mapping Hands-free upkeep 

Robot Assistants in Daily Life 

Robot vaccums really help the household women or the working ones to ease the task, the AI gadgets that map homes and avoid obstacles autonomously. Now they schedule cleanings based on the usage patterns and helps in finishing the routine activities. Which gets paired whit the wearables AI, which helps in contributing clutter-free, and creates stress-free environment. 

Robot Model Navigation Scheduling Battery Life 
iRobot Roomba Combo j9+ AI obstacle avoidance Habit-based 120 minutes  
Roborock S8 Pro Ultra 3D mapping Multi-floor 180 minutes 
Eufy X10 Pet-friendly AI Voice integration 150 minutes 

Future of Wearable AI and AI Gadgets 

Wearables Ai is evolving towards a predictive health and then it gets integrated with smart home for unified experiences. By 2026, expect more seamless Ai devices blending the augmented reality glasses for the aids. These advancements promise greater accessibility in regular life. 

The trends are AR Glasses and the health predictions, and the home integration. 

Trend Current Example 2026 Projection Benefit 
AR Glasses Meta Ray-Ban Real-time translation Hands-free info  
Health Prediction WHOOP bands Preemptive alerts Preventive care 
Home Integration Nest ecosystems Full automation Time savings 

AI gadgets ensure more productivity, health, and convenience across routines. From wearable AI tracking vitals to smart speakers in orchestrating homes, these devices learn and adapt for tangible improvements. 

Conclusion: 

To conclude, Ai gadgets help in reducing stress-free worlds, AI gadgets like intelligent wearables, adaptive home assistants, and autonomous cleaners are quietly revolutionizing our daily rhythms. They don’t just automate tasks. They just learn from the experiences and then sets the process ultimately, and safeguard health, turning potentially into harmonious efficiency. From commute stress with predictive navigation to fostering better sleep through data-driven insights, these devices prove that AI’s true power lies in amplifying human potential rather than replacing it. 

Looking ahead, the rapid evolution of AI promises more intutive companions that integrated our lives deeper manner, all while prioritizing privacy and sustainability. Embraces these tools today position us for a brighter, more empowering tomorrow. So now just dive into the gadgets highlighted here, just watch your regular because the future of smarter living is already in your hands. 

FAQS 

1. What are AI gadgets? 

AI gadgets are smart devices which are powered by artificial intelligence that automate tasks, which provides customized insights and adapts to users regular routines. For instance, like the smart speakers like amazon Echo and wearables like the Fitbit trackers helps in monitoring health.  

2. How do wearable AI devices benefit from health tracking? 

Wearable AI devices like the Oura Ring Gen 4 and Apple Watch Series 10 track metrics such as heart rate, sleep stages, and blood oxygen levels using machine learning.  

3. Which smart home AI gadgets save the most energy? 

There are many but the devices like the Nest Thermostat and Philips Hue Lights optimize energy use by learning schedules and automating adjustments, potentially saving up to 15% on bills.  

4. Are robot vacuums effective AI devices for cleaning? 

Yes, models like iRobot Roomba Combo j9+ use AI for obstacle avoidance, home mapping, and habit-based scheduling, providing hands-free cleaning with long battery life. They also perform excellent in multiple floors and sets pet friendly. 

5. What future trends should we expect in AI gadgets? 

By 2026, expect advancements in AR glasses like Meta Ray-Ban for real-time translation and deeper home integration for predictive health alerts. These will wearable AI with ecosystems for good convenience and preventive care.
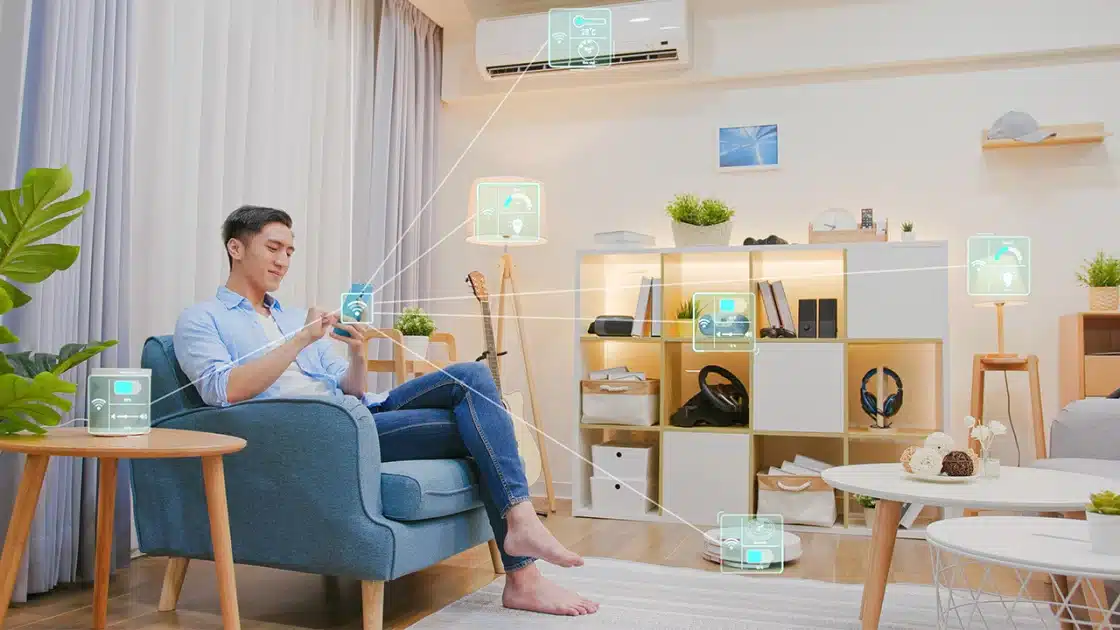
Nowadays renting an apartment or house is really leading to navigating strict lease rules that bans the permanant modifications like driling the walls . Yet the appeal of a smart home like the automated lights, securing door locks, and the atmosphere controller inbuilt in a house which remains in the customized and leads to effective living space. The good news? You don’t need to risk your security deposit or landlord’s approval to dive into smart tech.  

Incase if you are a tech newbie or the seasoned gadget lover, now provided renter-friendly hacks transform any lease-bound space into a futuristic haven. Now here are the top devices, step-by-step installation steps. By the end, you’ll enjoy hands-free control, energy savings, and enhanced security while keeping your rental pristine and portable for your next move. 

This article gives you a ultimate focuses exclusively on no-drill setups using adhesive mounts, tension rods, magnetic holders, and clever freestanding designs that install in minutes and remove cleanly without a trace. 

Why Automate Home as a Renter? 

Nowadays automating home transforms daily routines into effortless smart routines, saves time, energy, and security.  Moreover, the renters benefit from portable devices that can pack altogether easily. If you are moving with the price starting under $50 per item. Keep focus on wireless hubs like Google nest, Amazon Echo, Apple Homepod for the extremely seeamless integration. 

Essential No-Drill Devices 

Foremostly begin with basics that stick, plug in, or sit freestanding. Below is the camparision tabular form of the top – renter- approved devices: 

Device Type Examples Key Features Price Range Compatibility 
Smart Plugs TP-Link Kasa, Wyze Plug Remote control, energy monitoring $10-25 Alexa, Google 
Smart Bulbs Philips Hue, LIFX Mini Color-changing, scheduling $15-50 All major hubs 
Smart Speakers Echo Dot, Nest Mini Voice control, hub functionality $30-60 Built-in hub 
Motion Sensors Wyze Sense, Aqara Trigger lights/scenes automatically $10-20 Zigbee/Z-Wave 
Door/Window Sensors Philips Hue Contact Alerts for openings, no adhesive $20-40 HomeKit, Alexa 

These devices use Wi-Fi, Bluetooth, or hubs without wall damage. 

Step-by-Step Setup Process 

Follow these steps to automate home without tools: 

  1. Firstly, choose a Hub for picking one ecosystem one ecosystem  
  1. Download the app, connect to Wi-Fi, and then scan QR codes on devices. 
  1.  Group by bedroom, kitchen for smart routines. 
  1.  Voice command like”Turn on kitchen lights.” 
  1. Add sensors for automation ideas like auto-off lights. 

Total setup time required for this is around 30-60 minutes. 

Creating Smart Routines and Scenes 

Smart routines group actions for efficiency. Scenes trigger multiple devices at once for ideal for automation ideas. 

Morning Routine Example: 

  • Trigger: Time (7 AM) or voice “Good morning.” 
  • Actions: Lights brighten, coffee maker starts, blinds lift. 
Routine Type Trigger Actions Performed Benefits 
Morning Wake-Up Sunrise or alarm Lights on, thermostat to 72°F, news plays Energizing start 
Evening Wind-Down “Good night” voice Dim lights, lock doors, play music Relaxation prep 
Away Mode Phone leaves geofence Lights randomize, cameras arm Security without worry 
Guest Welcome Doorbell motion Porch light on, alert to phone Hospitality automation 
Energy Saver No motion after 10 PM All plugs off except essentials Bill reduction 

Now use all these apps to customize the google home for simple drag and drop. Alexa is the most used one these days. 

Automation Ideas for Common Rooms 

Cut scenes for spaces. No drill tips keep it renter- safe. 

Kitchen Automation 

Kitchen automation is really the heart of the home by seamless integration of  smart devices that streamlines cooking ,meal preparations and grinding and coffee machine and many more. Nowadays we get the healthy oven recieps which come inbuilt and preheat and set the timer according to the dis requirement like they take the commands from assistances like Alexa or Google home and also most surprisingly they do generate grocery shopping list automatically and moreover the robotic arms that shop vegies with the driven precision.this kind of automation is being magically helpful for the kitchen automation. 

Furthermore, these systems majorly rely on IOT connectivity, sensors, and machine learning to understand user-suggested recipes based on their daily routines and their holiday meal preparation. Brands like Samsung and Thermomix with appliances that reduce food waste and energy use while freeing up time for creativity in the kitchen. 

Plug in all the required appliances for hands-free control. 

Idea Devices Needed Setup Routine 
Coffee Auto-Brew Smart plug + coffee maker 7 AM timer on plug 
Oven Reminder Motion sensor + speaker Beep if forgotten after 30 min 
Cabinet Lighting Battery LED strips Motion-activated open/close 

Bedroom Scenes 

Ensure your sleep patterns with gentle automation. 

Scene Trigger Devices 
Sleep Mode “Bedtime” Blackout bulbs, fan on, white noise 
Wake Gradually Alarm integration Lights fade up over 30 min 
Pet Comfort Motion at night Night light for pet path 

Living Room Hub 

The living room hub transforms from a seating area into the dynamic epicenter of family life, blending comfort, technology, and connectivity seamlessly. Picture plush modular sofas arranged around a sleek smart TV wall that doubles as an interactive display for streaming movies, video calls, or even virtual workouts, while built-in charging stations and ambient LED lighting keep devices powered and moods elevated.  

Centralize the whole entertainment. Like for instance if one is planning for a movie night which needs an environment setup at home necessarily. So accordingly darkening the lights,TV on, AC cools and increasing the speaker’s volume. 

Automation Idea Smart Routine Details 
Movie Night Voice: Darken lights, TV on, AC cool 
Party Mode Guests arrive: Uplift lights, music 
Cleaning Boost Vacuum schedules around your routine 

Security Without Commitment 

No-drill cameras and locks protection without landlord issues. Here are the different layers in it like the entry level, indoor view and the package guard,night patrol. 

Security Layers Table: 

Layer Device Example No-Drill Method Automation Trigger 
Entry Alert Door sensor Magnetic clip-on Phone notification 
Indoor View Wyze Cam v3 Tabletop stand Motion → light + alert 
Package Guard Floodlight cam Plug-in extension Delivery → photo snap 
Night Patrol Motion floodlight Ground stake Sweeps yard hourly 

Cost and Compatibility Breakdown 

So here is the clear understanding on the budget level and which devices are included and the hub spots as per the required. Now the budget level starts from the starter, mid-tier and the full setup. There are hubs which are supported like the multi hub abd the matter enabled. 

Budget Level Total Cost Devices Included Hubs Supported 
Starter $100 2 plugs, 1 speaker, 2 bulbs Any one 
Mid-Tier $300 + Sensors, camera, thermostat Multi-hub 
Full Setup $600+ All rooms covered Matter-enabled 

Matter protocol ensures future proofing across Alexa, Google, and Apple. 

Troubleshooting Common Issues 

  • If your Wi-Fi is Weak? Use mesh extenders like Eero plugs. 
  • Device Offline? Restart hub, check 2.4GHz band. 
  • Routine Fails? Verify permissions in app settings. 

Conclusion: 

To conclude, transforming a rental into a smart home using no-drill solutions empowers renters to enjoy modern conveniences like automated lighting, enhanced security, and energy efficiency without risking lease violations or permanent alterations. Devices such as adhesive-mounted sensors, battery-powered cameras, and smart plugs offer seamless integration and portability, ensuring you can take your setup to the next residence effortlessly. This approach not only elevates daily living but also appeals to landlords by preserving property integrity while adding value through subtle upgrades.   

FAQs 

1. Can renters really automate home without drilling?  

Yes, 90% of devices are plug-in or adhesive-free with removable strips. One can take them whenever you are planning to move.   

2. What’s the easiest hub for beginners?  

the easiest hub for starters is Amazon Echo intuitive app, vast skills library for smart routines.   

3. How do I create scenes for automation ideas?  

In apps: Select “Routines” > Add trigger/action combos, like motion → lights.   

4. Are these setups secure for renters?  

Use encrypted hubs, enable 2FA, and guest networks. Battery cams avoid wiring vulnerabilities.   

5. What’s a top automation idea for energy savings?  

Smart plugs auto-off idle devices; routines cut usage 20-30% monthly.

Nowadays laptop is seen in every person’s hand all over the world, so here comes the exact problem of dust which is the silent killer which stops the performance of laptop. Over a time, it clogs vents and coats fans and the thermal paste, creates a issue with your CPU and GPU.This article helps you understand how important dust removal and maintenance are to restore speed, silence and longevity. So, the regular cleaning boosts cooling by 20-30% in turn cuts the noise, and prevents crashes the actual gamers, professionals and the daily users.so follow the mentioned steps safely, and your machine will be like a new one. 

Let’s dive together into the article  

Why Cleaning Matters: The Performance Payoff 

First and foremostly laptops inhale dust like the vacuums, especially in our homes and offices. Aso the accumulated grime insulates the components, forcing the fans to spin around harder and tigering thermal throttling. Where the processor downlocks to stop melting down. Moreover, the symptoms include the slow apps,random freezes, high pitched fan and the batteries which will be draining faster. Its priority task that for every 3-6 months temperature gets dropped by  15-25°C, extend hardware life by years, and reclaims benchmark scores lost to heat. 

Quick Benefits Table 

Benefit Before Cleaning After Cleaning Improvement 
CPU Temperature (Idle) 60-70°C 40-50°C -20°C 
Fan Noise Level Loud (50+ dB) Whisper-quiet (30 dB) 40% quieter 
Boot Time 45 seconds 25 seconds 44% faster 
Gaming FPS (e.g., Cyberpunk) 45 FPS 60 FPS +33% 

Data based on average mid-range laptops (e.g., Dell XPS, MacBook Pro). Results vary by model and dust levels. 

Tools You’ll Need for Dust Removal  

Don’t wing it proper gear prevents static damage or scratches. Budget is $20-50. 

Essential Tools Table 

Category Item Purpose Cost Estimate 
Anti-Static Wrist strap or mat Grounds you to avoid ESD $5-10 
Cleaning Compressed air (canned, 3-pack) Blasts dust from fans/vents $10 
Brushes Soft microfiber brush (ESD-safe) Sweeps crevices gently $5 
Liquids 70% isopropyl alcohol + lint-free wipes Surface/component cleaning $5 
Advanced Thermal paste (Arctic MX-4) + plastic spudger Repaste CPU/GPU for pros $10-15 
Safety Screwdriver set (Torx/Phillips) Disassembly (model-specific) $10 

Skip vacuums, they generate static. Work on a non-carpeted surface. 

Step-by-Step Clean Laptop Guide: Exterior Dust Removal 

One can off the power, unplug, and remove the battery if possible. Ground yourself with a wrist strap. 

  1. Wipe Exterior: make wet microfiber cloth with isopropyl alcohol. Clean keyboard, trackpad, ports, and screen bezel. Let dry for 5 minutes. 
  1. Keyboard Deep Clean: Invert laptop over a trash bin. Blast keys with compressed air at 45° angle, short bursts. Shake out the debris. For sticky keys, dip a swab in alcohol and gently press. 
  1. Ports and Vents: Use air to clear USB, HDMI, and charging ports.  

Time: 10 minutes. Expect visible dust bunnies. 

Internal Dust Removal: Focus on Thermal Paste – Fans 

  • This is where 90% of performance gains happen.   
  • Many laptops allow bottom-panel access without voiding the warranty. 

Disassembly Risk Levels Table 

Skill Level Task Tools Needed Time Risk of Damage 
Beginner Vent/fan blasting Compressed air, brush 15 min Low 
Intermediate Bottom panel removal Screwdriver, air 30 min Medium 
Advanced Full teardown + repaste Spudger, thermal paste 1-2 hrs High 

Beginner-Friendly Internal Clean: 

  • Firstly flip the laptop, remove all th bottom screws 8-12 and the store in a magnetic tray. 
  • Pry the panel gently with plastic spudger ,starts at hinges. 
  • Then importantly locate fan, blast the air ,holding fan blades to prevent spinning.  
  • Brush heatsink fins. Reassemble loosely first to test. 

Tip: Film the teardown in reverse for easy reassembly. 

Advanced: Thermal Paste – Fans Repasting Guide 

After 2-3 years, the factory’s thermal paste dries into a crusty barrier. Replaces it and then drops temperature dramatically but requires care even if not evenly applied this can cause hotspot. 

Thermal Paste Application Steps 

Now disassemble to expose CPU/GPU.then clean paste with alcohol-soaked swab until shiny copper. Just apply pea sized dot i center. Reinstall the heatsink,tigten cross-pattern which is not too tight. Then boost and monitor temps with HWMonitor. 

Paste Comparison Table 

Paste Type Price (4g) Temp Drop Ease of Use Longevity 
Stock (OEM) Free Baseline Easy 1-2 years 
Arctic MX-4 $7 -10-15°C Beginner 8 years 
Thermal Grizzly Kryonaut $15 -15-20°C Intermediate 5 years 
Liquid Metal (Conductonaut) $20 -25°C+ Expert only 3 years 

Warning: the liquid metal shorts circuits on aluminium dies stick to non- conductive for safety. 

Post-Cleaning Optimization and Testing for laptops 

Now reassemble and boot up. Then update BIOS/drivers via manufacture site.Run stress tests: 

  • Prime95/Cinebench: CPU heat check (aim <85°C). 
  • FurMark: GPU throttling test. 
  • CrystalDiskInfo: SSD health post-vibration. 

Then baseline your “before” stats with these tools. Which is expected to gain 15-30% better sustained performance. 

Maintenance Schedule Table 

Frequency Tasks 
Weekly Wipe exterior, clear keyboard 
Monthly Compressed air vents/fans 
6 Months Full internal dust removal 
2 Years Thermal paste replacement 

Safety Warnings and Common Mistakes 

  • Never: Use vacuum, WD-40, or run while cleaning internals. 
  • Warranty Check: Cleaning vents is fine; repasting may void unless DIY-approved. 
  • Laptop-Specific: MacBooks need pentalobe screws; gaming rigs have beefier coolers. 
  • If Stuck: Professional service ($50-100) beats bricking your $1500 machine. 

Mistakes like over-tightening screws or uneven paste lead to cracks go slow. 

Long-Term Habits for Peak Performance 

Integrate this clean laptop guide into your routine: 

Elevate laptops on a stand for better airflow. Furthermore, there is use in the dust-free Zones then try cleaning the desk weekly. Monitor with MSI there are after burner alerts at 90 degrees, also invest in cooling pads for heavy workloads. 

Conclusion  

To Conclude the gamers and creators renders faster in premiere. A 2023 MacBook cleaned today outperforms a dusty 2025 model. Here to be understood the dust removal is not glamorous but its the basic necessity and cheap to upgrade. So follow all the steps mentioned in this article and clean and see your laptops sprint. 

FAQS: 

1. How often should I clean my laptop internals? 

A: Every 3-6 months for dust removal,or if sooner the fans get loud, which indeed exceeds 85°C. 

2: What’s the safest way to remove dust from fans? 

A: Use short bursts of compressed air at a 45° angle meanwhile hold the fan blades to prevent spinning. 

3: Do I need to replace thermal paste during cleaning? 

A: Yes, every 2-3 years apply a pea-sized dot of Arctic MX-4 after cleaning old paste with isopropyl alcohol. 

4: What tools are essential for a clean laptop guide? 

A: Compressed air, microfiber brush, isopropyl alcohol wipes, anti-static wrist strap, and model-specific screwdrivers. 

5: How much performance gain can I expect after cleaning? 

A: 15-30% better cooling, quieter fans, and faster sustained speeds.

Nowadays in this digitalized world, so if the laptop is slow then it will directly effect productivity, it might be you are editing the documents, browsing the web or gaming. So, the most prominent thing is everyone should know how to speed up your laptop even if you’re using windows or macOS.  

This article provides clearly understand on the actionable performance tips actionable performance tips to optimize your device, which covers everything from managing storage and tweaking power settings to advanced tweaks. With step-by-step instructions for both operating systems, you’ll reclaim speed without needing expert skills. Expect noticeable improvements in boot times, app responsiveness, and overall efficiency aiming for a laptop that runs like new.By the end, you’ll have a toolkit of performance tips tailored to your OS, helping you speed up your laptop efficiently.  

These methods are safe, free, and reversible. Let’s dive into the article. 

Diagnose the Problem First 

Firstly, identify the bottlenecks and then think about how to fix them. Slowdown for the full storage, outdated software, or inefficient power settings. 

Quick Diagnostic Steps 

  • Check Resource Usage: On Windows, open Task Manager (Ctrl + Shift + Esc) to monitor CPU, RAM, and disk usage. On macOS, use Activity Monitor.  
  • Run Built-in Tools: Windows users, try the Performance Troubleshooter. (macOS offers First Aid in Disk Utility.  
  • Benchmark: make free use of tools like UserBenchmark (Windows) or Geekbench (both OS) for baselines. 

Essential Performance Tips: Manage Storage Effectively 

Storage is a prime reason for lagging. When your drive reaches 80-90% full, then the performance tanks due to limited virtual memory. 

Storage Optimization Table 

Tip Windows Steps macOS Steps Expected Impact 
Free Up Space Settings > System > Storage > Storage Sense (auto-delete temps). Use Disk Cleanup. Apple Menu > About This Mac > Storage > Manage (Optimize Storage, Empty Trash Automatically). +20-30% free space; faster app launches. 
Uninstall Unused Apps Settings > Apps > Apps & features > Sort by size. Applications folder > Drag to Trash > Empty Trash. Use App Cleaner for remnants. Reclaims GBs; reduces background processes. 
Move Files to Cloud/External OneDrive/Google Drive sync; External USB/SSD. iCloud Drive or external drive via Finder. Keeps local storage lean for speed. 
Enable Storage Sense Settings > System > Storage > Configure Storage Sense. N/A (use Manage Storage). Auto-maintains optimal storage. 

Set a goal for 20-30% free storage. Moreover, tools like CCleaner (Windows) or CleanMyMac (macOS) now automate this, but then stick it to builtins. 

Optimize Startup and Background Processes 

So many apps launch at boot , hogging RAM and CPU. Which streamlines this in which creates a core performance tip to speed up your laptops. 

Startup Management Table 

Category Windows macOS Pro Tip 
Disable Startup Items Task Manager > Startup tab > Disable non-essentials (e.g., Spotify). System Settings > General > Login Items > Remove. Cuts boot time by 30-60 seconds. 
Limit Background Apps Settings > Privacy > Background apps > Toggle off. Activity Monitor > CPU/Energy tab > Quit high-energy processes. Frees 1-2GB RAM instantly. 
Use Autoruns (Advanced) Download from Microsoft Sysinternals. N/A (use Launchpad tweaks). Granular control over hidden startups. 

On Windows 11, enable “Game Mode” in Settings > Gaming priority to foreground tasks. macOS users, turn off Visual Effects in System Settings > Accessibility > Display > Reduce Motion. 

Update Software and Drivers for Peak Performance 

Outdated systems are prone to bugs and miss out on optimizations, which is a simple yet powerful way to speed up your laptop.   

  • Windows:In settings there will be update for windows and check them and fullfil. next update drivers with the help of device manager or the GeForce Experience    
  • Now, in macOS, go to System Settings > General > Software Update. For Intel Macs, check the SMC/PRAM reset instructions (Apple Support guides).   

Install pending updates weekly. Use Driver Booster (Windows) or Driver Easy Sparingly Manual is safer. 

Tweak Power Settings for Better Speed 

Power settings directly impact the performance and also the balanced modes throttle CPU/GPU to save battery. 

Power Settings Optimization Table 

Setting Windows Steps macOS Steps Benefit 
High Performance Mode Settings > System > Power & battery > Power mode > Best performance. System Settings > Battery > Options > Low Power Mode (off); Energy Saver tweaks. Unlocks full CPU speed (+10-20% tasks). 
Battery Optimization Advanced Power Plan (Control Panel > Power Options > Create plan). Third-party like AlDente for charge limits. Prevents thermal slowdowns. 
Sleep/Hibernate Tweaks Power Options > Change plan settings > Adjust timeouts. Energy Saver > Adjust sliders. Faster wake-ups; less lag post-sleep. 

RAM and Virtual Memory Boosts 

Low RAM, under 8GB, forces swapping to disk, killing speed. Virtual memory helps but does not fix it entirely. 

  • Check RAM: Windows Task Manager > Performance; macOS About This Mac. 
  • Upgrade if Possible: 16GB minimum for modern use. Use Crucial Scanner for compatible sticks. 
OS Steps 
Windows System Properties > Advanced > Performance Settings > Advanced > Virtual memory > Custom size (1.5x RAM). 
macOS Auto-managed; no tweaks needed. 

Close tabs or the apps and now use browser extensions like The Great Suspender. 

Hardware Maintenance for Long-Term Speed 

Dust and wear cause throttling is the hardware-focused performance tip. 

  • Clean Internally: Use compressed air quarterly (powered off). 
  • SSD Upgrade: Swap HDD for NVMe SSD (e.g., Samsung 970 EVO). Clone with Macrium Reflect (Windows) or Carbon Copy Cloner (macOS). 
  • Battery Health: Windows: powercfg /batteryreport; macOS: System Settings > Battery. 
Upgrade Cost Speed Gain 
SSD (500GB) $40 5-10x boot/app speed. 
RAM (16GB) $50 Multitasking heaven. 
Cooling Pad $20 Reduces throttling. 

Advanced Performance Tips 

  • Defragment (HDD only): Windows: Optimize Drives tool. SSDs: TRIM enabled automatically. 
  • Malware Scan: Windows Defender full scan; macOS: Malwarebytes. 
  • Browser Cleanup: Clear cache; switch to Edge/Chrome with hardware acceleration. 

Disable Animations: 

OS Path 
Windows System > About > Advanced > Performance Options > Adjust for best performance. 
macOS System Settings > Accessibility > Display > Reduce transparency/motion. 

For gamers: Update GPU drivers, enable Resizable BAR (BIOS). 

Security and Maintenance Schedule 

Secure systems run faster there are no resource-draining threats. 

Weekly Routine: 

  • Update everything. 
  • Clear temps/storage. 
  • Scan for malware. 

Monthly: 

  • Check power settings. 
  • Review startup. 
  • Backup (external/cloud). 

Conclusion: Your Faster Laptop Awaits 

To Conclude, implementing these performance tips will gradually help in speeding up your laptop, whether on Windows or macOS. Your first prioritize should be storage cleanup, power settings tweaks, and updates for quick wins, then go to the hardware. Track progress with benchmarks expects 2-5x improvements in daily tasks. If issues raise, then look on to the professional diagnostics. 

FAQs 

1. Why is my laptop so slow, and what will be the first step to speed up laptop? 

Laptops usually slow down because of full storage, there are so many startup apps, outdated software. Firstly start diagnosing via task manager , check if the storage is full like 80%, or CPU/RAM is maxed. Then try and free up the space and remove unnecessary things and then start immediately 

2. How to optimize storage to improve performance on Windows ? 

On Windows go to settings then system and then storage and enable storage sense to auto delete temps. Aim for 20-30% free space; this performance tip can boost app speeds by 20-30% by reducing disk thrashing. 

3. What power settings can speed up my laptop without draining the battery too fast?  

Switch to “Best Performance” mode: Windows (Settings > System > Power & battery > Power mode) then go to macOS (System Settings > Battery > turn off Low Power Mode). then plug in for max CPU which enhances the speed and sleep timeout. The entire process balances the modes of battery life. 

4. Should I upgrade hardware to speed up my laptop, and what gives the biggest bang for the buck?  

Yes, if software falls short. Prioritize an SSD upgrade (5-10x faster boots) over RAM. Use Crucial Scanner for compatible options, clone your drive with Macrium Reflect (Windows) or Carbon Copy Cloner (macOS). A 500GB SSD (~$40). 

5. How often should I maintain my laptop for sustained speed, and what’s a simple routine? 

Always perform quick checks weekly, update the software, clear storage and review power settings, and clean the malware. This ensures one’s laptop to stay optimized and prevents gradual slowdowns.

Your favorite album starts running through your headphones that hugs your ears just at you space like your home or office space and the audio system paints a sound stage in so vibrant way which feels very kick.so here is the actual miracle of dialed-in-audio.  But between jargon-filled specs, room gremlins, and endless gear options, many stall out. 

This audio setup article cuts through noise and provides understanding about how to select headphones, perfect headphones setup and EQ calibration, optimizing speaker placement, and building home audio systems that can be delivered every other time.  taking from budget tweaks for the calibrations  tothe step by step word flows, tool recommendations and a glance for mastery. 

So, for understanding this there is no requirement of any engineering degree, only the willingness to listen is required. So, let’s dive into the article. 

Section Focus Area Key Topics Covered Primary Tools/Steps Expected Outcome 
Headphones How to Choose & Setup Use case matching, impedance/sensitivity, comfort testing Reference tracks (Billie Eilish, Steely Dan), DAC/amp chain Personalized sound that fits your lifestyle 
EQ Calibration Science Meets Ears Frequency sweeps, parametric filters, Harman curve targeting UMIK-1 mic, REW software, AutoEQ presets Smooth, balanced response—no boomy bass or harsh highs 
Speaker Placement Geometry of Sound Equilateral triangle, toe-in angles, room-specific positioning Mirror trick, bass traps, sub crawl method Holographic imaging & tight bass 
Home Audio System Building Blocks Signal chain, budget ladders, multi-room integration Topping DACs, KEF speakers, Dirac Live Reliable, scalable setup from $400 to $5k+ 
Quick Wins Troubleshooting & Maintenance Common fixes, reference tracks, yearly recalibration Placement tweaks, EQ tables, cleaning routine Pro-level sound without constant frustration 

Now use this tabular format as your roadmap like if you want you can print it, pin it. Each section/stream builds the last for a complete audio setup article. 

1. How to Choose Headphones: Match Gear to Your World 

First and foremost, things come with the headphone setup selection. Always skip impulse buys accordingly and get aligned with your lifestyle, budget and as well as goals. Here is the exact process for mastering the headphone setup and also the sound perfection. 

Mastering Headphone Setup: From Selection to Sound Perfection 

Headphones are your personal audio gateway which provide portable, private, and potent. Which create indeed a private space, but a mismatched pair or sloppy headphone setup can turn bliss into frustration. Firstly, how to select the headphones by aligning with your goals.  

Defining Your Needs. Firstly, ask, “What’s your priority? For traveling or workouts, just select closed-back over-ears like the Sony WH-1000XM5, which blocks out the noise with active noise cancellation and delivers punchy noise via Bluetooth codecs like LDAC. Moreover, it’s like critical thinking as it’s like Open-back models like the Sennheiser HD 800 S offer airy staging and neutral response, unique mixes tracks. For gamers, the priority is the planar for magnetic drivers for pinpoint imaging. 

Is the Budget under $100? True wireless Anker Sound core Liberty 4 NC above its weight. 

Key Decision Factors: 

Category Use Case Top Picks (2025) Price Range Key Specs 
Closed-Back Commuting, Travel, Gaming Sony WH-1000XM6, Bose QC Ultra $300-450 ANC, LDAC, 32Ω 
Open-Back Studio, Home Listening Sennheiser HD 800 S, HiFiMan Arya Organic $900-1,800 300Ω+, Airy staging 
Planar Magnetic Gaming, Detail Work Audeze LCD-GX, Hifiman Sundara $400-900 Fast transients, 18Ω 
Budget Wireless Daily Driver Anker Soundcore Space A40, SoundPEATS Capsule3 Pro $50-100 aptX Adaptive, IPX5 

2. Headphone Setup and Basic EQ Guide 

Chain System: Source → DAC/Amp → Headphones. For phones, add a dongle DAC (iFi Go Blu, $200).  

Once it gets to be selected the chain like the source (DAC) then the Amp and the headphones. try to use balanced cables for less noise,Most importantly comfort matters which clearly adjusts the clamp force just swaps the pads , and aim for 95-105 dB to avoid disturbances. here comes the wireless which are high-res codecs and keeps the firmware update,for the wired purists, a dongle DAC like AudioQuest DragonFly Cobalt adds finesse.  

Headphone EQ Calibration Workflow:  

  • The baseline listens, no EQand the note flaws 
  •  The measurement is like free tools  HeSuVi or AutoEQ database.  
  •  Apply the parametric EQ to get a target harman curve. 

Common Headphone EQ Presets Table: 

Headphone Model Bass Boost Mid Dip Treble Cut Preamp Gain Tool 
Sony WH-1000XM5 +3dB @60Hz (Q=1.0) None -2dB @6kHz (Q=2) -4dB AutoEQ 
Audio-Technica ATH-M50x +2dB @80Hz -1dB @2kHz None -2dB Oratory1990 
Beyerdynamic DT 990 None None -3dB @8kHz (Q=3) -3dB Peace EQ 
Sennheiser HD 560S +4dB @40Hz None -1dB @10kHz -5dB Equalizer APO 

Tip: Always Cut before boosting. Using linear phase for timing preservation will benefit. A/B with pink noise tracks. 

3. EQ Calibration Deep Dive: Science Meets Ears 

EQ calibration always shows like a moment where one finally gets to hear guitar after months of it sounding off,where evrything feels too good just comes into a place . its not that audiophile has done some miracle but its the science which is fixing quirks in your headphones or speakers that creates a sound called boomy ,shrill or flat. Moreover its all about science which is fixing the quirks in your headphones or speakers that make music sound boomy,shrill or flat.your room throws bass waves around like a kid with a ball,creating a nasty peaks at 80HZ or so,which where the headphones drivers might screams too loud at 10KHz. 

These grabs the basics like a soild mic like the UMIK-1 , free REW Software on your laptop, and pink noise blasting from youtube. Futhermore this sets the mic at ear height on a tripod no wobbly phone.Hits record, from 29HZ to 20 HZ three times,boom ,REW spits out a graph shows your systems . This huge spike at 120HZ? Room mode from your walls being very near which creats a null dipping low? So there is a cancellation mode from bad speaker angles. 

Full Calibration Process: 

Step Action Tool Target 
1. Setup Mic at ear height, tripod UMIK-1 + REW Quiet room 
2. Measure 20Hz-20kHz sweep x3 Pink noise generator Raw frequency response 
3. Analyze Identify peaks (>+6dB), nulls (>-10dB) REW waterfall plot Room modes (40, 80, 160Hz) 
4. Filter Parametric EQ: Cut peaks first Roon/DSP Harman or flat curve 
5. Verify A/B blind tests Reference tracks Transparent sound 

There is a math behind the room axial modes calculate as=c2Lf=2Lc, where c=343 m/sc=343m/s (sound speed), L=L= room dimension. 10x12ft room? First mode ~28Hz. 

4. Speaker Placement: The Geometry of Great Sound 

There is a speaker placement of trumps gear 80% of the time.so , there are so many people wasting their time and money staring at gorgeous speakers that just sounds like filmy whenever needed they can be fit just right up against wall, shelves wobbling. furthermore speaker placement is not just a guess, its all about a geometry mix with all the trial-error which trains ones ears, so get trained and one day you will enter into holographic stage where guitar floats towards left, vocals dead at the center, so now altogether its a mess, which should be handled. Tweeters at height tries grabs a stand if the shelves too low or too high. so if the room gets to be tiny then the bass traps from hell,piling up low towards the end like a subwoofer on steriods. more bigger spaces? Floorstanders can hug the walls which are 3-4 feet along moreover crank a 40HZ tone, which crawls around all the four,so there is always a sweet spot to put, likewise in my old apartment there is a sweet spot its under couch.keep in note that reflection kills magically too.  

One can test it in live the queue Pink Floyd’s “Time” for soundstage width,Nudge an inch, listen again small moves yield big wins. i have almost transformed $300 Edifiers into “whoa” territory just by positioning them altogether. 

Optimal Placement by Room Size: 

Room Size Speaker Type Wall Distance Toe-In Sub Position 
Small (10x12ft) Bookshelf (KEF LS50 Meta) 2-3ft 30° Front corner 
Medium (12x16ft) Floorstanding (Wharfedale Linton) 3-4ft 25° Crawl method 
Large (16x20ft+) Tower + Sub (SVS Ultra Evolution) 4-6ft 20° 1/4 wall space 
HT 5.1 Mains + Center Per Dolby guide 30°/110° Dual subs 

5. Home Audio System Building Blocks 

Man, building a home audio system feels like stacking Legos as a kid—you start with a wobbly pile, but once the blocks snap right, it stands tall and badass. Skip the hype; it’s about smart blocks in the right order: source, DAC, amp, speakers, room tweaks. I’ve pieced together setups from garage sale scraps to full-blown living room beasts, and the magic’s in synergy, not splashing cash on snake oil cables. 

Foundation: Signal Chain. Kick off with a killer source, your phone’s fine for starters, but level up to a streamer like the WiiM Pro Plus ($150). It pulls Tidal or Qobuz hi-res streams without hiccups. Next, DAC (digital-to-analog converter) turns bits into waves. Topping E30 II ($130) punches way above weight, cleaner than most laptops. Feed that to a preamp or integrated amp like Cambridge CXA81 ($1,200), which juices speakers without coloring sound. Power amp if you’re going to be active speakers. Endgame: speakers (KEF Q350 bookshelves, $500/pr) and maybe a REL T/5x sub ($650) for gut-punch lows. 

Don’t sleep on power: clean outlets (surge protector, not extension cords) and stands (IsoAcoustics puck ’em up). Multi-room? Sonos Era 300 or WiiM links zones seamlesslycalibrate each with Trueplay phone mic. 

Pitfalls I Learned Kicking Myself: Matched impedance 8-ohm speakers need stable amps. Volume control: aim 75-85dB peaks. Vinyl heads, Pro-Ject Debut Carbon EVO ($600) with exact cartridge alignment. Streaming? Roon ($15/month) ties it all, EQ per zone. 

Test blocks together: Rip “Hotel California” Eagles guitars should pan wide, drums lock center. My breakthrough was ditching laptop audio for a $100 DAC; mids bloomed overnight. Scale slow: Nail placement and EQ before chasing bling. 

Budget-to-Bling Ladder: 

Level Total Spend Core Components Sound Quality 
Starter $400 Edifier R1280T + EQ app Good for desk 
Serious $1,200 KEF Q350 + Topping DX7 Pro+ + UMIK-1 Audiophile entry 
Elite $5,000+ Focal Aria K2 + miniDSP Flex + Dirac Reference level 

Signal Chain system is Streamer (Bluesound Node) → DAC → Preamp → Power Amp → Speakers → Room Correction. 

6. Troubleshooting and Maintenance Table 

Common Issues Quick-Fix: 

Problem Likely Cause Solution Priority 
Boomy bass Corner placement Move 1-2ft from walls High 
Harsh treble Untreated reflections Sidewall panels High 
Weak imaging Misaligned toe-in 30° toward ears Medium 
Thin mids Over-EQ’d highs Reset to Harman curve Medium 
Distortion Clipping Reduce gain -3dB Urgent 

Maintenance: Clean drivers monthly, recalibrate yearly or post-redecorating. 

Reference Tracks for Testing: 

Genre Track Tests 
Bass Daft Punk “Get Lucky” Low-end control 
Mids Steely Dan “Hey Nineteen” Vocal clarity 
Treble Miles Davis “So What” Cymbal air/decay 
Imaging Pink Floyd “Time” Soundstage width 

Conclusion 

To conclude, this audio setup article guidesto conquer headphone setup, master EQ calibration, nail speaker placement, and build home audio that rivals studios. Here are the tabular forms provided for the guidelines. Workflows enables on repeat success. Start it as simple EQ for your current headphones using the presets above then it scales up. According to the emotions hitting hard and the details popping up rediscovering the music again and again.  

Your setup will evolve you, but these principles endure respectively. So, enjoy your journey. 

FAQS 

1. How do I choose headphones?  

Firstly know the purpose and then use the closed back or the open-back and try checking impedance ,and select one which is undr 300g and bit sensitive. for instance, if its for travelling use Sony XM6. 

2. Best EQ calibration method?  

Measure with UMIK-1 + REW, cut the peaks first to the Harman curve, and specify all the small changes via A/B tests under 6dB.  

3. Optimal speaker placement?  

It should be an equilateral triangle,which is apart 6-10ft and 2-4ft from walls it should be placed 20-30 degrees toe-in. 

4. Quick fixes for common issues?  

its now the boom which is move the walls, accordingly,add the reflection panels ,distortion, which cuts to gain 3dB,  

5. Starter budget setup?  

Budget can be $400.

In the recent evolving days in the world of connected living. Automation, security and setup serves you an obsolute roadmap to master smart home setup. Incase if you are looking for the budget smart home project or if one is looking deep down into the automation article, then this is the one article which gives you a glance on the process, from selecting compatible devices to creating seamless Alexa/Google routines. With the rise of the possible standards like the matter and thread, whereas now the modern homes are integrating lighting, locks, theromats, and cameras effortlessly, which changes everyday lifestyle into intuitive, and voice activated ensures the comfort and efficiency. 

This article prioritizes the practicality of automation, robust security measures, and scalable setups tailored to any lifestyle. Explore tabular breakdowns of components, budget strategies, and troubleshooting tips designed to future-proof your space against emerging tech trends.  

Getting Started with Smart Home Setup 

Always smart home setup with assessing one’s requirements on budget. Select a central hub like that amazon echo, google nest, or the apple homepod to connects devices via internet or emerging standards like Matter and Thread for better interoperability. There are required steps which ensure strong wifi coverage and downloading all the apps. Start small with smart plugs or bulbs to test compatibility before expanding.  

Core Components of Home Automation Guide 

A home automation article emphasizes hubs and protocols, and devices working in unison. Moreover, there is the issue on commands and as well as the networks will be depending on the devices which executes like dimming lights at dusk.  

Most popular protocols include Zigbee for low-power mesh networks and Matter for cross-brand compatibility, reducing vendor lock-in. Mostly the Thread enhances Matter with reliable, low-latency connections ideal for battery devices. Interestingly there is the voice control via Alexa or Google Assistant which makes routine flexible, for instance like a “good night” to lock the doors.  

Component Description Examples Protocols Supported 
Hub Central brain for commands Google Nest Hub, Amazon Echo Show Wi-Fi, Zigbee, Matter 
Network Communication backbone Mesh Wi-Fi routers Thread, Z-Wave, Bluetooth 
Devices Action executors Smart bulbs, locks Zigbee, Wi-Fi  

Budget Smart Home Strategies 

So here comes the budget smart home setups ensuring the high impact on low-cost devices.furtherly the smart plugs turn the existing appliances smart for price under $15 each like the automating fans or lamps. There is a option of selecting the matter certified gear to future proof investments, starting with EVe which is compatible for Alexa, google and home kit. 

Layer in open-source options like Home Assistant on a Raspberry Pi for under $100, offering unlimited custom automations without subscriptions. 

Budget Tier Starter Kit Cost Key Devices Savings Tips 
Under $50 $30-50 Plugs, basic bulbs Use Wi-Fi only, skip hubs 
$100-200 $100-200 Hub + sensors Matter for multi-platform 
$300+ $300+ Full room kit Open source for expansion  

Automation Essentials: Alexa and Google Routines 

Home automation is something which automates your daily routine, it’s like numerous actions can be triggered from just few phrases like “Movie time “to on or off the light and close the blind folds. 

Furthermore, Google routines excel in context aware triggers, which is adjusted based on the location or turn AC if arriving home 

Advanced setups use conditions: If motion detected after 10 PM and no one’s home, activate security mode.  

  • Set sunrise lights: Gradually brighten bulbs via app schedules. 
  • Energy savings: Thermostat lowers 4°F when away, saving 10-15% on bills. 
  • Morning routine: Coffee brews, news plays, shades rise at 7 AM. 

Matter and Thread Explained 

Matter and thread helps in revolutionizing smart home setup by the communication. Also, the matter is an IP–based protocol which ensures devices from Philips Hue and the switchbot work seemlessly. 

Thread provides the mesh backbone, extending range without hubs straining Wi-Fi, perfect for large homes.  

Adopting these cuts setup time: Scan QR code, pair instantly across ecosystems. 
 

Feature Matter Thread Benefits 
Compatibility Universal standard Low-power mesh Cross-brand control 
Range Hub-dependent 30-100m per hop Reliable in big spaces 
Power Use Varies Ultra-low Battery life years youtube 

Security in Smart Homes 

Always smart homes promise the convience for the people on the voice activated lights and the automated thermostats, and also the remote door locks, there is no security risk at all. Just last year, reports surfaced of vulnerabilities in popular smart bulbs that let intruders listen in on conversations through built-in mics to imagine that happening while you’re discussing dinner plans. The interconnected nature of these devices means one breach can cascade, controlling everything from your garage to your baby monitor. 

To fight back, start with the basics: use strong, unique passwords for every device and enable two-factor authentication wherever possible. Regularly update software, as manufacturers often patch flaws quietly in the background think of it like changing locks after a break-in. Network segmentation helps too; set up a guest Wi-Fi for IoT gadgets so if your smart fridge gets compromised, it doesn’t touch your laptop. Tools like VPNs and firewalls add extra layers, and apps from companies like Bitdefender scan for weak spots in your setup. 

Looking ahead, the future of smart home security lies in standards like Matter, which aims to make devices interoperable and more secure out of the box. Privacy-focused brands are rising, emphasizing end-to-end encryption and minimal data collection. Ultimately, stay vigilant and treat your smart home like a real one, with locks, alarms, and a healthy dose of skepticism toward flashy new gadgets. Balance the wow factor with solid protection, and you’ll sleep soundly, even if your lights don’t. 

Security Device Key Features Integration Price Range 
Cameras 2K video, AI detection Alexa, Google $40-150 
Locks Auto-lock, PIN codes Matter-compatible $100-250 
Sensors Door/window alerts Z-Wave hubs $20-50  

Step-by-Step Smart Home Setup 

Follow this home automation guide for foolproof installation. 

  1. Map your space: Identify Wi-Fi dead zones, add extenders. 
  1. Pick ecosystem: Alexa for affordability, Google for AI smarts. 
  1. Install hub: Plug in, connect to Wi-Fi, link accounts. 
  1. Add devices: Scan codes or use Bluetooth pairing.  
  1. Create routines: Test simple ones first, like timed lights. 
  1. Secure it: Update firmware, use guest networks. 

Test with IFTTT for cross-platform automation if mixing brands.  

Advanced Automation Techniques 

With the introduction of advanced automated technology, today’s manufacturing sector is experiencing a rapid transformation, going beyond traditional robotic systems used in assembly line production. For instance, artificial intelligence (AI) and machine learning systems assist in developing ‘collaborative robots’, or ‘cobots’, which work alongside human workforce members to create an efficient workplace through the integration of sensing technology to check where the other person is located, thus predicting movements and preventing collisions between cobots and the human workers. 

Universal Robots pioneered this technology within the manufacturing sector by automating operations that reduced the time required to set up a manufacturing process from several hours to just minutes while simultaneously increasing the precision of tasks such as welding or handling highly delicate electrical devices. The advantages of working with cobots also include the ability to leverage information collected via realtime analytics to continuously improve upon the delivery methods as part of adapting to changing operational conditions (e.g., products undergoing changes to design specifications) and to re-establish continuity when supply chain disruptions occur. 

The development of predictive maintenance using machine learning has taken automation one step further by using algorithms to analyze the machine-generated sensor data to identify when equipment is likely to fail before that occurs, rather than simply responding after equipment has failed and has already stopped production on the factory floor. Manufacturers are now utilizing devices such as Siemens’ MindSphere to identify wear patterns on motors or belts several days before experiencing a failure. This new approach has resulted in a reduction of downtime of as much as 50% in some industries, allowing manufacturing engineers the opportunity to direct their time and energy toward innovative designs instead of constantly “fire fighting”. In conjunction with edge computing which allows IoT streams to be produced and analyzed without overloading central systems during the process, predictive maintenance has stretched the capabilities of highly connected factories enabling them to become a reality. 

The true revolutionary breakthrough is the implementation of digital twins-tools through digital-twin technology. The integration of digital-twin technology with the tools referenced herein will allow for faster experimentation of possible production scenarios through the use of digital twins to assess all aspects of a factory’s operation over time. For example, Tesla’s factories perform many thousands of tests and experiments to optimize every step of the production process from assembling batteries, painting, and inspecting finished products before shipping out to customers. As 5G becomes widely available, this low-latency connectivity will enable real-time coordination between multiple locations and therefore allow for increased flexibility, resiliency, and scalability within the automation landscape and allow for new opportunities for businesses to maintain a competitive edge in an evolving global economy. 

Troubleshooting Common Issues  

When your computer freezes up mid-task, the first thing to check is the basics: Is it overheating? Dust buildup in the vents can turn your machine into a reluctant toaster. Grab a can of compressed air and give those fans a gentle clean. I’ve saved more late-night deadlines this way than I can count. If that doesn’t do the trick, force a restart by holding the power button, but not before saving any open work. Next, boot into safe mode to see if a rogue app or driver is the culprit; from there, uninstall recent additions and run a quick antivirus scan. Patience is key rushing through steps often leads back to square one. 

Network glitches hit hardest when you’re streaming or uploading files, leaving you staring at that endless buffering wheel. Start by restarting your router unplug it for a full 30 seconds, as this resets the connection handshake. Check if other devices on the network are hogging bandwidth; pause those smart fridge updates if needed. If Wi-Fi is spotty, switch to Ethernet for a stable line, or tweak your router’s channel settings via its admin page to dodge interference from neighbors’ signals. For deeper issues, log into your ISP account online and test for outages sometimes the problem miles away from your setup. 

Printer woes are the ultimate patience tester, especially when that “out of paper” error mocks your full tray. Power cycle everything: printer, computer, and even the outlet. Ensure drivers are up to date by heading to the manufacturer’s site generic ones from Windows often fall short. Clear any paper jams thoroughly, checking rollers for gunk, and align print heads if the output looks streaky. If it’s stubbornly offline, set it up as a new device; old configurations can linger like bad habits. A little trial and error goes a long way here, and you’ll be back to crisp prints in no time. 

Issue Cause Fix 
Disconnects Weak signal Add mesh nodes 
Slow response Overloaded hub Upgrade or segment 
No integration Protocol mismatch Use Matter/Thread  

Conclusion: 

Integrating a smart home system is more than adding some advanced electronic devices within your home. It’s creating a space that anticipates your everyday needs and fits seamlessly into the overall flow of your life. You may want to automate all the different aspects of your home, such as when to turn on the lights with your morning cup of coffee, or having a secure system in place to ensure you feel comfortable leaving your home unattended. All the examples presented allow for creating an intuitive living space, as well as easy-to-use applications, inexpensive hubs, and expandable solutions. That means that anyone, regardless of experience level, can participate in creating such a space. 

By entering into the world of smart homes, you’ll gain access to increased efficiency, a more secure way of protecting your family, and the thrill of being able to connect with the latest technology easily. By taking steps to protect your family, reduce your household chores, and create an overall streamlined living experience, you can take advantage of a life that is free from the clutter of everyday tasks. Explore, experiment, and enjoy this new lifestyle opportunity! The future is now at your fingertips! 

FAQS 

1.What is the first step in smart home setup?  

Begin by evaluating your Wi-Fi strength and choosing a central hub like Amazon Echo or Google Nest Hub, which supports protocols such as Zigbee, Z-Wave, or Matter for device compatibility. Download the companion app and start with basic devices like smart plugs to test integration before scaling up.  

2. How do I set up a basic smart home automation hub?  

Start by choosing a compatible hub, like Google Home or Amazon Echo, connect it to your Wi-Fi, and pair devices, such as lights or thermostats, through the app. Test routines like “goodnight” mode to automate shutdowns, ensuring all components sync seamlessly for daily use.   

3. What are the best security features for beginners?  

Key features include motion-detecting cameras, door/window sensors, and geofencing that sends alerts when you leave home. Smart locks with temporary codes provide access control, while integration with sirens effectively deters intruders.  

4. Can smart home systems integrate automation and security?  

Yes, platforms like Samsung SmartThings or Hubitat link security cameras with automations, like turning on lights during the night. This literally creates the layered protection that streamlines efficiency and safety. 

5. What should I consider for smart home setup costs?  

Entry-level setups start at $100-300 for a hub, basic sensors, and one camera, with pro monitoring adding $10-30 monthly. Factor in Wi-Fi strength and compatibility to avoid hidden expenses, prioritizing scalable systems for future expansions

Shopping for gifts for gamers is challenging. On the one hand, there are so many cool games, consoles, and accessories to choose from. But that’s also the tricky part: There is so much gaming-related merchandise to choose from, to the point where you might feel under-leveled for the “simple” task of picking that just-right gift, especially if they are a long-time player who already has all of the obvious gaming gear.  

To help you on your side quest to find a respectable present for someone who loves video games, we’ve compiled a list of affordable gifts. 

Affordable Gaming Accessories to Gift  

A Custom Keycap 

A custom keycap adds some extra vibe to any standard gaming keyboard. Drop has an ever-changing selection of limited-edition artisan keycaps (including space bars) from respected brands like Craftkey and Dwarf Factory, ranging from $20 to $65. The “Lord of the Rings” collection is kind of a must-have for any gamers. 

The LEGO Super Mario Game Boy 

Some version of the humble Game Boy likely has a special place in the heart of any ’90s or early 2000s gamers. And LEGO and Nintendo linked up just in time to give you the perfect gift idea: The LEGO version of the very first Game Boy. It is a 1:1 scale replica that features interchangeable lenticular screens and brick-built Game Paks. 

Backbone One Mobile Gaming Controller 

Are you gifting someone who loves iPhone gaming? The Backbone One plugs directly into the iPhone, so it works just like a handheld gaming console. It gives mobile gamers two analog sticks and plenty of buttons with an awesome built-in interface. Gamers can stream modern console games via the cloud, or use an Apple Arcade subscription to game. You can opt for something of the limited-edition variety, like their recent Death Standing 2 controller and exclusive collaboration with Kith.  

LEGO Super Mario Game Boy 

This Lego set is modeled after the iconic O.G. Game Boy handheld console. The 421-piece set is built to the exact dimensions of the original device and features all of the familiar controls, interchangeable Game Paks, and a stand to proudly display your work of art. 

Marvel Cosmic Invasion  

Just released on Dec. 1, 2025, “Marvel Cosmic Invasion” is hot off the press and an imminent staple for any Marvel head. It’s a nostalgic nod to the classic heroes of weekend morning cartoons, complete with delicious retro visuals. It is compatible for Xbox, PlayStation, Nintendo Switch and Switch 2. 

The ‘Video Game of the Year’ Book 

Written by Jordan Minor, senior analyst at our sister site PCMag, “VGOY” dissects the most influential titles across 40 years of gaming history. (Spoiler: Something managed to beat out “Breath of the Wild” for 2017’s slot.) Colorful illustrations and over 75 guest blurbs supplement Minor’s voicey and thoughtful essays 

Gunnar Gaming and Computer Glasses 

Spending too much time staring at a screen leads to eye fatigue and poor sleep because of the blue light. With these doctor-recommended blue light blocking glasses, enjoy a bit more time adventuring without all of the eye stress, especially if you also spend the rest of the day working at a screen. Gunnar offers a variety of styles and tint types, and thanks to the glasses’ low color distortion, viewing quality remains true to color and quality, too. 

Arcade Classics Pac-Man – Retro Mini Arcade Game 

Pac-Man fever lives on in the form of this small arcade cabinet. Less than six inches tall, this micro Pac-Man machine actually works just as its bigger arcade brother would, with the graphics, sounds, and authentic cabinet art you remember from the ’80s. 

CushZone Foot Rest 

Long hours spent gaming occasionally end up leaving you feeling sore, but this foot rest provides a nice spot for a gamer to improve comfort during and after long gaming sessions. The height adjusts up to 6 inches, and it even works as an under-knee support if desired. We’re playing the long game here, folks. 

Solidee LED Dimmable Neon Signs 

Many gamer rooms can benefit from thematic decorations that really sell the vibe. That’s where Solidee’s neon controller sign comes in. It provides a splash of color and indirect light to your gaming den. It’s easy to hang and comes with multiple brightness settings to ensure it fits into any room and any lighting conditions. It’s also not bad to have some additional light for marathon gaming, especially when you’ve totally lost track of time. 

Logitech G309 Lightspeed Wireless Gaming Mouse 

The new Lightspeed G309 is only $30 more than the G305, but it offers plenty of reasons to upgrade. There’s the inclusion of Logitech’s latest Hero 25K sensor and hybrid optical switches, plus it only weighs 86 grams and can last about 270 hours on a single AA battery. All of those features make the G309 a great gaming mouse that is also great for regular laptop use 

Hitscan Hyperlight 

If you want a mouse for someone who plays more competitive games, try the Hitscan Hyperlight. As we note in our guide to the best gaming mice, it has a sturdy, minimalist design and a safe shape that should fit most small to medium-sized hands comfortably. Sensor performance is effectively flawless, and the whole thing weighs just 41 grams, well below a device like the Logitech G309. Its optical switches provide a lovely bounce to each click, plus they should remain durable over time. 

Gaming Consoles for Gift 

Nintendo Switch 2 

With upgraded battery life, crisp HD resolution, and enhanced Joy-Con controllers, Nintendo Switch 2 provides the perfect hybrid gaming experience. Equipped with versatile play modes (TV, tabletop, and handheld), it is ideal for gaming on the go or at home. Built-in Wi-Fi, expandable storage, and exclusive titles like Mario Kart and Zelda also boost the excitement. If you’re looking for the ultimate balance between portability and performance, Nintendo Switch 2 is your go-to console this festive season; simply perfect for solo missions, family fun, or multiplayer battles. 

Sony PlayStation 5 Gaming Console (Slim) 

With its thinner and compact design, PS5 delivers impressive performance, thanks to ultra-fast SSD load times, ray-traced graphics, and haptic DualSense feedback. This gaming console delivers an immersive gaming experience in your living room, offering 4K visuals and a growing library of exclusive titles. If you want flagship PlayStation power in a space-friendly package, this is the one to buy right away. From new gamers to PS veterans, everyone will surely love discounts and bundled deals during the Amazon Festival. 

Xbox Series S Video Game Console 

Designed for the next generation of gaming, this sleek, all-digital console delivers ray tracing, 120fps support, and ultra-fast load times using its custom SSD. With full integration into Xbox Game Pass, users get instant access to hundreds of games and enjoy first‑party releases from day one. If you are looking for high-end performance on a modest budget, Series S is a go-to option. It is ideal for gamers who prefer downloadable libraries over physical discs.  

Nintendo Switch 2 Standard Edition  

With vibrant aesthetics and next-generation performance, this gaming console offers seamless transitions between handheld, docked, and tabletop modes. Sharper visuals and upgraded processing power are added benefits. If you want a console that is both fun to use and visually exciting, this edition hits the sweet spot. The combination of upgraded internals and impressive design makes it a standout choice for both casual and serious gamers, especially when festival discounts are available. 

Nintendo Switch OLED Gaming Console White 

With its 7‑inch OLED screen, Nintendo Switch OLED (White) provides deeper blacks and sharper visuals. Additionally, the gaming console features an adjustable wide kickstand, enhanced audio for tabletop mode, and 64 GB of internal storage, all packaged in a sleek, white design that stands out. The Switch ecosystem enthusiasts receive a fascinating visual upgrade with this OLED model. 

Final Thoughts  

Beyond mere entertainment, gaming also fosters a sense of community, connecting people with diverse backgrounds through shared experiences. With more people playing games than ever before, many non-gamers scratch their heads at what gifts to buy their gaming family and friends. Since gaming is often a highly specialized hobby, with games and gear costing a pretty penny, it’s important to ensure you buy something the gamers in your life want and will use.  

FAQs 

1. What should I gift a casual gamer at an affordable budget? 

Casual gamers appreciate comfort-focused gifts like ergonomic controllers, wireless headsets, or simple gaming accessories. 

2. How do I choose the right gift for a gamer? 

Consider their gaming platform, favorite genres, setup space, and whether they prefer competitive or casual gaming experiences. 

3. Are gaming accessories under $50 worth buying as gifts? 

Yes, many gaming accessories under $50 offer great performance and enhance the gaming experience without breaking the budget. 

4. Can I find useful gaming gifts under $50 for kids? 

Yes, kid-friendly gaming gifts under $50 include fun gaming headsets, LED lights, and game storage solutions. 

5. What are unique gaming gift ideas under $50? 

Unique picks under $50 include novelty gaming mugs, themed posters, keycap sets, and game art deco lights.

While Microsoft is being criticized for adding AI to Windows 11, the company promises a new Performance Fundamentals philosophy for the next year that aims to make gaming faster by optimizing how your PC behaves. 

Windows has had a dedicated Game Mode for several years now, but it didn’t make much of a difference in gaming performance, despite Microsoft saying that it turns things off in the background while you game. 

Let’s take a look at the best ways to optimize Windows for gaming. 

Enable Game Mode 

Microsoft has developed a Game Mode option for Windows 11 to optimize your computer experience when playing games. By utilizing Game Mode, Windows 11 can prioritize the game files associated with each game and lower the chance of being interrupted from another program running in the background. 

Most likely, Game Mode is already automatically turned ON when you install Windows 11. So check its status (either ON or OFF) and also use the steps below to enable Game Mode if it happens to be turned off. 

  • Open Settings. 
  • Click on Gaming. 
  • Click the Game Mode page on the right side. 
  • Turn on the Game Mode toggle switch. 

Your performance and experience will differ from system to system, as well as from game to game, when performing these tasks. However, using the game mode option does provide benefits, especially for systems that may be less capable of running other applications while gaming. 

Disable Memory Integrity 

According to Microsoft, if you’re noticing performance issues while playing games on Windows 11, this can be due to the Memory Integrity and Virtual Machine Platform security features. 

When optimizing your computer for gaming performance, it’s recommended to turn off this feature and then turn it back on after completing your gaming session. 

To disable Memory Integrity on Windows 11, use these steps: 

  • Open Windows Security. 
  • Click on Device Security. 
  • Click the “Core isolation details” option on the right. 
  • (Option 2) Turn on the Memory Integrity toggle switch to enable the feature. 
  • Restart the computer. 

Once you’re done playing games, Microsoft recommends re-enabling the feature 

Disable Virtual Machine Platform 

To turn off virtualization on Windows 11, use these steps: 

  • Open Settings. 
  • Click on System. 
  • Click the Optional features page on the right side. 
  • Click the “More Windows features” setting. 
  • Clear the “Virtual Machine Platform” option to disable the feature. 
  • Click the OK button. 
  • Restart the computer. 

After you’re done playing games, Microsoft recommends re-enabling the feature. 

Change power mode 

On Windows 11, setting the power mode to “High Performance” is often recommended because it aims to maximize your system’s resources to deliver the best possible gaming experience. 

Of course, if you’re using a laptop, you will achieve better performance by gaming with the device plugged into a power source. 

To change the power mode on Windows 11, use these steps: 

  • Open Settings. 
  • Click on System. 
  • Click the “Power & battery” (or Power) page on the right side. 
  • Click the Power Mode setting. 
  • Choose the Best Performance option for the “Plugged in” and “On battery” settings. 

Once you complete the steps, the processor, graphics cards, and other components will have access to more power to improve your gaming performance. 

Enable Auto HDR 

Auto HDR creates an enhanced version of SDR compatible games for all HDR compatible devices by means of an improved color and contrast ratio that enhances visual immersion in the game while maintaining the same performance level and providing developers with no changes necessary for updating their game. 

To enable Auto HDR on Windows 11, use these steps: 

  • Open Settings. 
  • Click on System. 
  • Click the Display page on the right side. 
  • Turn on the HDR toggle switch. 
  • Click the Graphics setting at the bottom of the page. 
  • Turn on the Auto HDR toggle switch. 

Auto HDR relies on the system’s “HDR” capabilities, which also have to be turned on, and the “Optimization for the windowed games” feature. 

Enable Automatic Super Resolution 

Automatic Super Resolution (Auto SR) is a Windows 11 feature that uses AI to upscale games to improve frame rates and image quality. 

The feature delivers a smoother and more immersive gaming experience. The only caveat is that Auto SR is only available for Copilot+ PCs and is compatible with specific games. 

To enable Auto SR on Windows 11, use these steps: 

  • Open Settings. 
  • Click on System. 
  • Click the Graphics page on the right side. 
  • Turn on the “Automatic super resolution” toggle switch. 

If the feature is causing issues for a specific game, but you want to continue using it for other games, you can turn off the Super Resolution feature from the game settings under the “Custom settings for applications” section. 

Change game default GPU 

Although I recommend letting the operating system use a specific graphics card, you can change the default GPU on a per-game basis. 

  • Open Settings. 
  • Click on System. 
  • Click the Graphics page on the right side. 
  • Select the game from the list. 
  • Choose the High-Performance option in the “GPU preference” setting. 

Although you can choose the graphics card for a specific game, the system can ignore the request and use another card as necessary. 

Install games on secondary drive 

It may help improve the performance of gaming on Windows 11 if the games are stored on a different hard disk drive than the one where Windows 11 is installed. 

When Windows 11 is installed, the operating system continually accesses the primary hard drive. If games are on the same hard drive, the amount of pre-load time before the game can play may take longer than normal. 

By installing games on a separate drive, particularly a faster one (such as an SSD), you effectively dedicate the drive’s resources primarily to the game, reducing friction with the operating system. 

Change refresh rate 

Adjusting the refresh rate on your monitor is one of the most significant ways to enhance your gaming experience on Windows 11. That’s, of course, if you have a monitor capable of higher refresh rates and a graphics card powerful enough to render frames at those rates. 

The refresh rate, measured in Hertz (Hz), indicates how many times per second your monitor can render the image on the screen. For example, a 60Hz monitor refreshes 60 times per second, a 144Hz monitor refreshes 144 times per second, and so on. 

If your monitor refreshes more frequently, it displays new frames more often, resulting in significantly smoother motion, especially in fast-paced games. It also reduces input latency, and you will see less screen tearing. 

To set your system to the highest refresh rate, use these steps: 

  • Open Settings. 
  • Click on System. 
  • Click the Display page on the right side. 
  • Click the Advanced display setting at the bottom of the page. 
  • Select the highest rate using the “Choose a refresh rate” setting. 
  • Turn off the “Dynamic refresh rate” toggle switch. 
  • After you complete the steps, games should play at higher refresh rates. 

Free up storage space 

It’s never a good idea to run your computer when it’s low on storage because this will negatively affect system performance. Usually, you never want to use a device with drive fill above 70 percent. 

To increase the overall system speed and gaming performance, free up as much space as possible on the main system drive. You can also transfer already installed games to a secondary drive, as I mentioned earlier. 

To free up space on Windows 11, use these steps: 

  • Open Settings. 
  • Click on System. 
  • Click the Storage page on the right side. 
  • Click on Clean recommendations. 
  • Click the Temporary files setting. 
  • Select the items to clear. 
  • Quick tip: You can also click the “See advanced options” button to access the Temporary Files settings and delete additional junk files. 
  • Click the “Clean up” button. 
  • Click the “Large or unused files” setting. 
  • Select the files to clear from the hard drive. 
  • Click the “Clean up” button. 
  • Click the “Files synced to the cloud” setting. 
  • Select the files already synced to the cloud. 
  • Click the “Clean up” button. 
  • Click the Unused apps setting. 
  • Select and remove the apps you rarely use to free up more space. 

Final Thoughts  

After completing the steps, you may notice an improvement in overall performance on Windows 11, including while playing games. 

FAQs 

1. Does Windows Game Mode really help with gaming? 

Yes, Game Mode prioritizes system resources for games by reducing background tasks and improving frame consistency. 

2. Should I disable startup programs to boost game performance? 

Yes, limiting startup programs frees up RAM and CPU resources, resulting in faster game loading and smoother play. 

3. Is it safe to turn off visual effects in Windows for gaming? 

Disabling animations and transparency effects can improve performance, especially on mid-range or older PCs. 

4. How does background software affect gaming performance? 

Apps running in the background consume system resources and may cause stuttering or input lag during gameplay. 

5. Can regular system maintenance improve gaming performance on Windows? 

Yes, cleaning temporary files, updating Windows, and scanning malware to help maintain consistent gaming performance.

We have all been there. You bought a top-rated smartphone, and at first, it worked flawlessly. But, over time, that device starts to feel sluggish. Over time, cached data can accumulate, become corrupted, or simply get outdated, which may slow down your device. Restarting your phone often helps, but a targeted cache clear is a quick way to boost responsiveness without upgrading your hardware. 

In this guide, we will discuss effective ways to clear cached data on Android. If you are an Apple user, here’s how to increase the speed of iPhone and Android devices. 

Reasons Why phones become slow?  

Phones slow down for many reasons, like aging hardware, a low battery, or too many apps running at once. Let’s take a look at these common causes and effective ways to increase the speed. 

Low Storage Space  

Simple tasks like scrolling, rebooting your device, or launching apps require storage space to operate successfully. Smartphones get clogged with unnecessary applications, photos, videos, and documents, leaving little memory for the system to work efficiently. This leads to slower performance and reduced responsiveness.  

How to save space on a slow device 

Check what’s taking up your device’s storage  

To see how much free storage space you have available on your slow devices (on your Android smartphone) as well as delete apps/files that aren’t being used, go into the device settings and then select Storage or Device care or tap on the About Phone menu item. 

For an iPhone, select General then select iPhone Storage and view the same information for your iPhone that an Android device provides. Typically, you’ll see options to delete duplicate files, old messages, large documents, and other types of apps that can be deleted to create additional free space.  

Optimize your media storage  

iPhone: Turn on Optimize iPhone Storage in Settings > Photos. This way, your device keeps smaller versions locally and stores full-size files in iCloud.  

Android phone: Back up photos and videos to Google Photos or another cloud service, or move them to your SD card, then delete the local copies.  

P.S.: Try to keep at least 10–20% of your storage free. This will give you more space and keep your device running smoothly without unnecessary lag.  

Too many background apps running  

When you have many applications running at once, they continue to run independently, even if you’re not actively doing anything with them. The background applications use up resources (CPU) and memory (RAM) available on your phone or tablet. As the active applications only have access to a portion of the available memory due to the presence of background applications, performance issues will exist, and delays are common. 

Following steps help speed things up:  

Close unused apps  

To reveal which apps are open in Android, tap “Recent apps” or swipe up and hold your finger on the screen until a list of current apps appears (A list showing what your device has been using). You can now select everything you want to remove from the list by swiping left on each item or you can select “Close All.” 

To access the currently running apps on iPhone, swipe up from the bottom of the screen, or double-tap the Home Button (if available). All running apps will now be displayed and can be closed by simply swiping up from their respective cards. 

Limit background activity  

Android phone: Go to Settings > Apps/manage apps > [App] > Battery and restrict background activity for heavy apps. Some phones also let you manage this in Settings > Battery > Background usage limits.  

iPhone: Go to Settings > General > Background App Refresh and turn it off entirely, or disable it for individual apps that don’t need to refresh (like games or shopping apps) constantly. You can leave this turned on for essential apps like health and fitness, calendar, or mail.  

Disable location services  

Location services allow apps to track your device’s position for navigation, weather updates, ride-hailing, social media check-ins, and more. While useful, leaving location services on can slow down your phone. This is how to disable it:  

iPhone: Go to Settings > Privacy and Security > Location Services. Toggle off Location Services entirely, or scroll down to disable it for apps that don’t need your location.  

Android: Go to Settings > Location. Turn off Use location entirely, or select App-level permissions to turn off location access for non-essential apps.  

Restart your phone regularly  

Hold the power button and tap Restart or reboot (or Power Off, then turn it back on). Phone shuts and quick restarts relieve temporary memory and stop background tasks that may have hung. Do this whenever you notice sluggishness. Once every few days is a good habit for heavy users.  

Outdated software and apps  

For your phone to perform smoothly, it needs to be updated with the latest version of its operating system and applications. Updates provide essential features, capabilities, bug fixes, and app security patches that help your phone handle modern apps and tasks.  

When you skip updates, your system is forced to run new features on outdated foundations, and that mismatch creates the lag and crashes we all hate. Outdated apps have the same issue. Missing these updates can make your other apps glitchy and slow.  

Install operating system updates  

On an Android phone: Go to Settings > System/About phone> Software Update.  

On iPhone: Go to Settings > General > Software Update.  

Update your apps  

On an Android phone: Open the Google Play Store app> tap the profile icon > Manage apps and device > Update all.  

On iPhone: Open App Store > Profile icon > Update all.  

Keeping everything up to date helps your phone run smoothly with the latest fixes and features.  

Malware, bloatware, and suspicious apps  

When installed on your phone, Malware, Bloatware, and other potentially unwanted programs use system resources and can severely impact your device’s speed and performance by using a large portion of the processor’s capacity for running itself.  

Push notifications and background syncing can also add to the sluggishness caused by these malicious applications, which steal your information and carry out additional illegal actions on your smartphone. You may have downloaded one or more of these programs without your knowledge by following an email phishing link or clicking on misleading advertisements.  

These apps run multiple background processes that eat up storage and overload your phone’s CPU. Over time, this makes your device sluggish and harder to use, especially when opening legitimate apps.  

Uninstall suspicious apps: Open your phone app list and look for apps you don’t remember installing, or that have strange names/icons. On Android, go to Settings > Apps, review all apps installed, and delete any unfamiliar ones.  

On iPhone, long-press the app icon and tap Remove App.  

Avoid shady downloads: Avoid third-party apps and only install apps from official stores (Google Play or App Store or Apple Store), and be cautious of links in emails, texts, or ads popping up on your phone.  

Final Thoughts  

These steps can help your Android smartphone regain its original efficiency. After trying out the tips outlined here, we believe you will see a noticeable increase in both the speed and overall performance of your device and have an enhanced day-to-day digital experience. 

FAQs 

1. Why has my phone become slow over time? 

Phones often slow down due to background apps, low storage space, outdated software, or battery health degradation. 

2. Will clearing cache delete my app data? 

No. Clearing cache only removes temporary files. Your accounts, settings, and app data remain intact. 

3. Will clearing cache make my device faster? 

Yes. It frees up storage and removes potentially corrupted or outdated files, which can resolve slowdowns and glitches. 

4. How often should I clear the cache? 

Whenever you notice slowdowns or app glitches. For most users, every three to six months is sufficient. 

5. Is clearing cache only for storage? 

Clearing cache can also fix app issues by forcing apps to rebuild their temporary files. It’s a quick troubleshooting step, not just a storage cleanup.

With so many excellent Android phones on the market, iPhone owners have plenty of reasons to consider making the switch to Android devices. Similarly, are you worried about losing your precious WhatsApp memories? The following are the important steps to remember before switching your device.  

Before you begin 

  • On your Android device, make sure Wi‑Fi is turned on, and plug your new iOS device and your Android device into a power source. 
  • Alternatively, you can also use a USB-C cable to directly connect your Android device and your iPhone for a faster transfer. 
  • Make sure the content you’re moving, including what’s on your external Micro SD card, will fit on your new iOS device 
  • If you want to transfer your Chrome bookmarks, update the latest version of Chrome on your Android device. 

iPhone to Android Data Transfer 

You can use a USB cable between your iPhone and Android, or a specific manufacturer app, to transfer content from iPhone to Android during the initial setup of the Android device; however, these methods are not suitable for an Android that has already been set up. 

If your Android has already been set up, skip the other sections of this guide to find out how to select exactly what content you want to transfer from iPhone to Android. 

Transfer content directly from iPhone to Android using a USB cable 

  • Turn on both devices and ensure they are charged. 
  • On the new Android device, tap Start to begin the setup. 
  • Follow the on-screen prompts to transfer your SIM card from iPhone to Android and connect to your Wi-Fi network. 
  • Connect the iPhone to the Android with your USB cable (and adaptor if required). 
  • Tap “Trust” if prompted for permission. 
  • Sign into your Google Account (or create one if you don’t already have one). 
  • On Android, select the content types you want to copy from iPhone to Android. 
  • Tap “Copy.” 

Transfer Photos and Videos from iPhone to Android with TouchCopy 

  • Download Touch Copy on your computer and run it. 
  • Connect your iPhone to TouchCopy using USB or Wi-Fi and select the “Photos” section. 
  • Click “Save to PC” or “Copy to Mac”. This will also copy any videos on your device. 

How to Transfer Contacts from iPhone to Android with Contact Transfer 

  • Launch Contact Transfer on your Windows 10 or 11 PC and choose “iOS Device” as your source, and “Android Device” as your Destination. Click Continue. 
  • Then connect your devices to your PC. Check out the guide for how to connect your devices with Contact Transfer using USB and Wi-Fi. Then click Continue. 
  • Select the contacts that you wish to copy from your iPhone. You can select all the contacts by clicking the “All” checkbox. 
  • Click Transfer! 

WhatsApp Transfer  

If you’re moving from an iPhone to an Android device, you can transfer your: 

  • Account information 
  • Profile photo 
  • Individual chats 
  • Group chats 
  • Communities 
  • WhatsApp Channels updates 
  • Chat history 
  • Media and settings 

You can’t transfer your call history, display name, status updates, or media received over WhatsApp Channels. 

Steps to move your chats from an iPhone to an Android device: 

  • Download the latest WhatsApp iOS version available in the App Store. 
  • Set up your new Android device and choose to restore data when prompted. 
  • Connect the devices by cable when the Copy apps and data screen appears. 
  • Tap Trust if the iPhone warning appears. 
  • Proceed through copying screens. 
  • Keep the iPhone unlocked during transfer. 
  • Use the iPhone camera to scan a QR code when prompted. 
  • Tap Start. 
  • Finish transfer and disconnect the cable. 
  • Open WhatsApp on your Android device. 
  • Verify your account using the same phone number used on your old device. 
  • Tap Start when prompted to import your chat history. 

Remember Following Things 

  • You can only restore your chats before you’ve activated WhatsApp on your new Android device. If you want to restore your old chats, you’ll need to first uninstall WhatsApp on your new device. You can’t merge new chats from your new phone and old chats from your old phone. 
  • It’s currently not possible to transfer chats from an iPhone to an Android device on the WhatsApp Business app. 
  • Your old device will still have your data unless you wipe it or delete WhatsApp. 
  • Transferring chats by cable means transferring data doesn’t go to cloud storage. However, you might have sent this data to your cloud storage separately by backing up chats to your iCloud account. 
  • WhatsApp can’t see the data you transfer. 
  • It’s not possible to transfer your chats to a new phone number. You’ll need to change your phone number on your old device to your new phone number to transfer chats. 
  • You can transfer personal messages, but you can’t transfer peer-to-peer payment messages. 

Your call history and status updates can’t be transferred from an iPhone to an Android device. 

Transferring data from the cloud 

If you don’t have too much data to transfer, or you’d rather just set up your Android phone as new, you can also choose to transfer your data from the cloud. This applies only to select data, however. If you use Google One, you can sync only photos, videos, contacts and calendars. To do so, simply backup your iPhone’s data with Google One and then open the Google One app on your Android phone.  

Android to iPhone WhatsApp and Data Transfer  

If you’re moving from an Android phone to an iPhone, you can transfer your account information, profile photo, individual chats, group chats, communities, WhatsApp Channels updates, chat history, media, and settings. You can’t transfer your call history or display name, or media received over WhatsApp Channels. 

However, it’s currently not possible to transfer chats from an Android device to an iPhone on the WhatsApp Business app. 

What do You need? 

  • Android OS Lollipop, SDK 21 or above, or Android 5 or above installed on your Android device. 
  • iOS 15.5 or above installed on your iPhone. 
  • Move to iOS app installed on your Android phone. Note: Using other data migration apps is not supported and will cause migration issues. 
  • Latest WhatsApp iOS version available in the App Store and latest WhatsApp Android version available in the Google Play Store. 
  • Use the same phone number as your old phone on your new device. 
  • Your iPhone must be factory new or reset to factory settings to pair with the Move to iOS app and move data from your Android phone. 
  • Both of your devices must be connected to a power source. 
  • Both of your devices need to be connected to the same Wi-Fi network, or you’ll need to connect your Android device to your iPhone’s hotspot. 

Move chats from Android to iPhone 

  • Open the Move to iOS app on your Android phone and follow the on-screen prompts. 
  • A code will be displayed on your iPhone. When prompted, enter the code on your Android phone. 
  • Tap Continue and follow the on-screen prompts. 
  • Select WhatsApp on the Transfer Data screen. 
  • Tap Start on your Android phone and wait for WhatsApp to prepare the data for export. You’ll be signed out from your Android phone once the data is prepared. 
  • Tap Next to return to the Move to iOS app. 
  • Tap Continue to transfer the data from your Android phone to your iPhone and wait for Move to iOS to confirm the transfer is complete. 
  • Install the latest version of WhatsApp from the App Store. 
  • Open WhatsApp and log in using the same phone number used on your old device. 
  • Tap Start when prompted and allow the process to be completed. 
  • Finish activating your new device and you’ll see your chats waiting for you. 

Troubleshooting Common Transfer Issues 

If you encounter any issue, such as Insufficient Storage Space, try these solutions: 

  • Go to Settings and check the storage on new devices. 
  • If the new device’s storage is full, consider expanding your storage plan or deleting unnecessary files 

Final Thoughts  

With your data transferred, it is time to enjoy your new device. Remember to prioritize the security of your personal information and to perform all the necessary setups so you can make the transition as seamless as possible. With these tips and tricks, moving into your new gadget will be easy. 

Even though you can’t directly restore Android backup on iPhone, it is better to maintain a backup nevertheless. This will ensure that you always have a copy of your WhatsApp chats. 

FAQs 

1. Do I have to factory reset my new iPhone to transfer WhatsApp? 

It depends on the method you choose. If you use Apple’s official “Move to iOS” app, then yes, your iPhone must be in a new or factory-reset state. This is a strict requirement of the official method. However, if you have already set up your iPhone and don’t want to erase your data, you can use third-party tools like MobileTrans. These tools do not require a factory reset and can migrate your WhatsApp data directly to an already-in-use iPhone. 

2. Will I lose my WhatsApp data if the transfer fails or gets interrupted? 

Generally, no. The transfer process is designed to “copy” your data, not “cut” or “move” it. Your original WhatsApp data on your Android phone will remain safe and untouched if a transfer fails. You can safely troubleshoot the issue (e.g., check your Wi-Fi, try a new cable) and attempt the transfer again without fear of losing your source data. 

3. Do I need a computer to switch between iPhone and Android? 

Not always. Many transfers can be done wirelessly using official apps, though a computer may help with backups or media transfers. 

4. What happens to my apps when I switch platforms? 

Some apps need to be reinstalled from the app store, and app-specific data may not always transfer between platforms. 

5. Are there any settings I should turn off before switching? 

Yes, it’s recommended to disable iMessage and FaceTime when moving from iPhone to Android, and to back up your data beforehand.